Configuring mail providers
We recommend using one of the providers below to send out mail.
Mailcoach also supports sending via SMTP. When using SMTP, open and click tracking will not be available.
On this page:
Best practices
When configuring a mail provider, you should primarily use their instructions for setting up your account and how to configure any DNS settings.
In most cases, you should make sure to set up SPF and DKIM DNS records for your domain.
You can read more in this blogpost.
Postmark
First off, make sure you have created an account with Postmark.
To get a 20% discount for the first three months on all subscriptions, you can use this coupon code: POSTMARKLOVESMAILCOACH2025.
To get started, go to Configuration > Settings > Mailers, and create a Mailer for the “Postmark” Email service.
After that, you’ll be greeted with a nice wizard that will help you set this up at Postmark. In order to start configuring this on your account, the wizard will ask for specifying a Postmark server API token.
How to create a server Postmark API token
- Log into your Postmark account.
- Follow these instructions in the Postmark docs on how to obtain your Postmark API keys.
Copy the Server API token to the Server API token field in the wizard at Mailcoach, and continue the wizard.
Resend
First off, make sure you have created an account with Resend.
To get started, go to Configuration > Settings > Mailers, and create a Mailer for the “Resend” Email service.
After that, you’ll be greeted with a nice wizard that will help you set this up at Resend. In order to start configuring this on your account, the wizard will ask for specifying a Resend API token.
How to create a Resend API token
- Log into your Resend account.
- Create an API key
Copy the API token to the API token field in the wizard at Mailcoach, and follow the wizard’s instructions.
Amazon SES
Mailcoach supports sending mails via Amazon SES. To get started, go to Configuration > Settings > Mailers, and create a Mailer for the “SES” Email service.
After that, you’ll be greeted with a nice wizard that will you setting this up at SES. In order to start configuring this on your account, the wizard will ask for creating an Access Key ID and Secret Access Key.
How to create an Access Key ID and Secret Access Key
First, log in to your account at AWS.
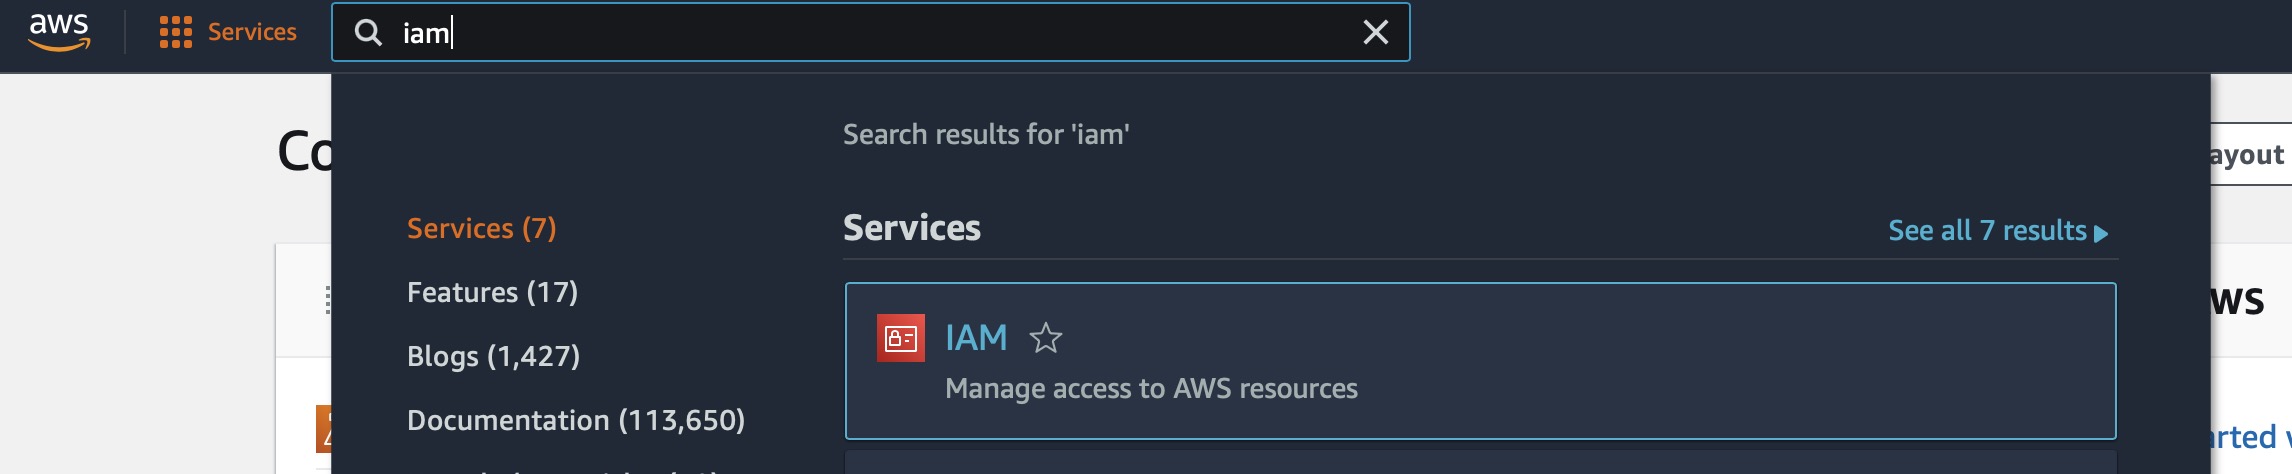
Next, search for the IAM service.
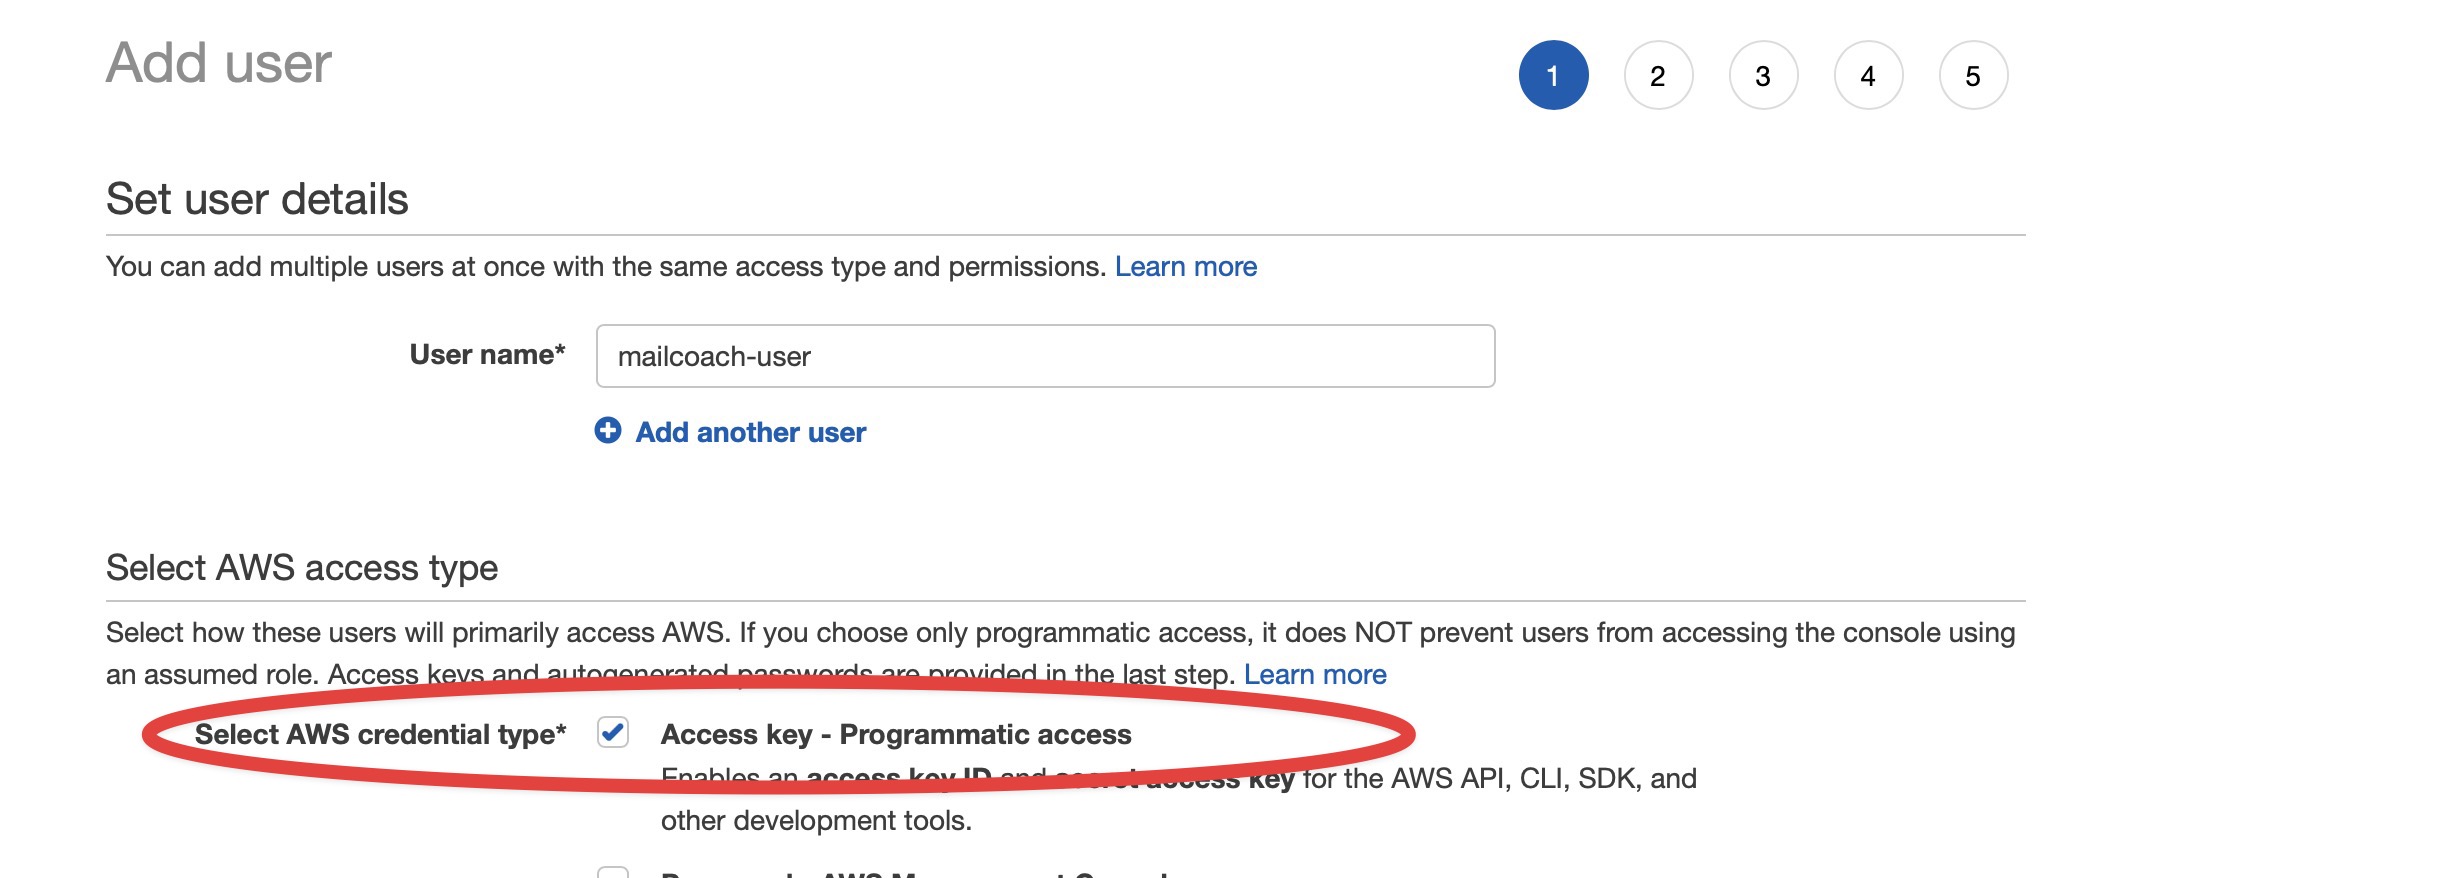
There, go to the “Users” section and create a new user.
On the next screen, give the user a name.
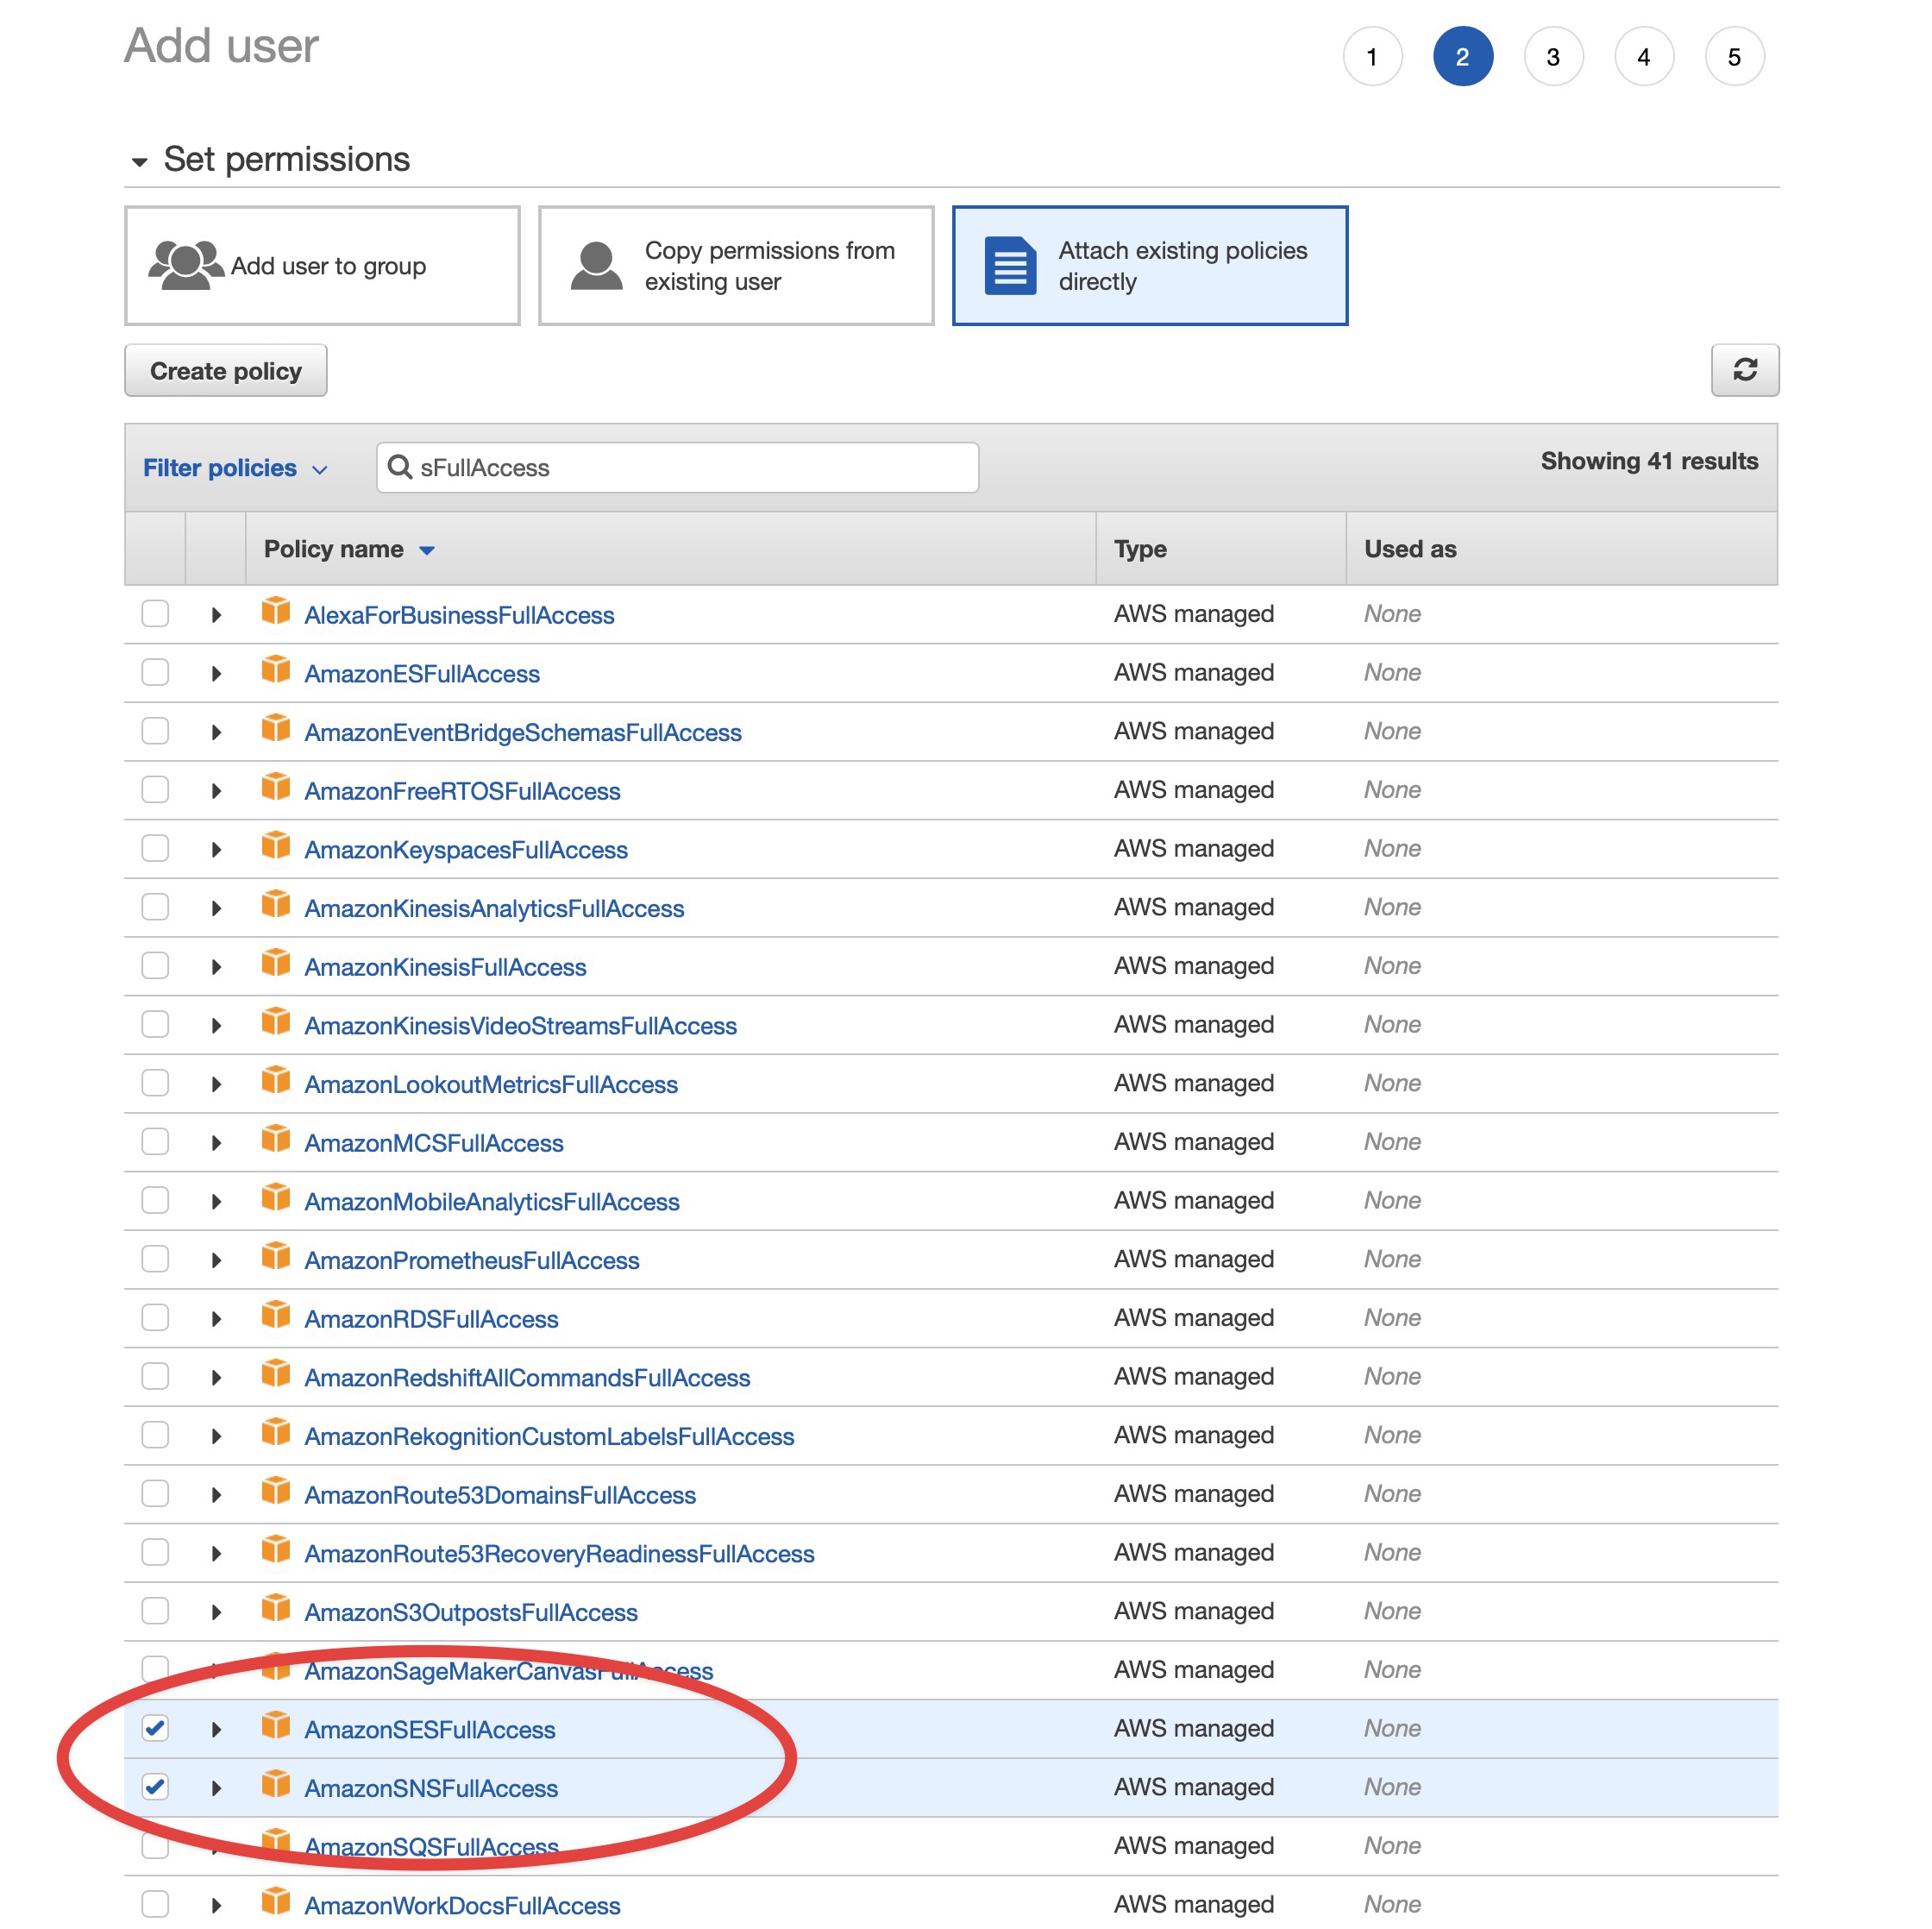
Next up is permissions, you need to select “AmazonSESFullAccess” and “AmazonSNSFullAccess”
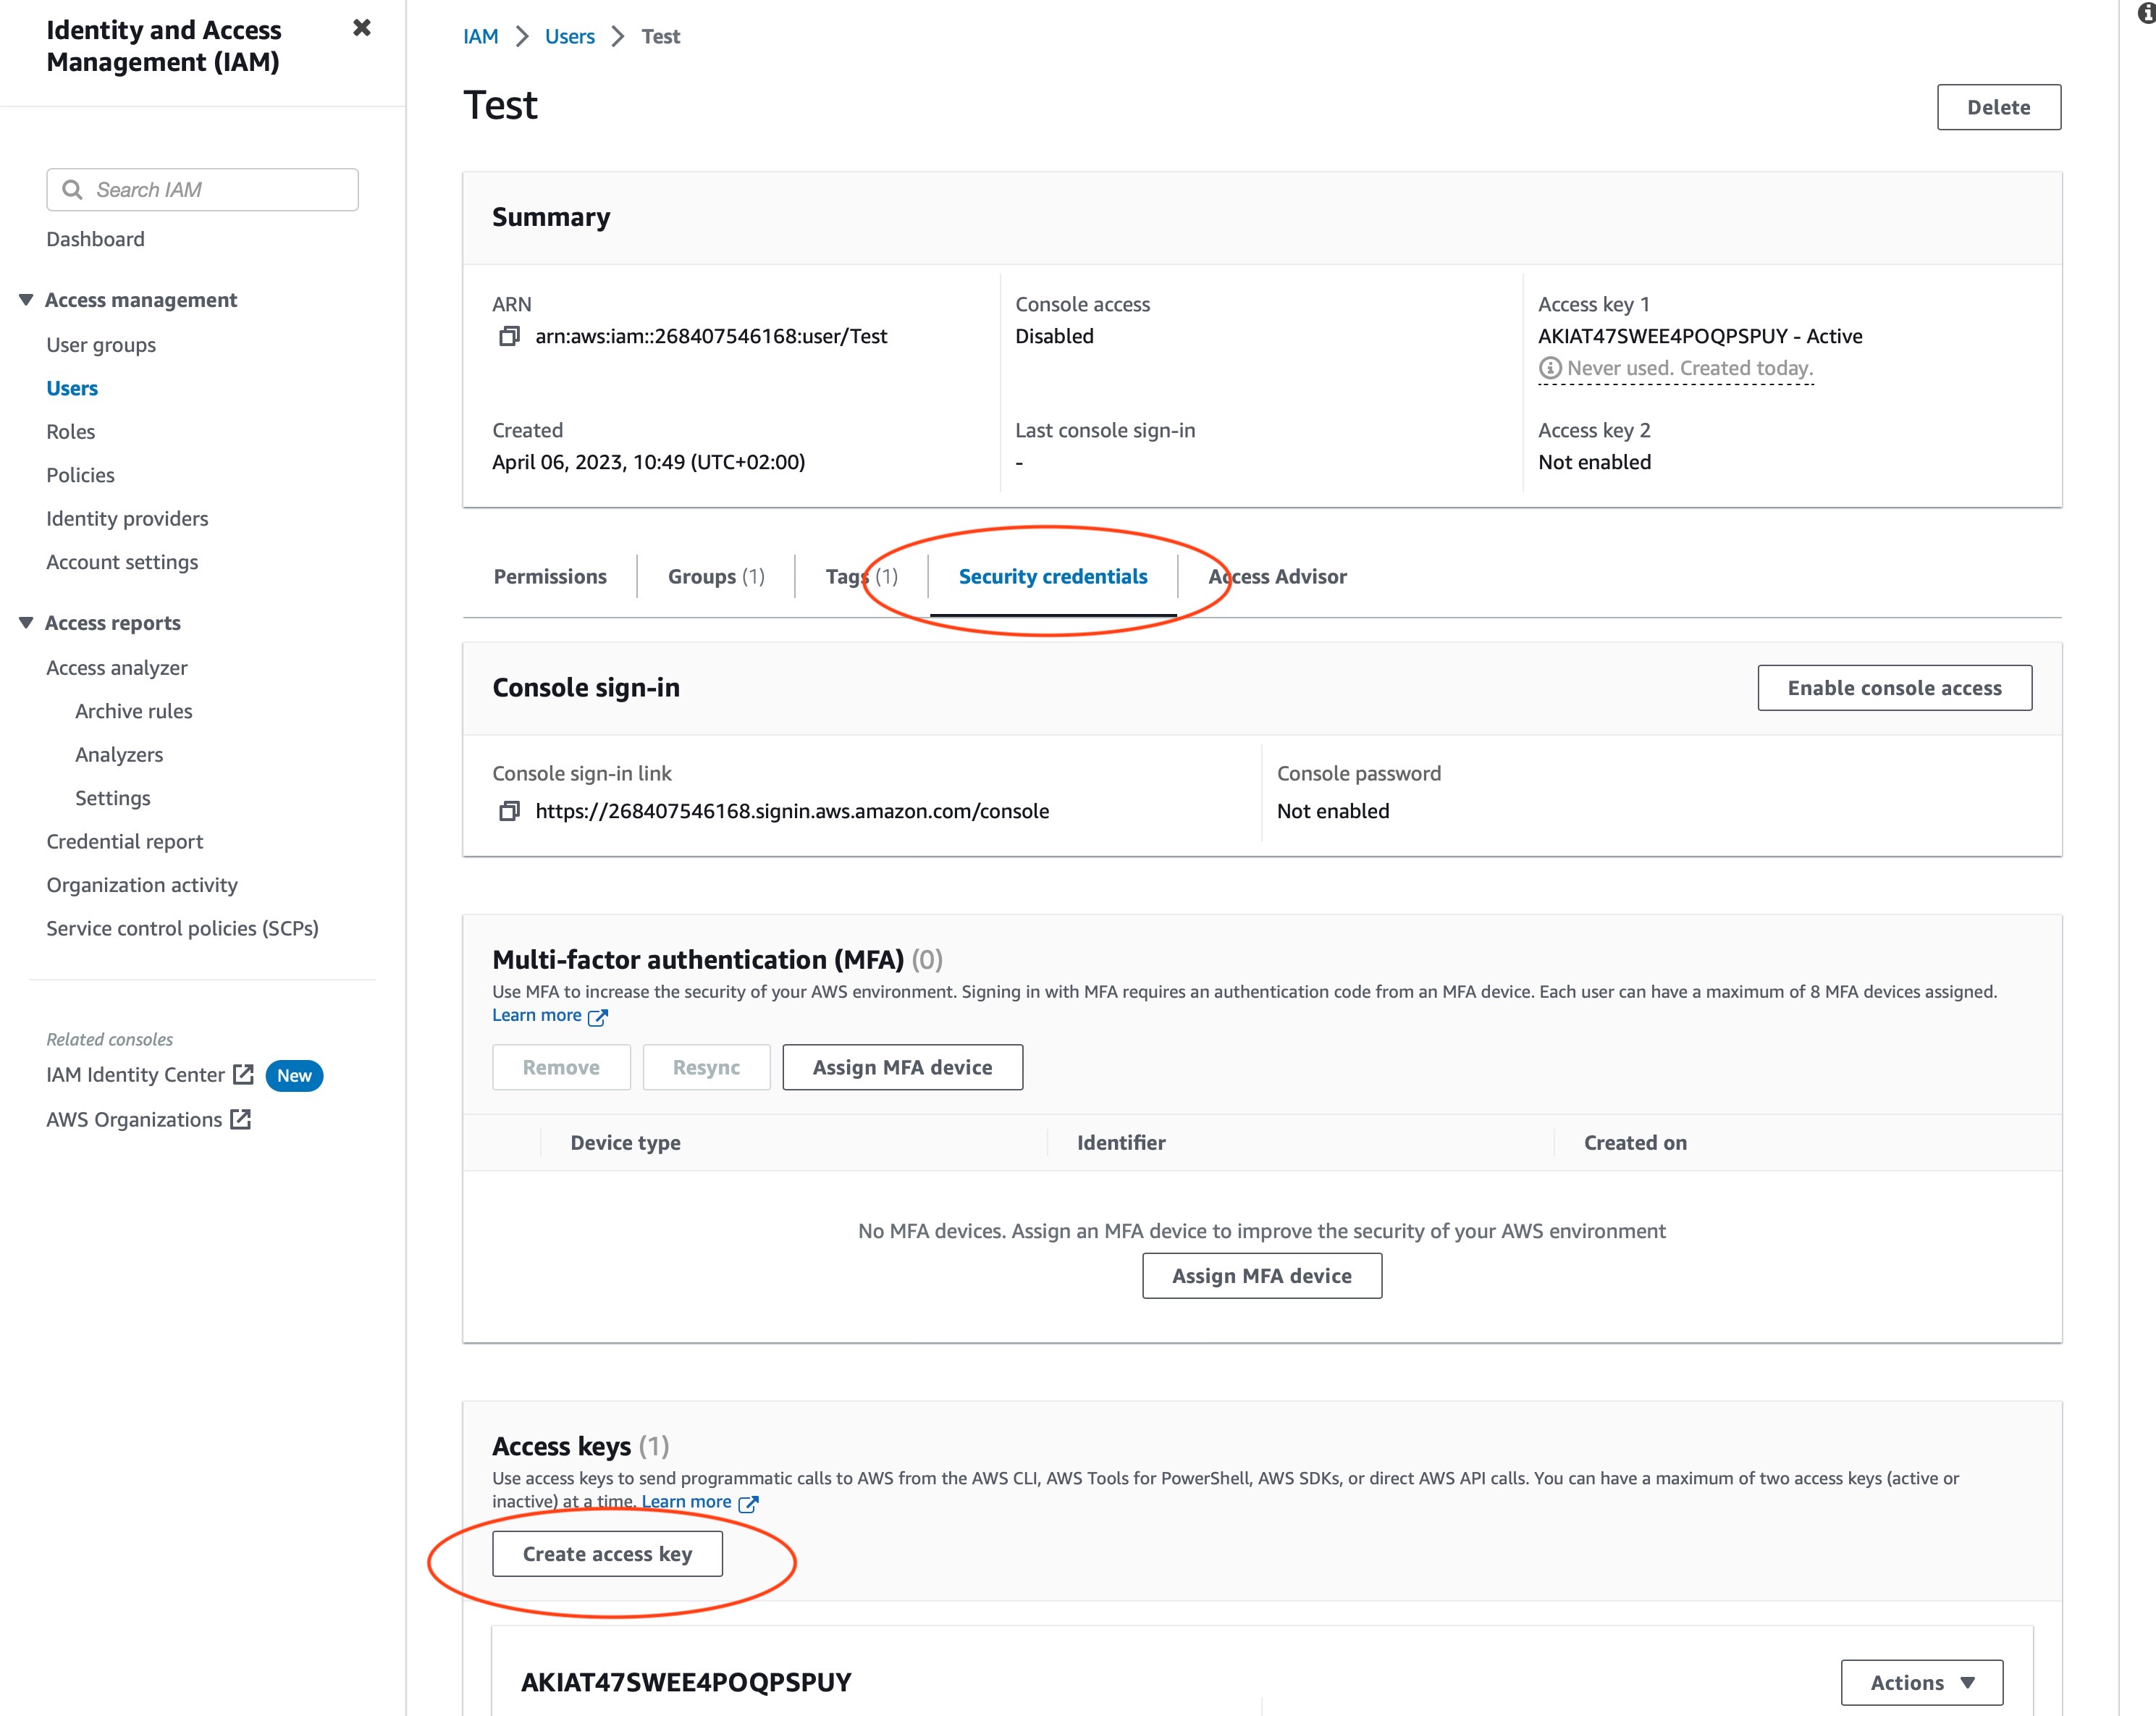
Next, click on the newly created user and go to the “Security credentials” tab. There, click on “Create access key”.
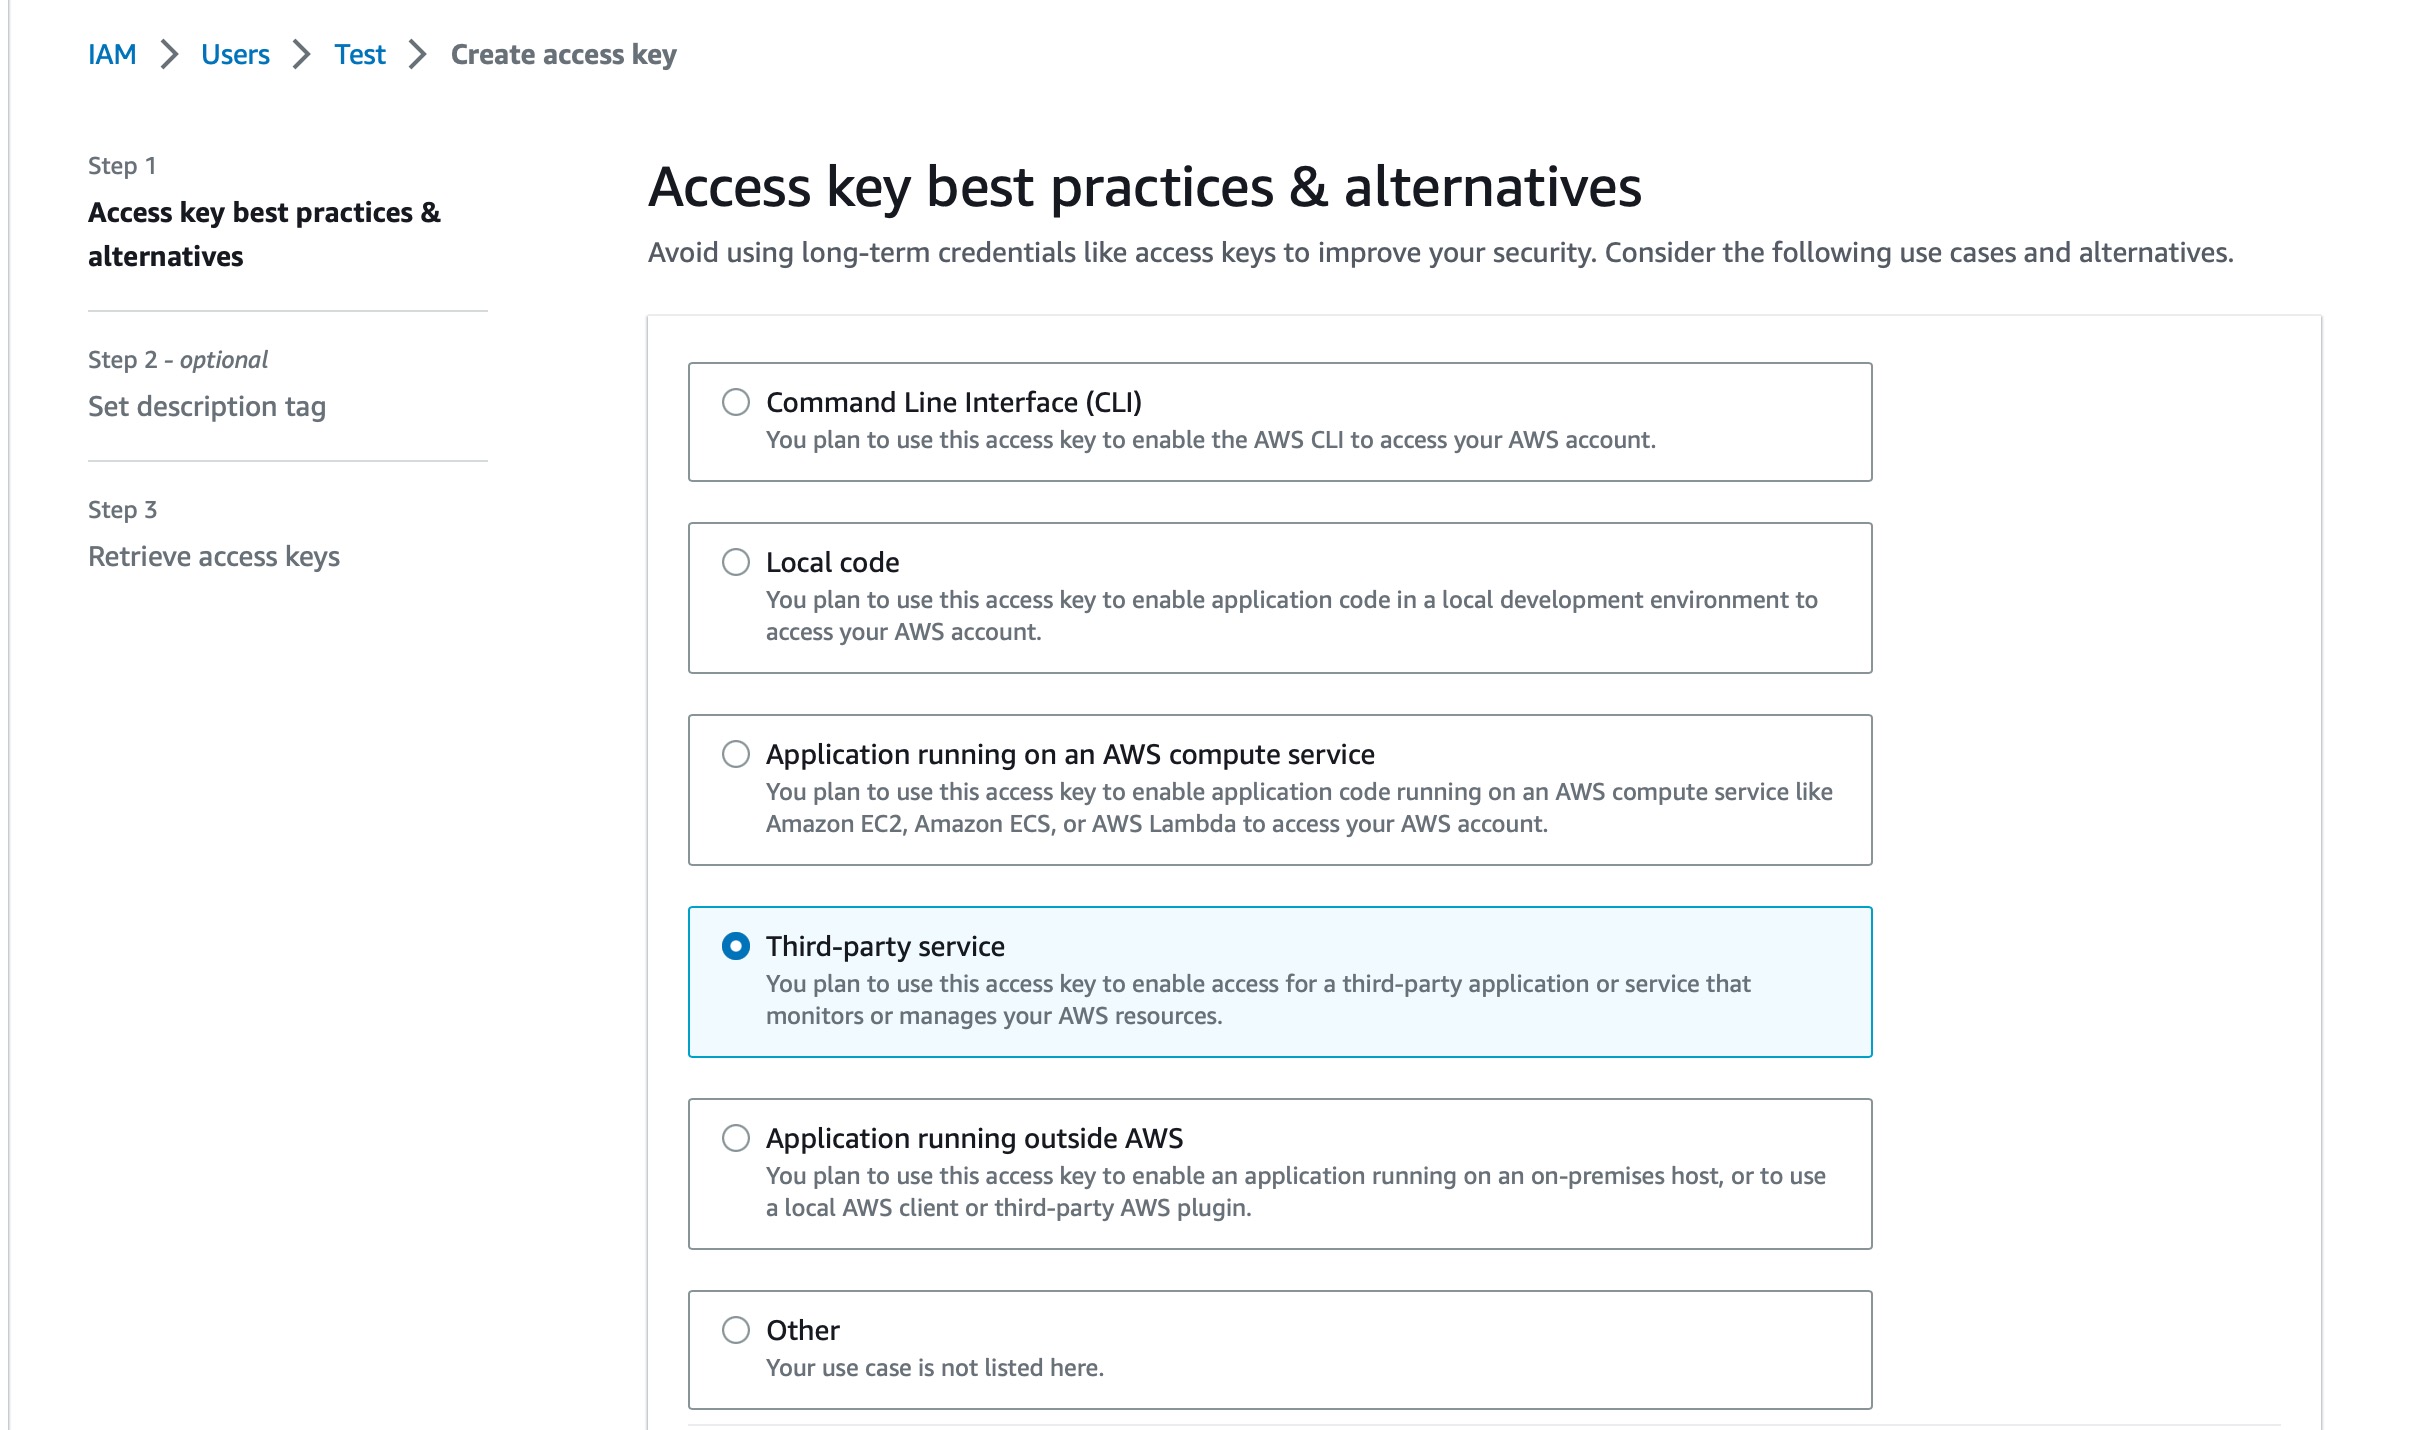
On the next screen, you’ll need to select “Third-party service”
And finally, the Access key ID and Secret access Key will be shown.
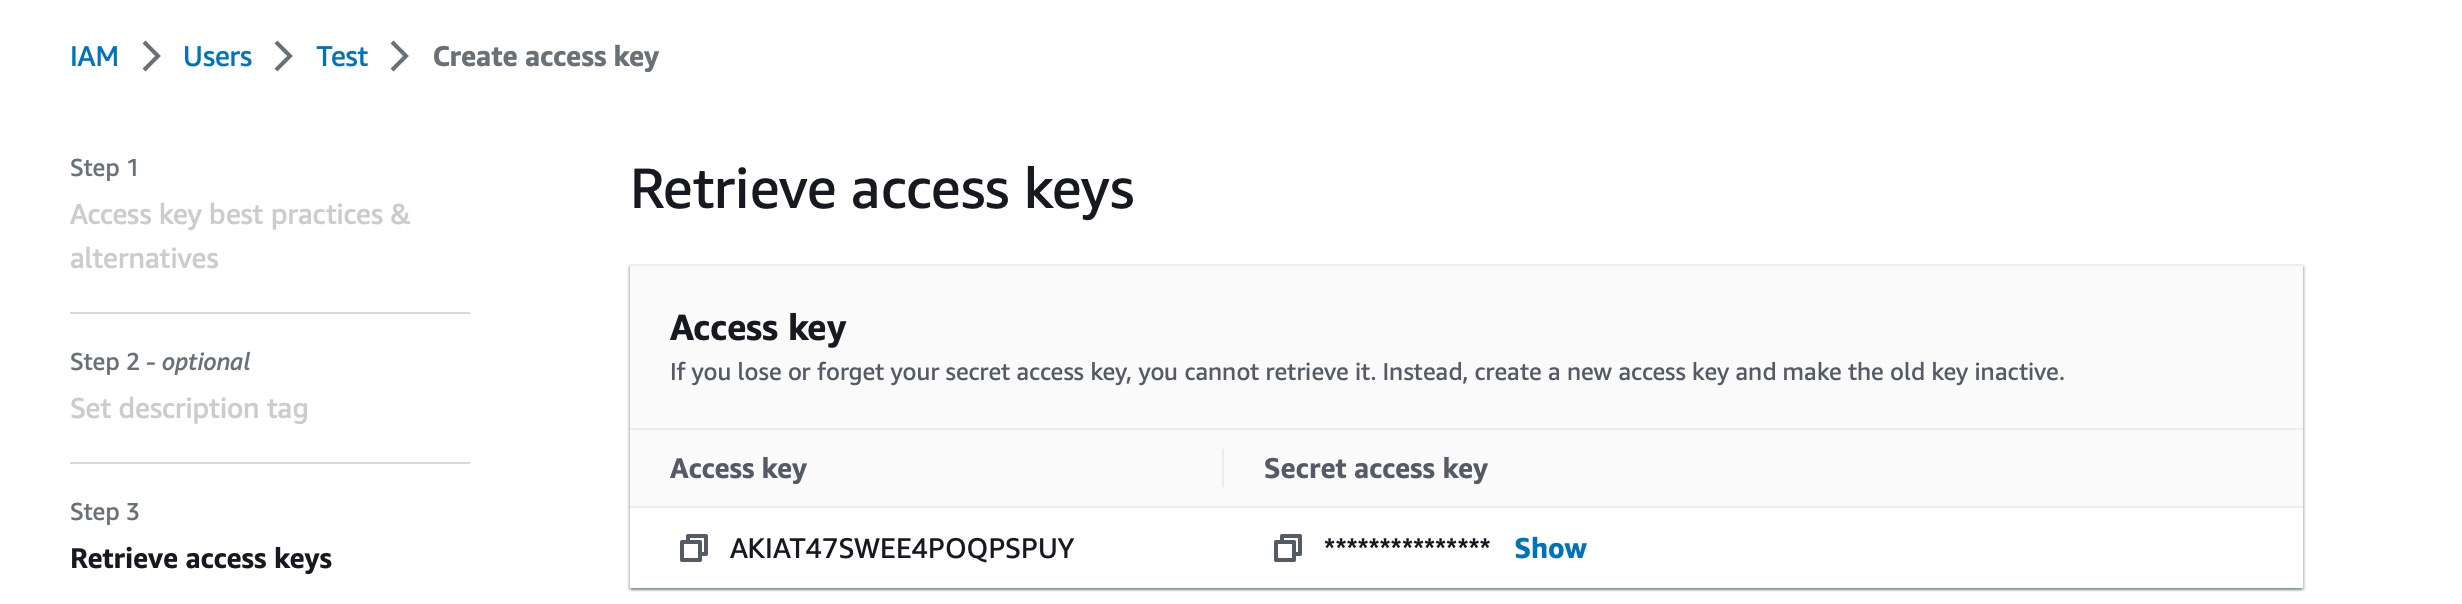
You need to copy these two values into the wizard in Mailcoach.
Using these values, Mailcoach has the correct permissions to automatically set up your SES account for use with Mailcoach. Just follow the wizard on Mailcoach.
Manual configuration of Amazon SES
Amazon SES requires users to track any bounced messages, you need to create an SES Configuration Set so Mailcoach can track these.
Open your AWS Dashboard and make sure you still have the same AWS region selected as where you verified your domain and sending email address. Go to the Simple Email Service under Services, and find the Configuration Sets menu item under Email Sending. Press the Create Configuration Set button:

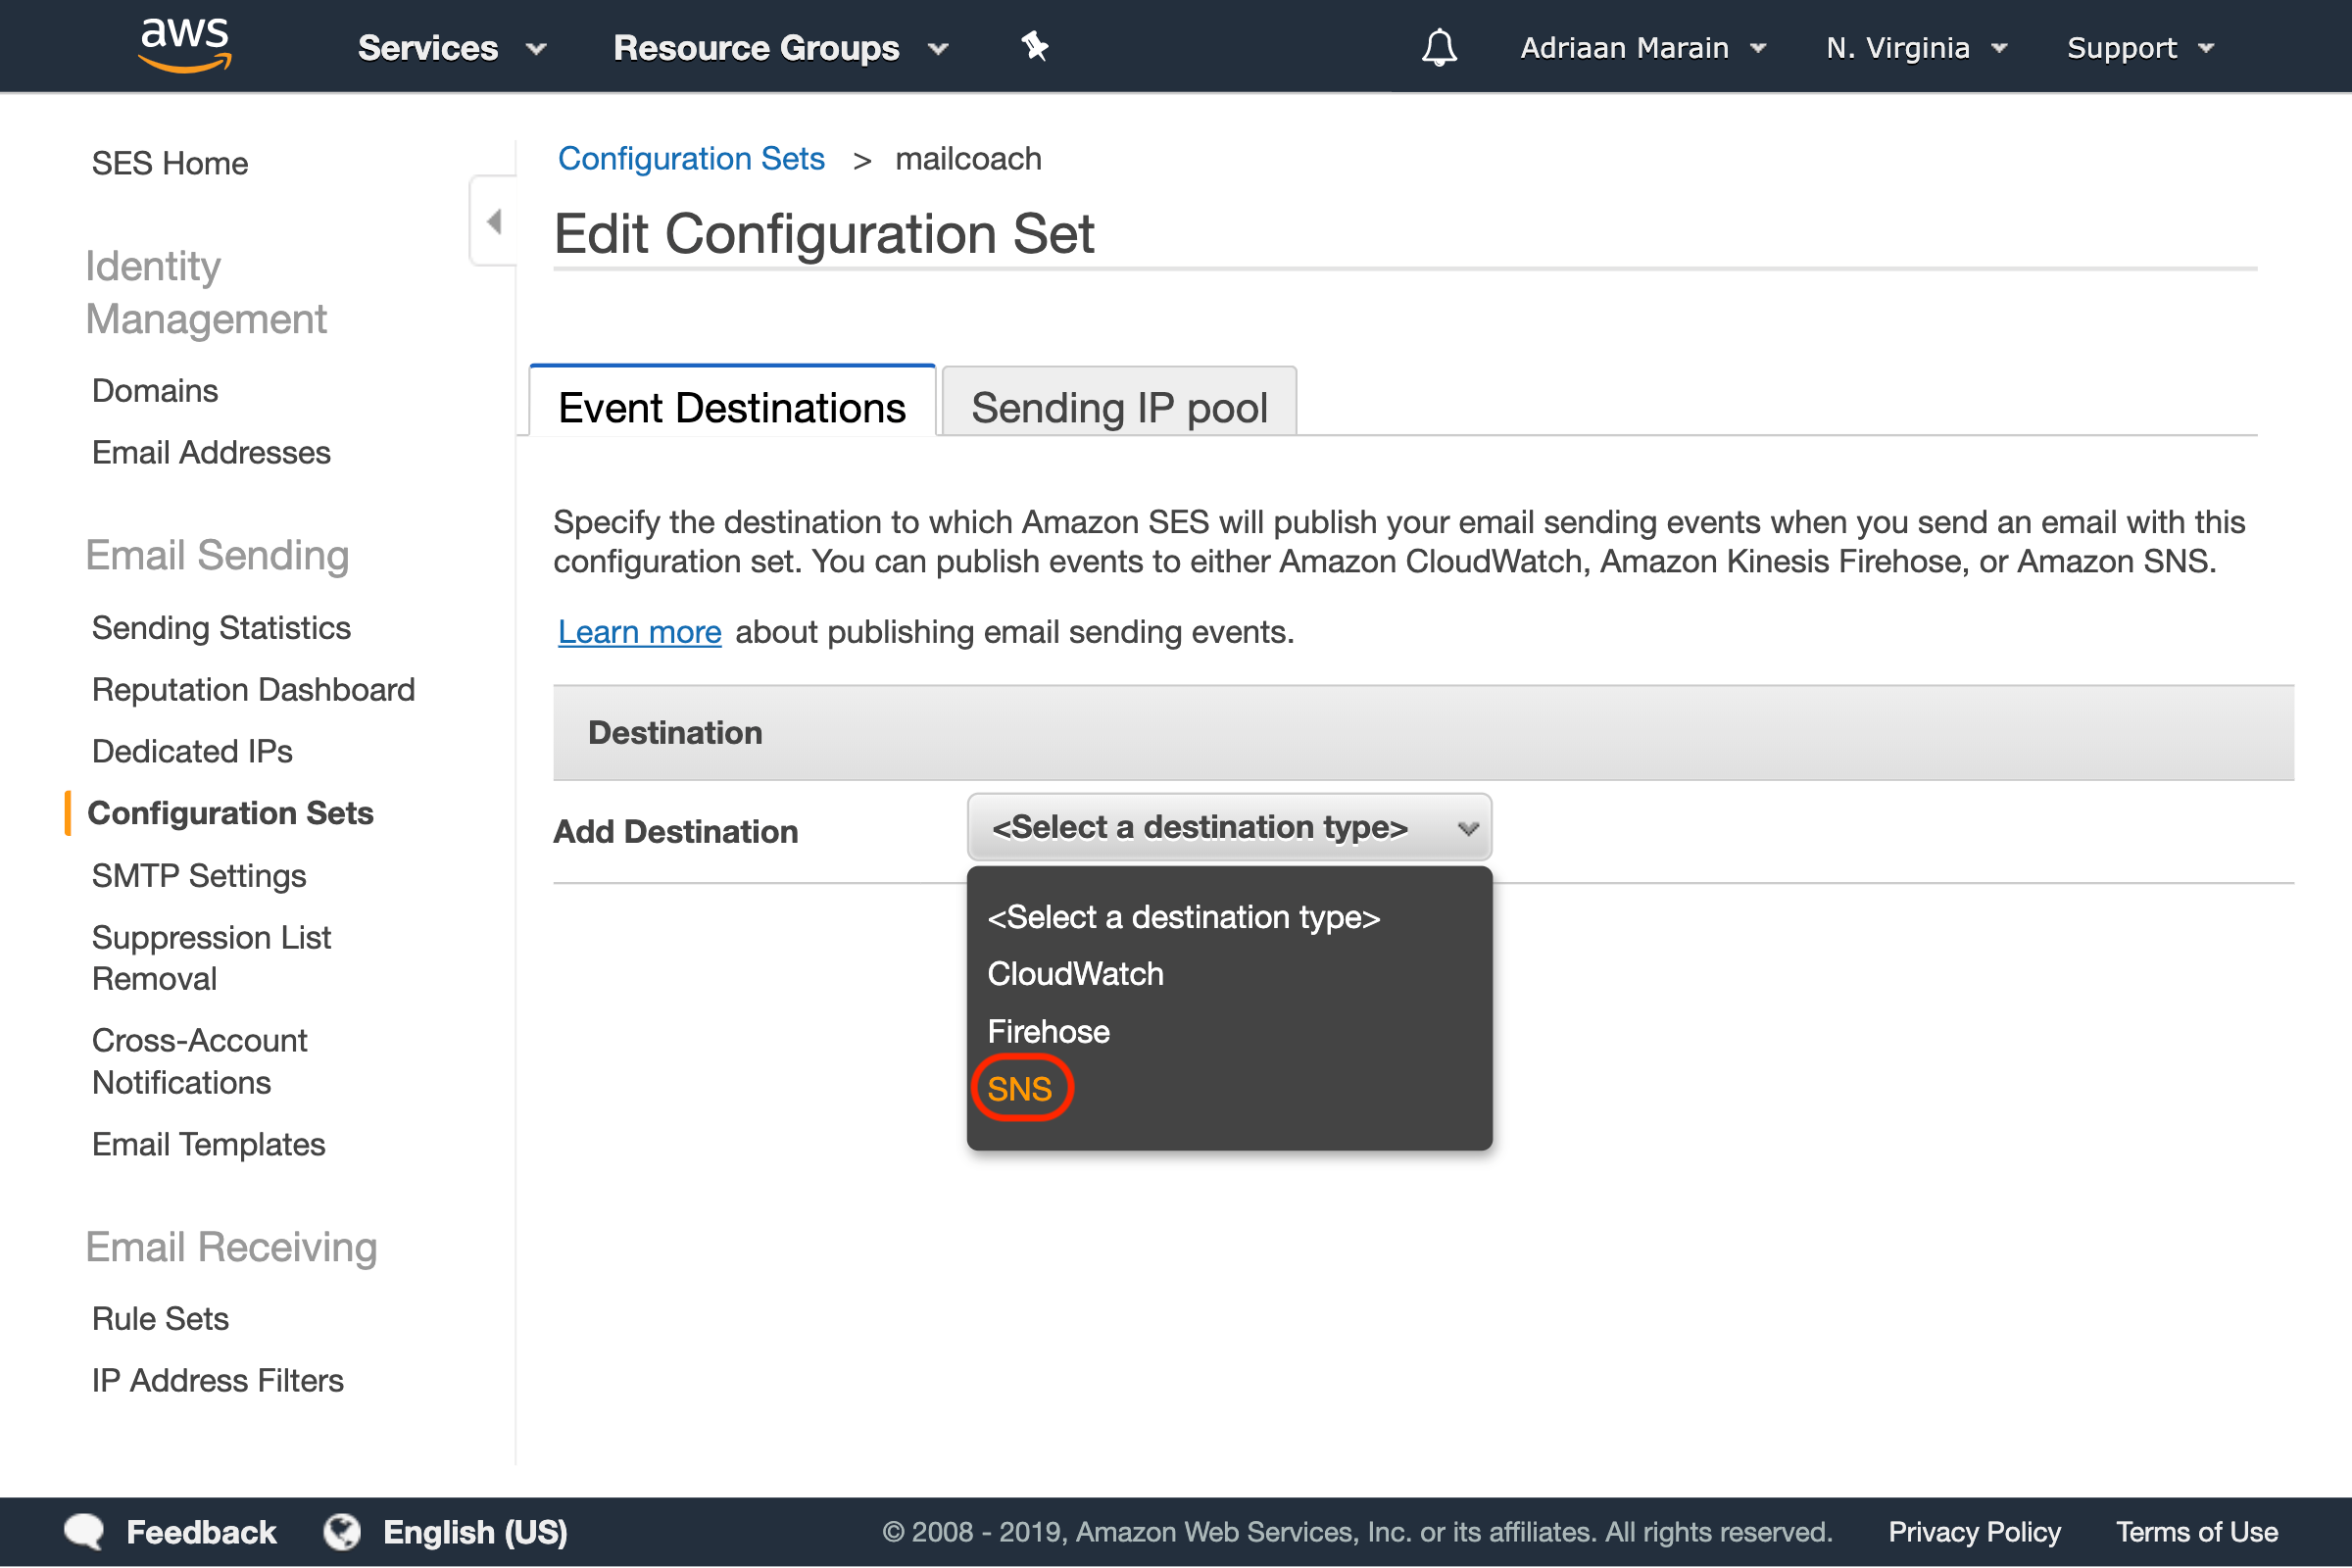
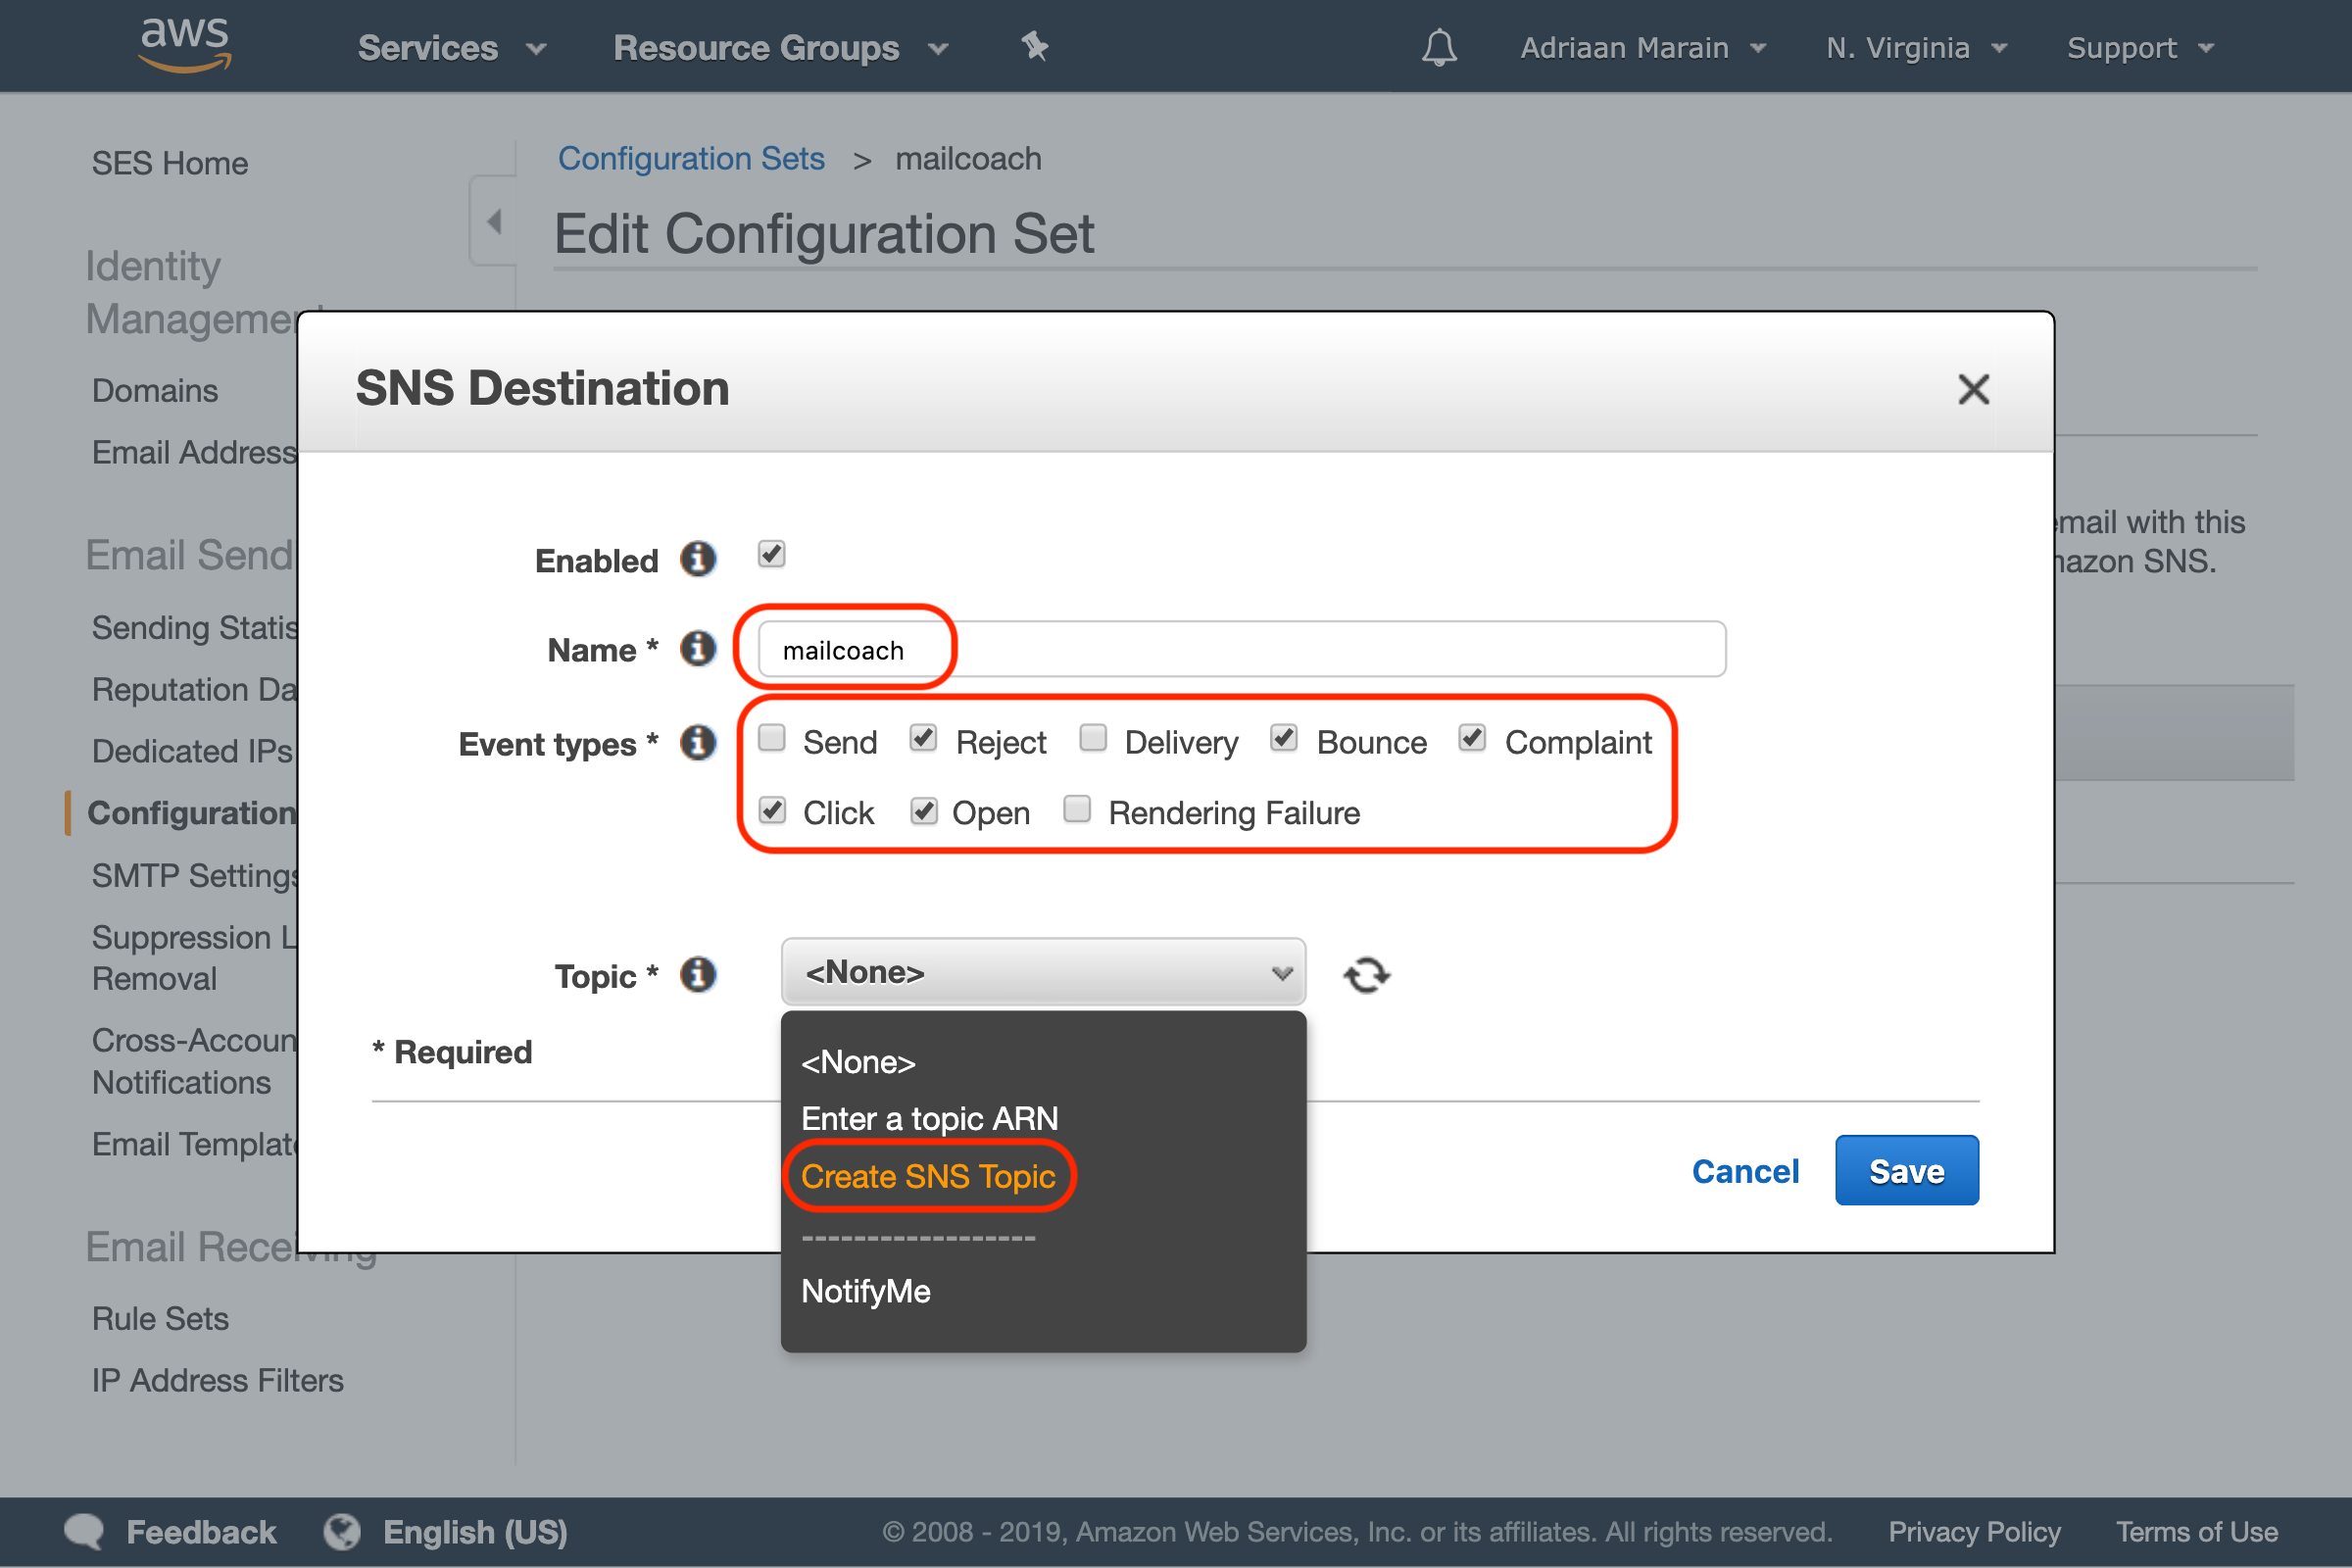
Choose a name for your configuration set and create it, then click the newly created item in the list to add some events destinations. Click the Select a destination type dropdown and select the SNS option:
In the window that pops up, choose a name and select the following event types: Reject, Bounce, Complaint, Click and Open. Next, press the Topic dropdown and choose Create SNS Topic:
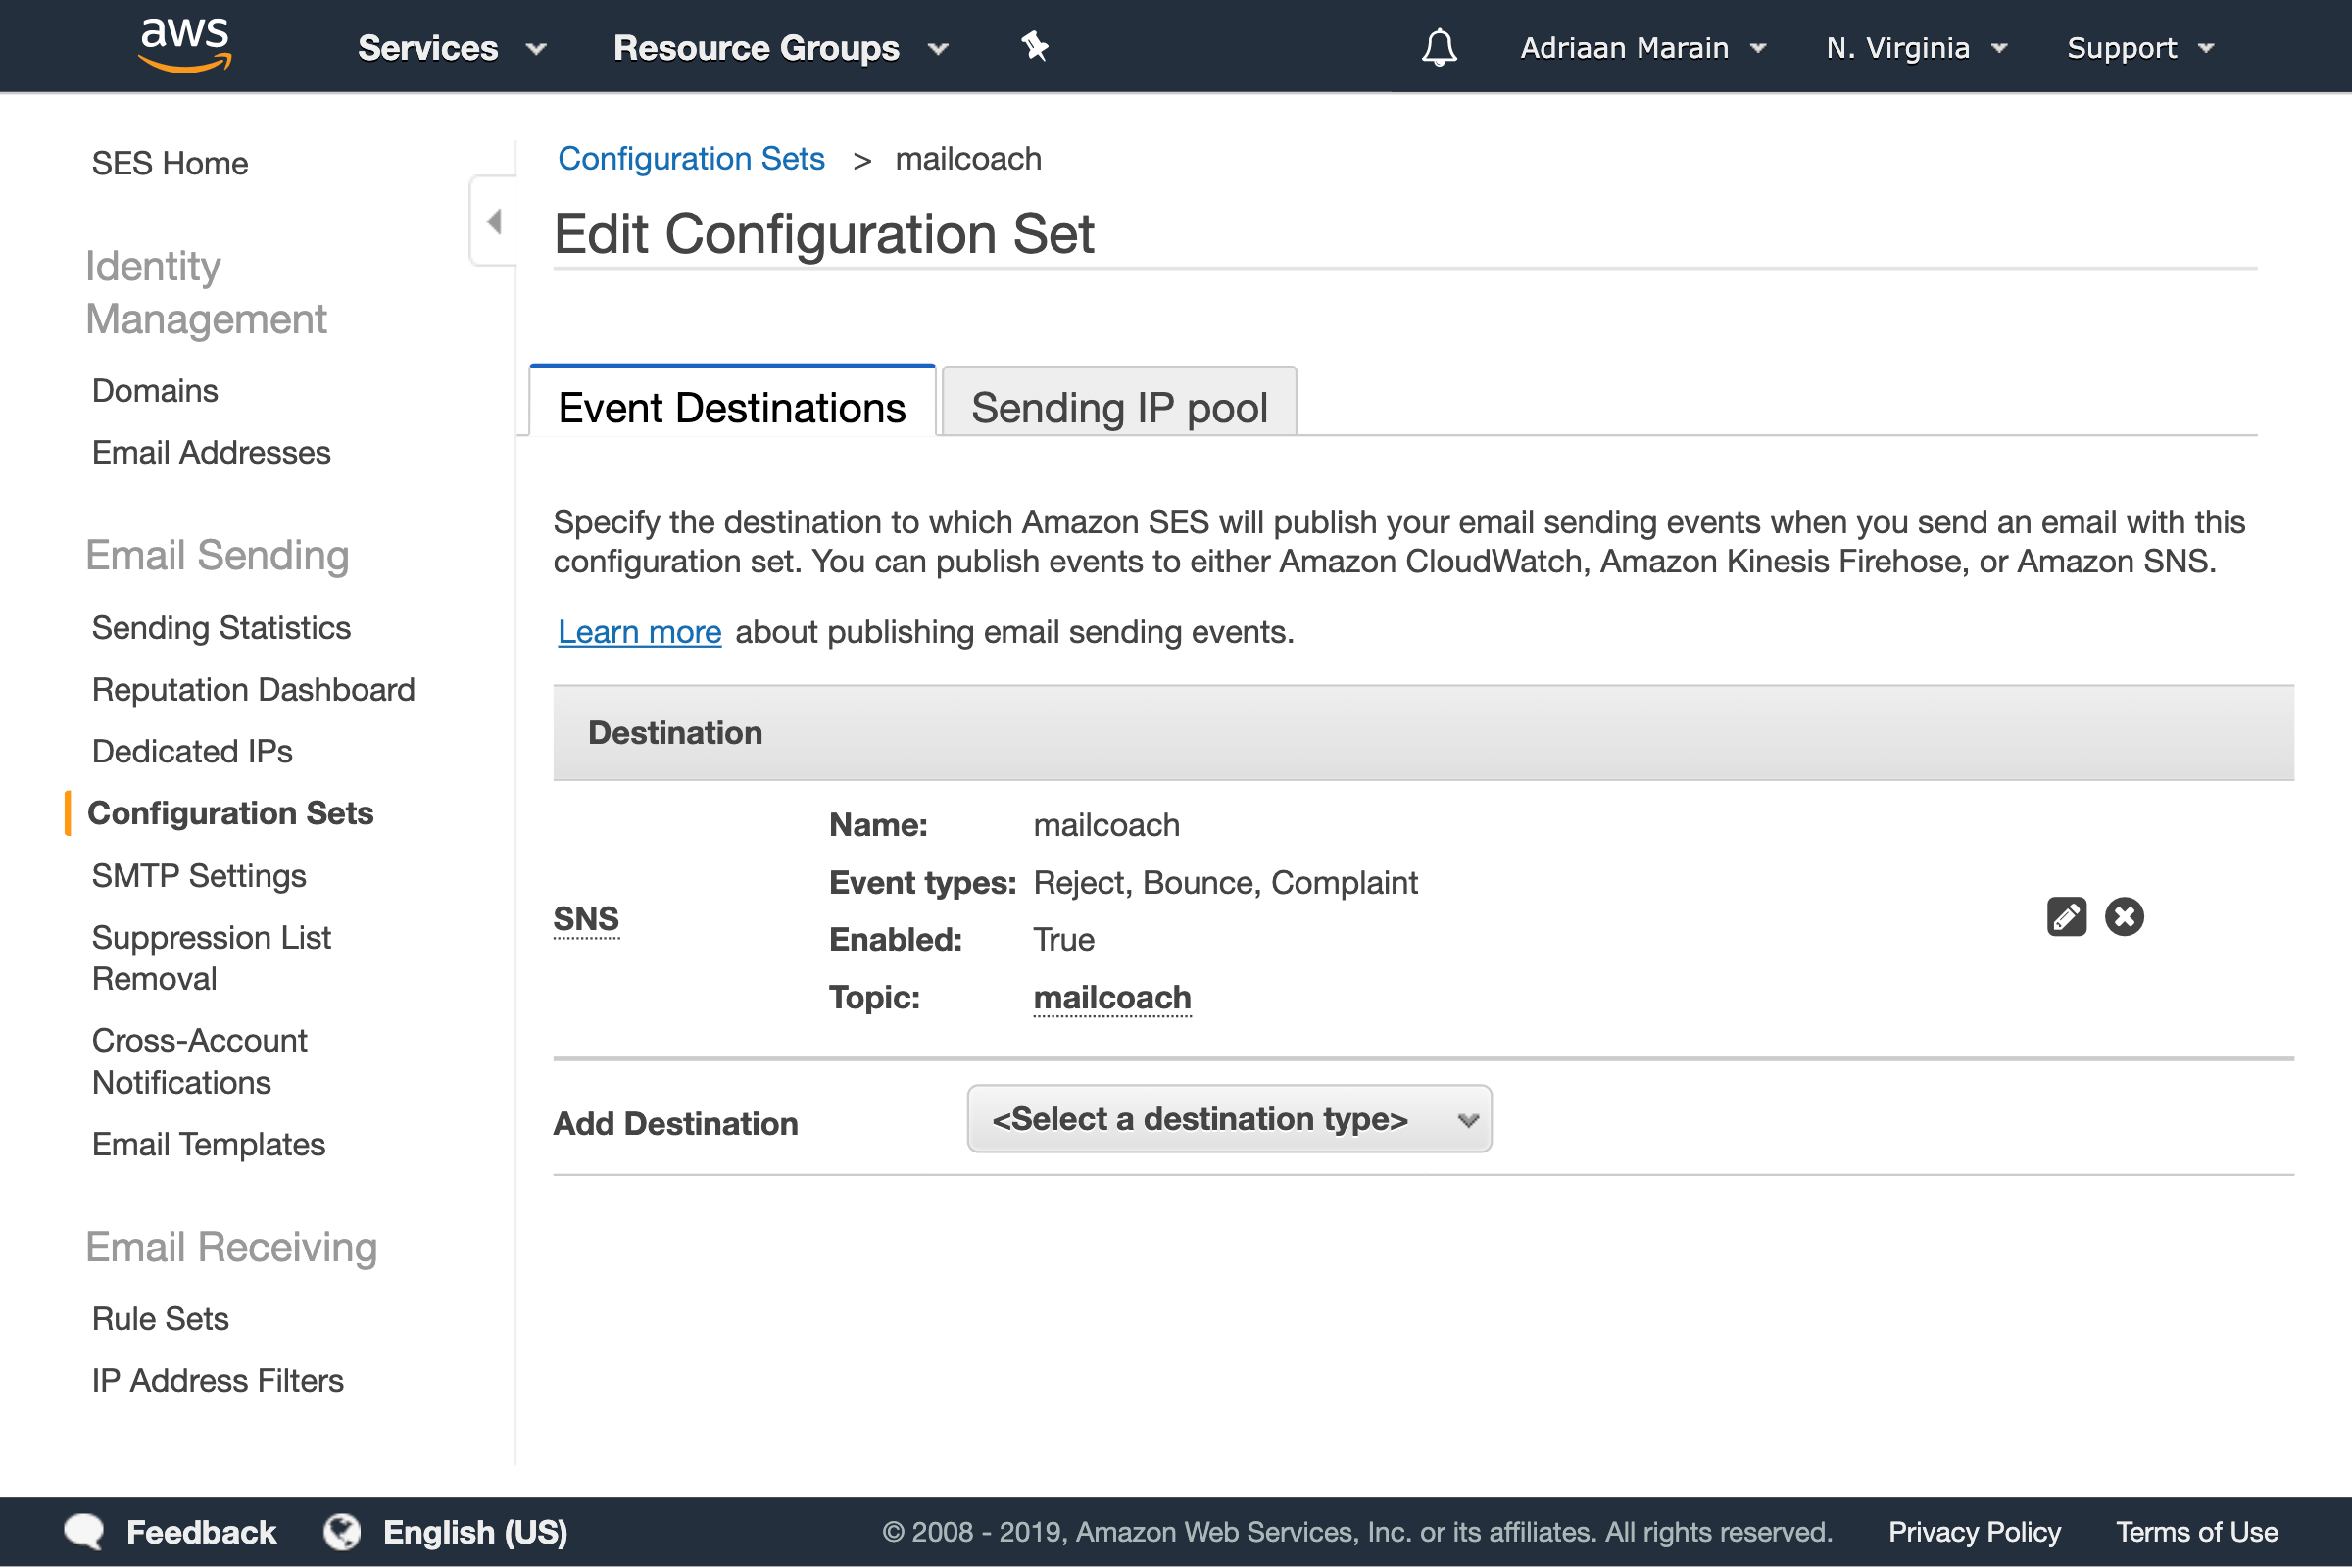
Another window will open, choose a topic and display name, press Create Topic and Save. You should now see your newly created Configuration Set:
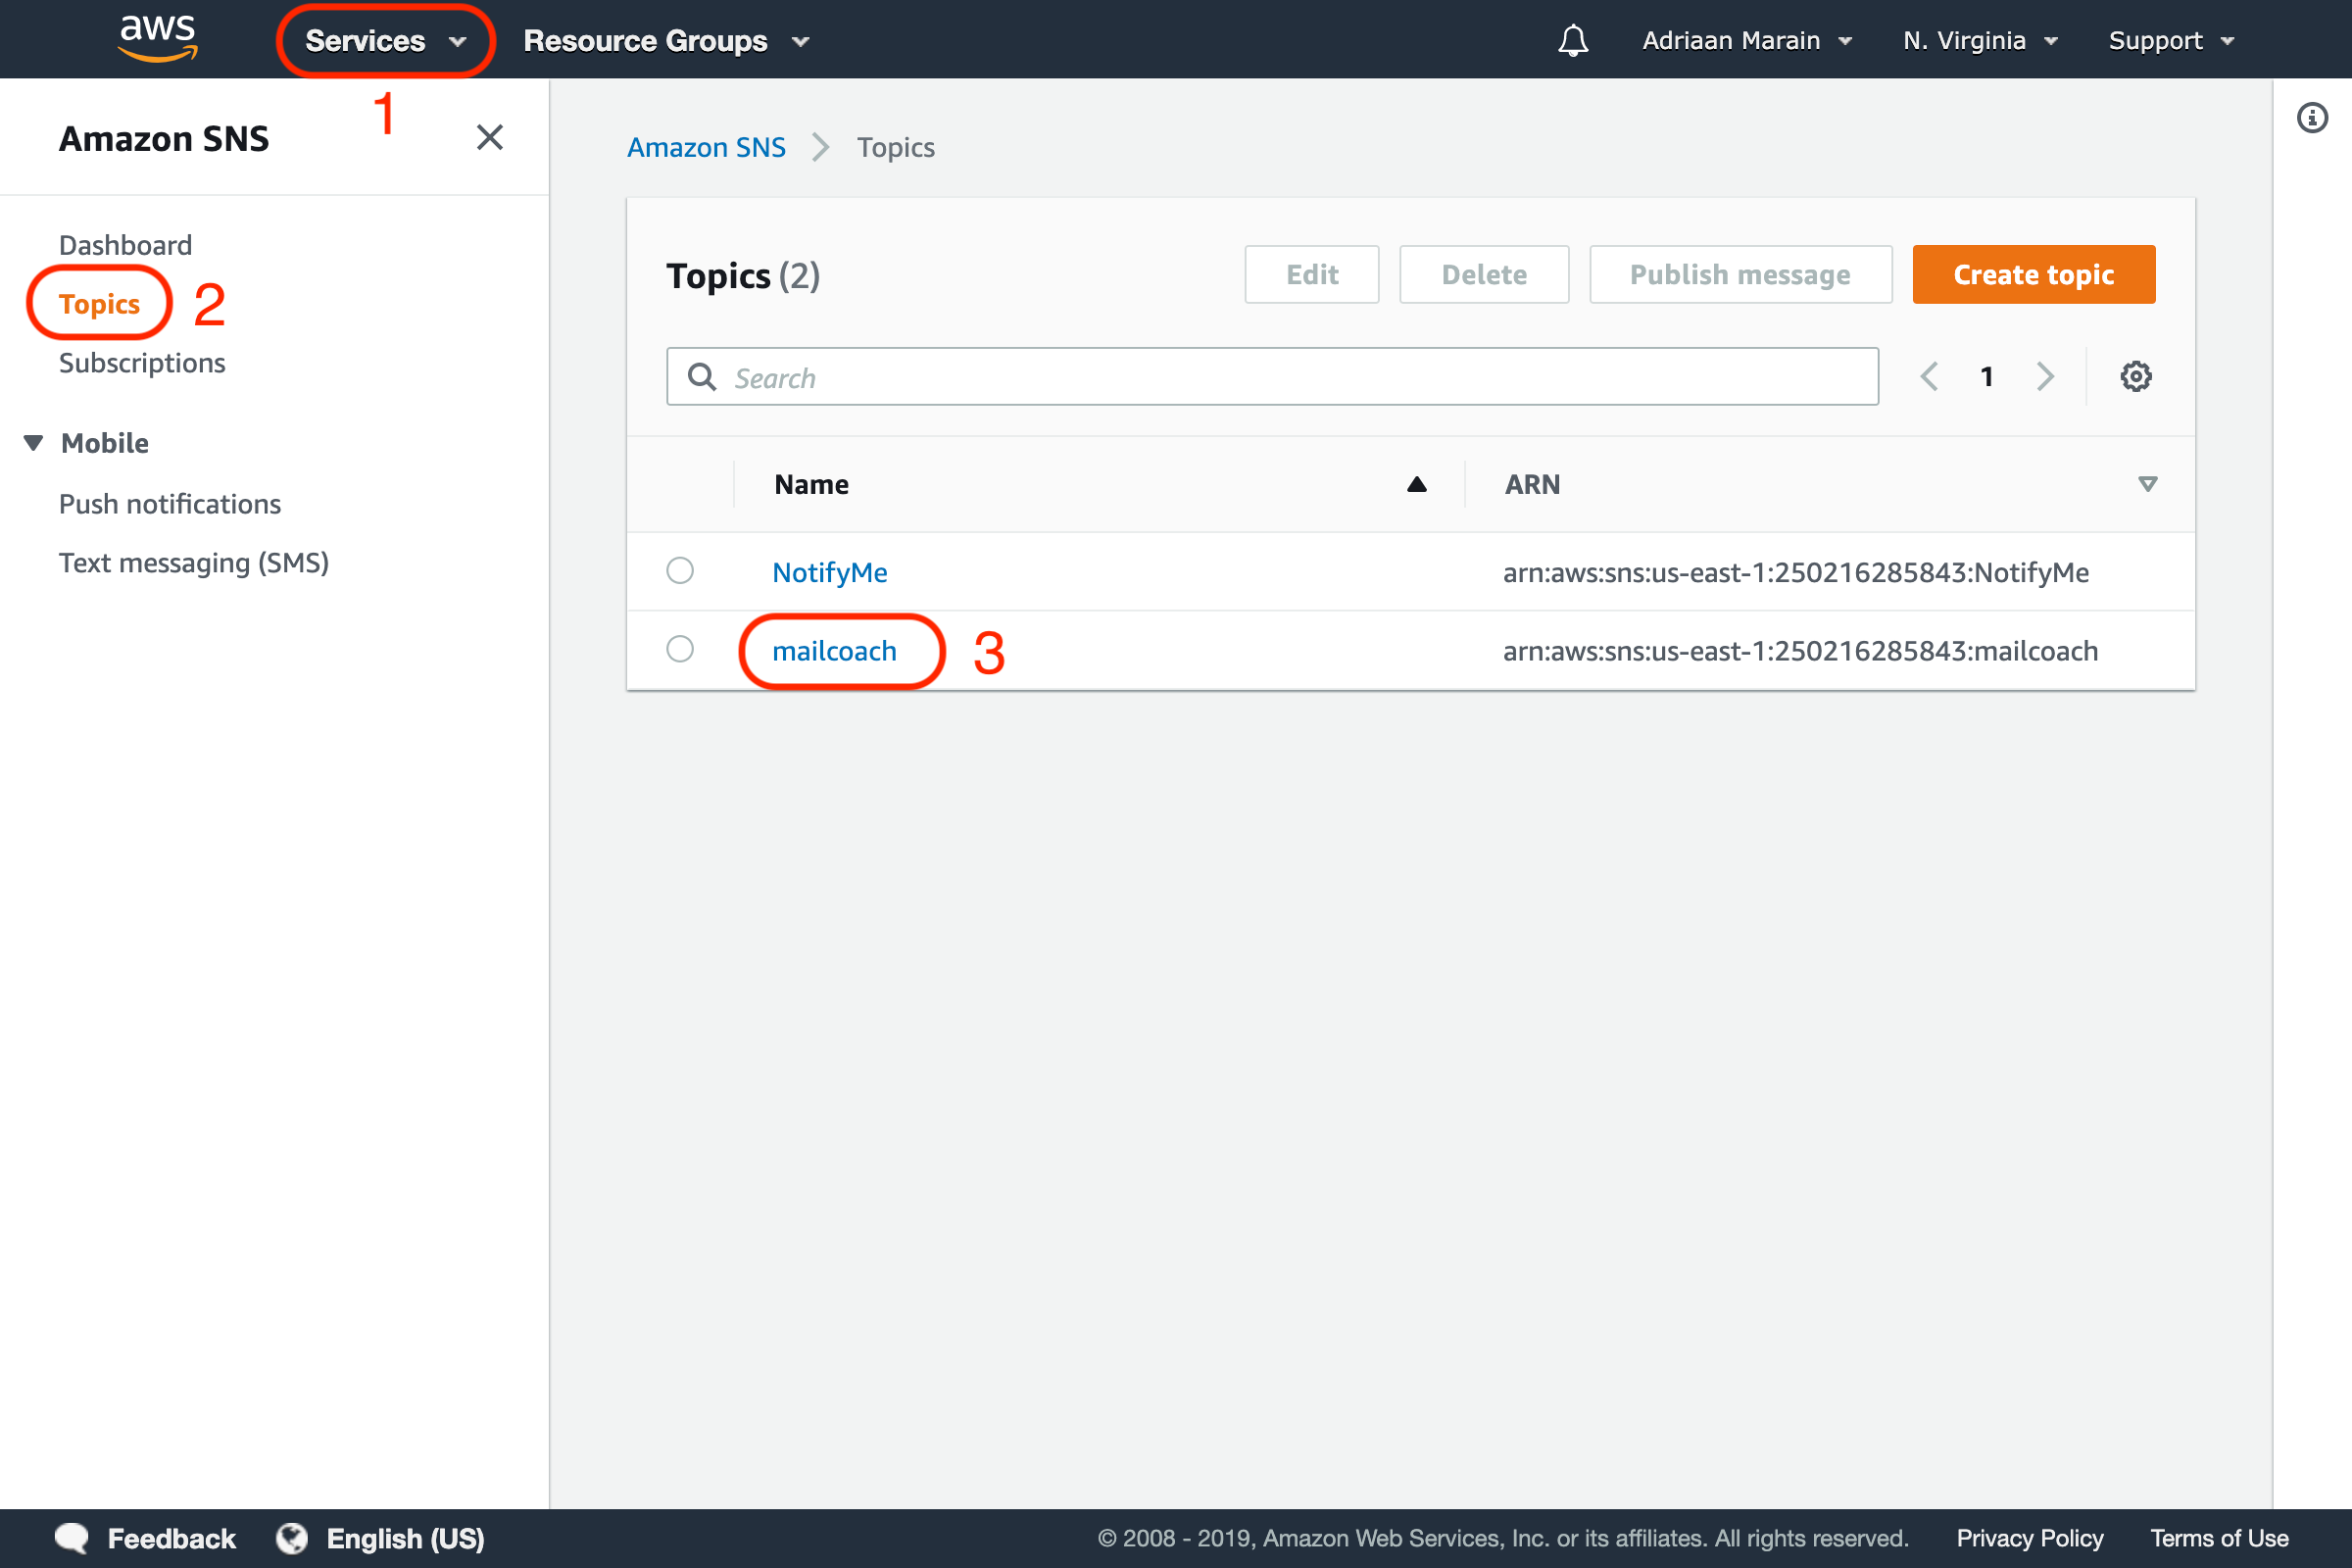
Now, go to Simple Notification Service (SNS) in your AWS dashboard to further configure the topic you just created. Open the Topics menu and select the topic.
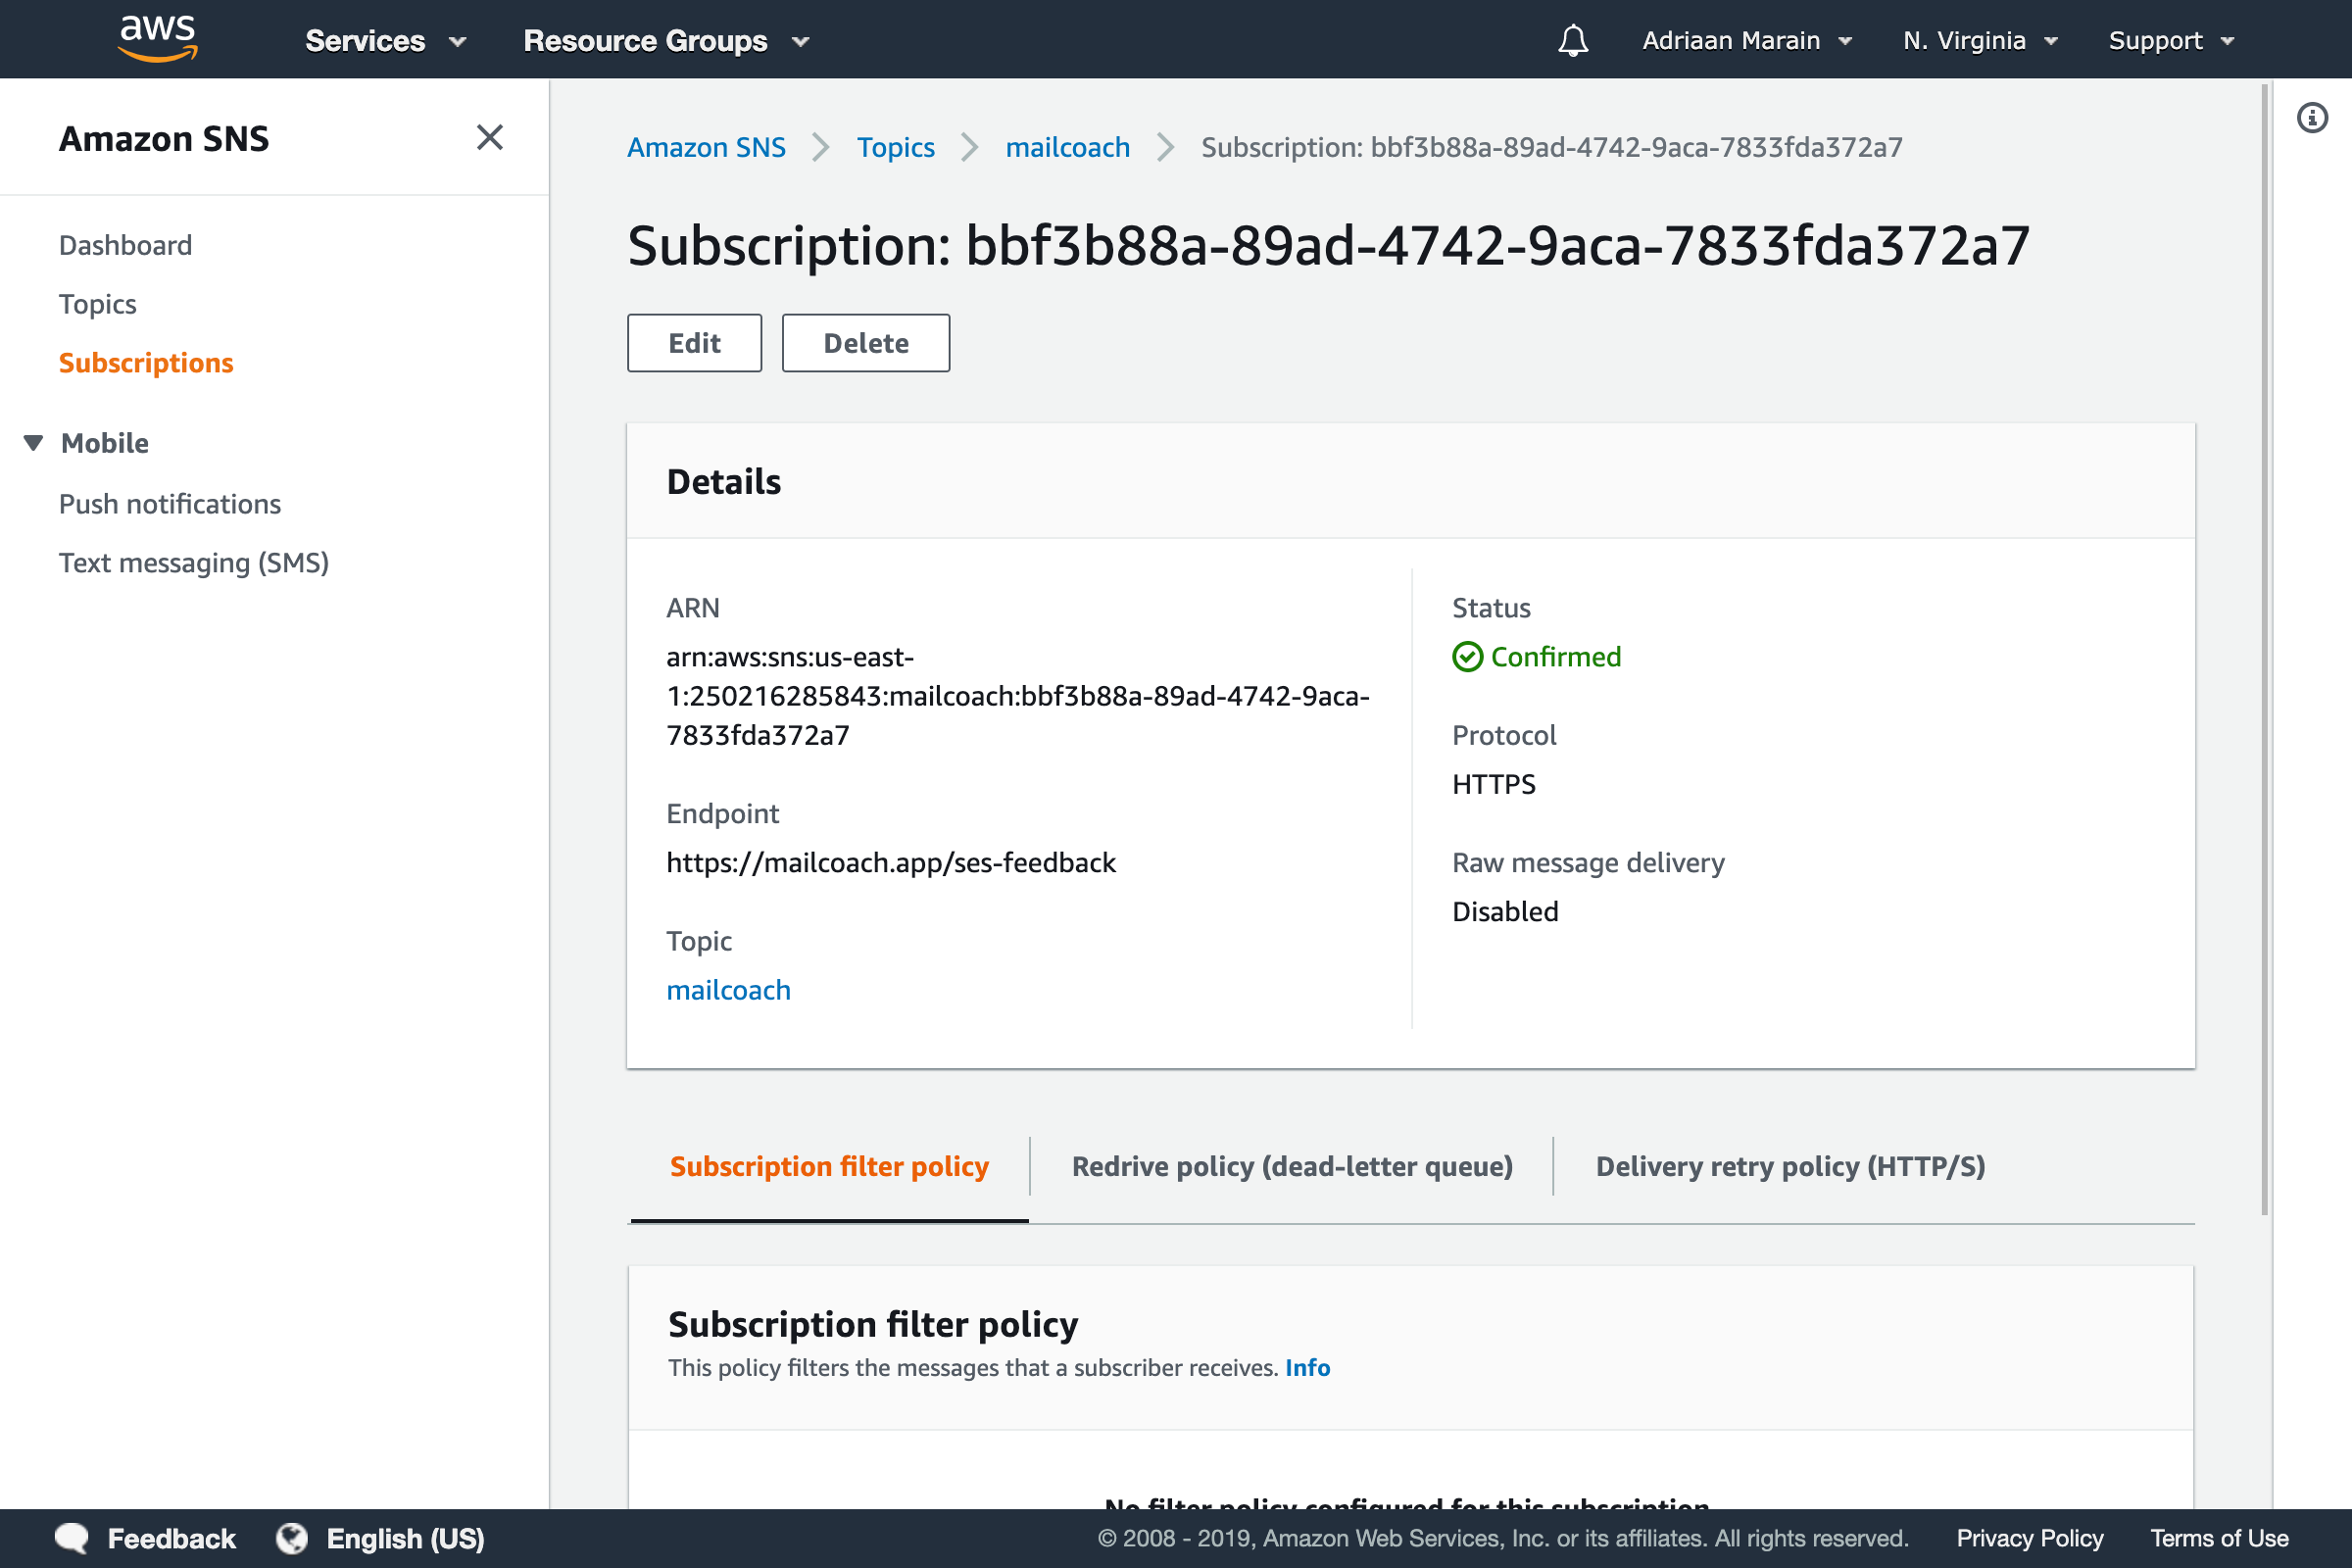
Press the Create subscription button on this page, choose the HTTPS protocol and enter the webhook URL that you can find on your Mailcoach Mail configuration page (https://YOUR-DOMAIN.com/ses-feedback):
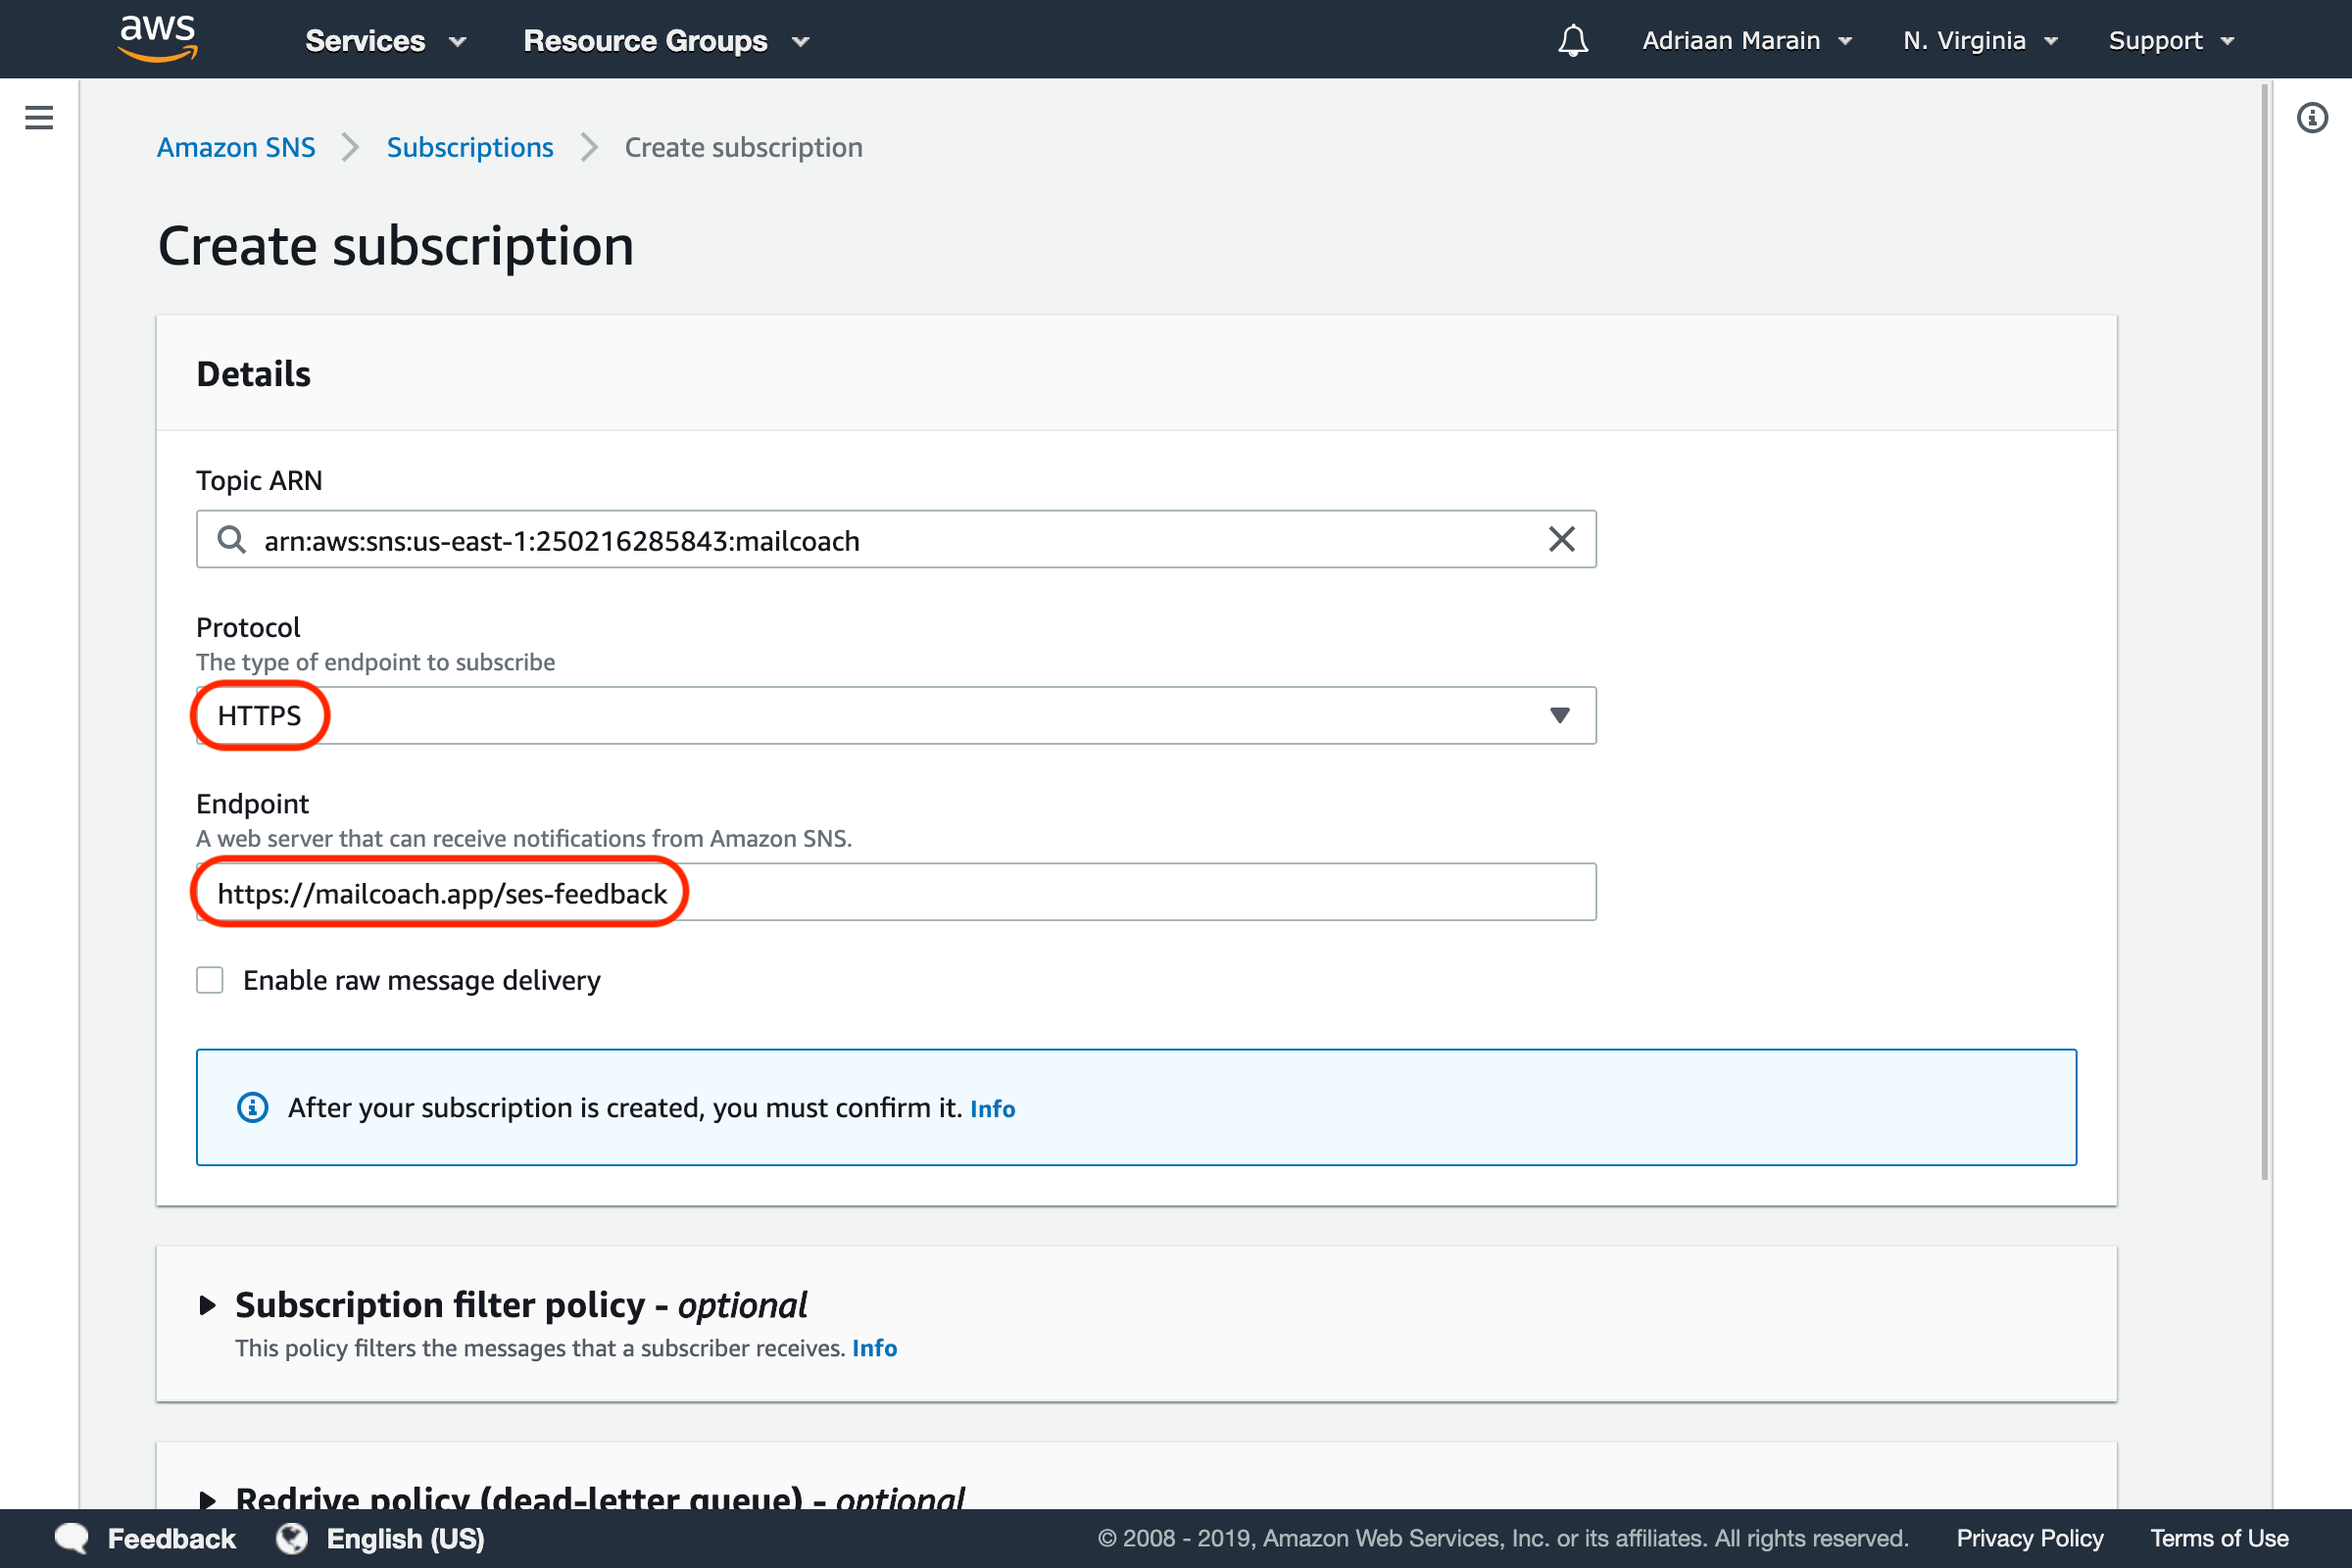
Scroll down and press the Create subscription button. If everything was configured correctly, the subscription should confirm itself and the Status should reflect this after a page refresh.
Your Amazon SES configuration should now be complete, you can go ahead and try sending a test mail. It may go to your spam if you have not set up your domain settings.
Note: If you have created a new Amazon SES account, you will need to request a sending limit change to have your account removed from the sandbox. Until your account is removed from the Amazon SES sandbox you will only be able to send emails to verified email addresses.
Mailgun
To get started, go to Configuration > Settings > Mailers, and create a Mailer for the “Mailgun” Email service.
After that, you’ll be greeted with a nice wizard that will you setting this up at Mailgun. In order to start configuring this on your account, the wizard will ask for specifying a Mailgun API Key.
How to create a Mailgun API key
- Log into your Mailgun account.
- From the top right navigation menu, click on your name and then Security.
- Under API Keys, locate the Private API Key field. Click on the eye icon to the right of the field to display your API key.
Copy that API key to the API key field in the wizard at Mailcoach, and continue the wizard.
Sendgrid
To get started, go to Configuration > Settings > Mailers, and create a Mailer for the “Sendgrid” Email service.
After that, you’ll be greeted with a nice wizard that will you setting this up at Sendgrid. In order to start configuring this on your account, the wizard will ask for specifying a Sendgrid API Key.
How to create a Sendgrid API key
Log in to your SendGrid account and follow these instructions on creating an API key. Make sure it add the “Mail Send”, “Mail Settings” and “Tracking” permissions when creating the API key.
Brevo (previously Sendinblue)
To get started, go to Configuration > Settings > Mailers, and create a Mailer for the “Brevo” Email service.
After that, you’ll be greeted with a nice wizard that will you setting this up at Brevo. In order to start configuring this on your account, the wizard will ask for specifying a Sendinblue server API token.
How to create a server Sendinblue API token
- Log into your Sendinblue account.
- Follow these instructions in the Sendinblue docs on how to obtain your Brevo API key.
Copy the API key to the API key field in the wizard at Mailcoach, and continue the wizard.