Sendgrid
On this page:
- Using Sendgrid in the Mailcoach standalone app
- Handling Sendgrid feedback in an existing Laravel app
Mailcoach supports sending mails via Sendgrid. This page contains instructions to set up Sendgrid in the standalone Mailcoach app and in a Laravel app with laravel-mailcoach.
Using Sendgrid in the Mailcoach standalone app
To get started, make sure your SendGrid account is completely set up and your domain has been verified. The verification steps are outside of the scope of this tutorial, so we refer you to SendGrid’s docs to get these steps done. Sending out emails without a verified domain is possible, but not recommended, as the chances of your emails being flagged as spam are very high.
The value for the mails per second field depends on your SendGrid account and settings. A good starting point is 5 mails per second.
Email configuration
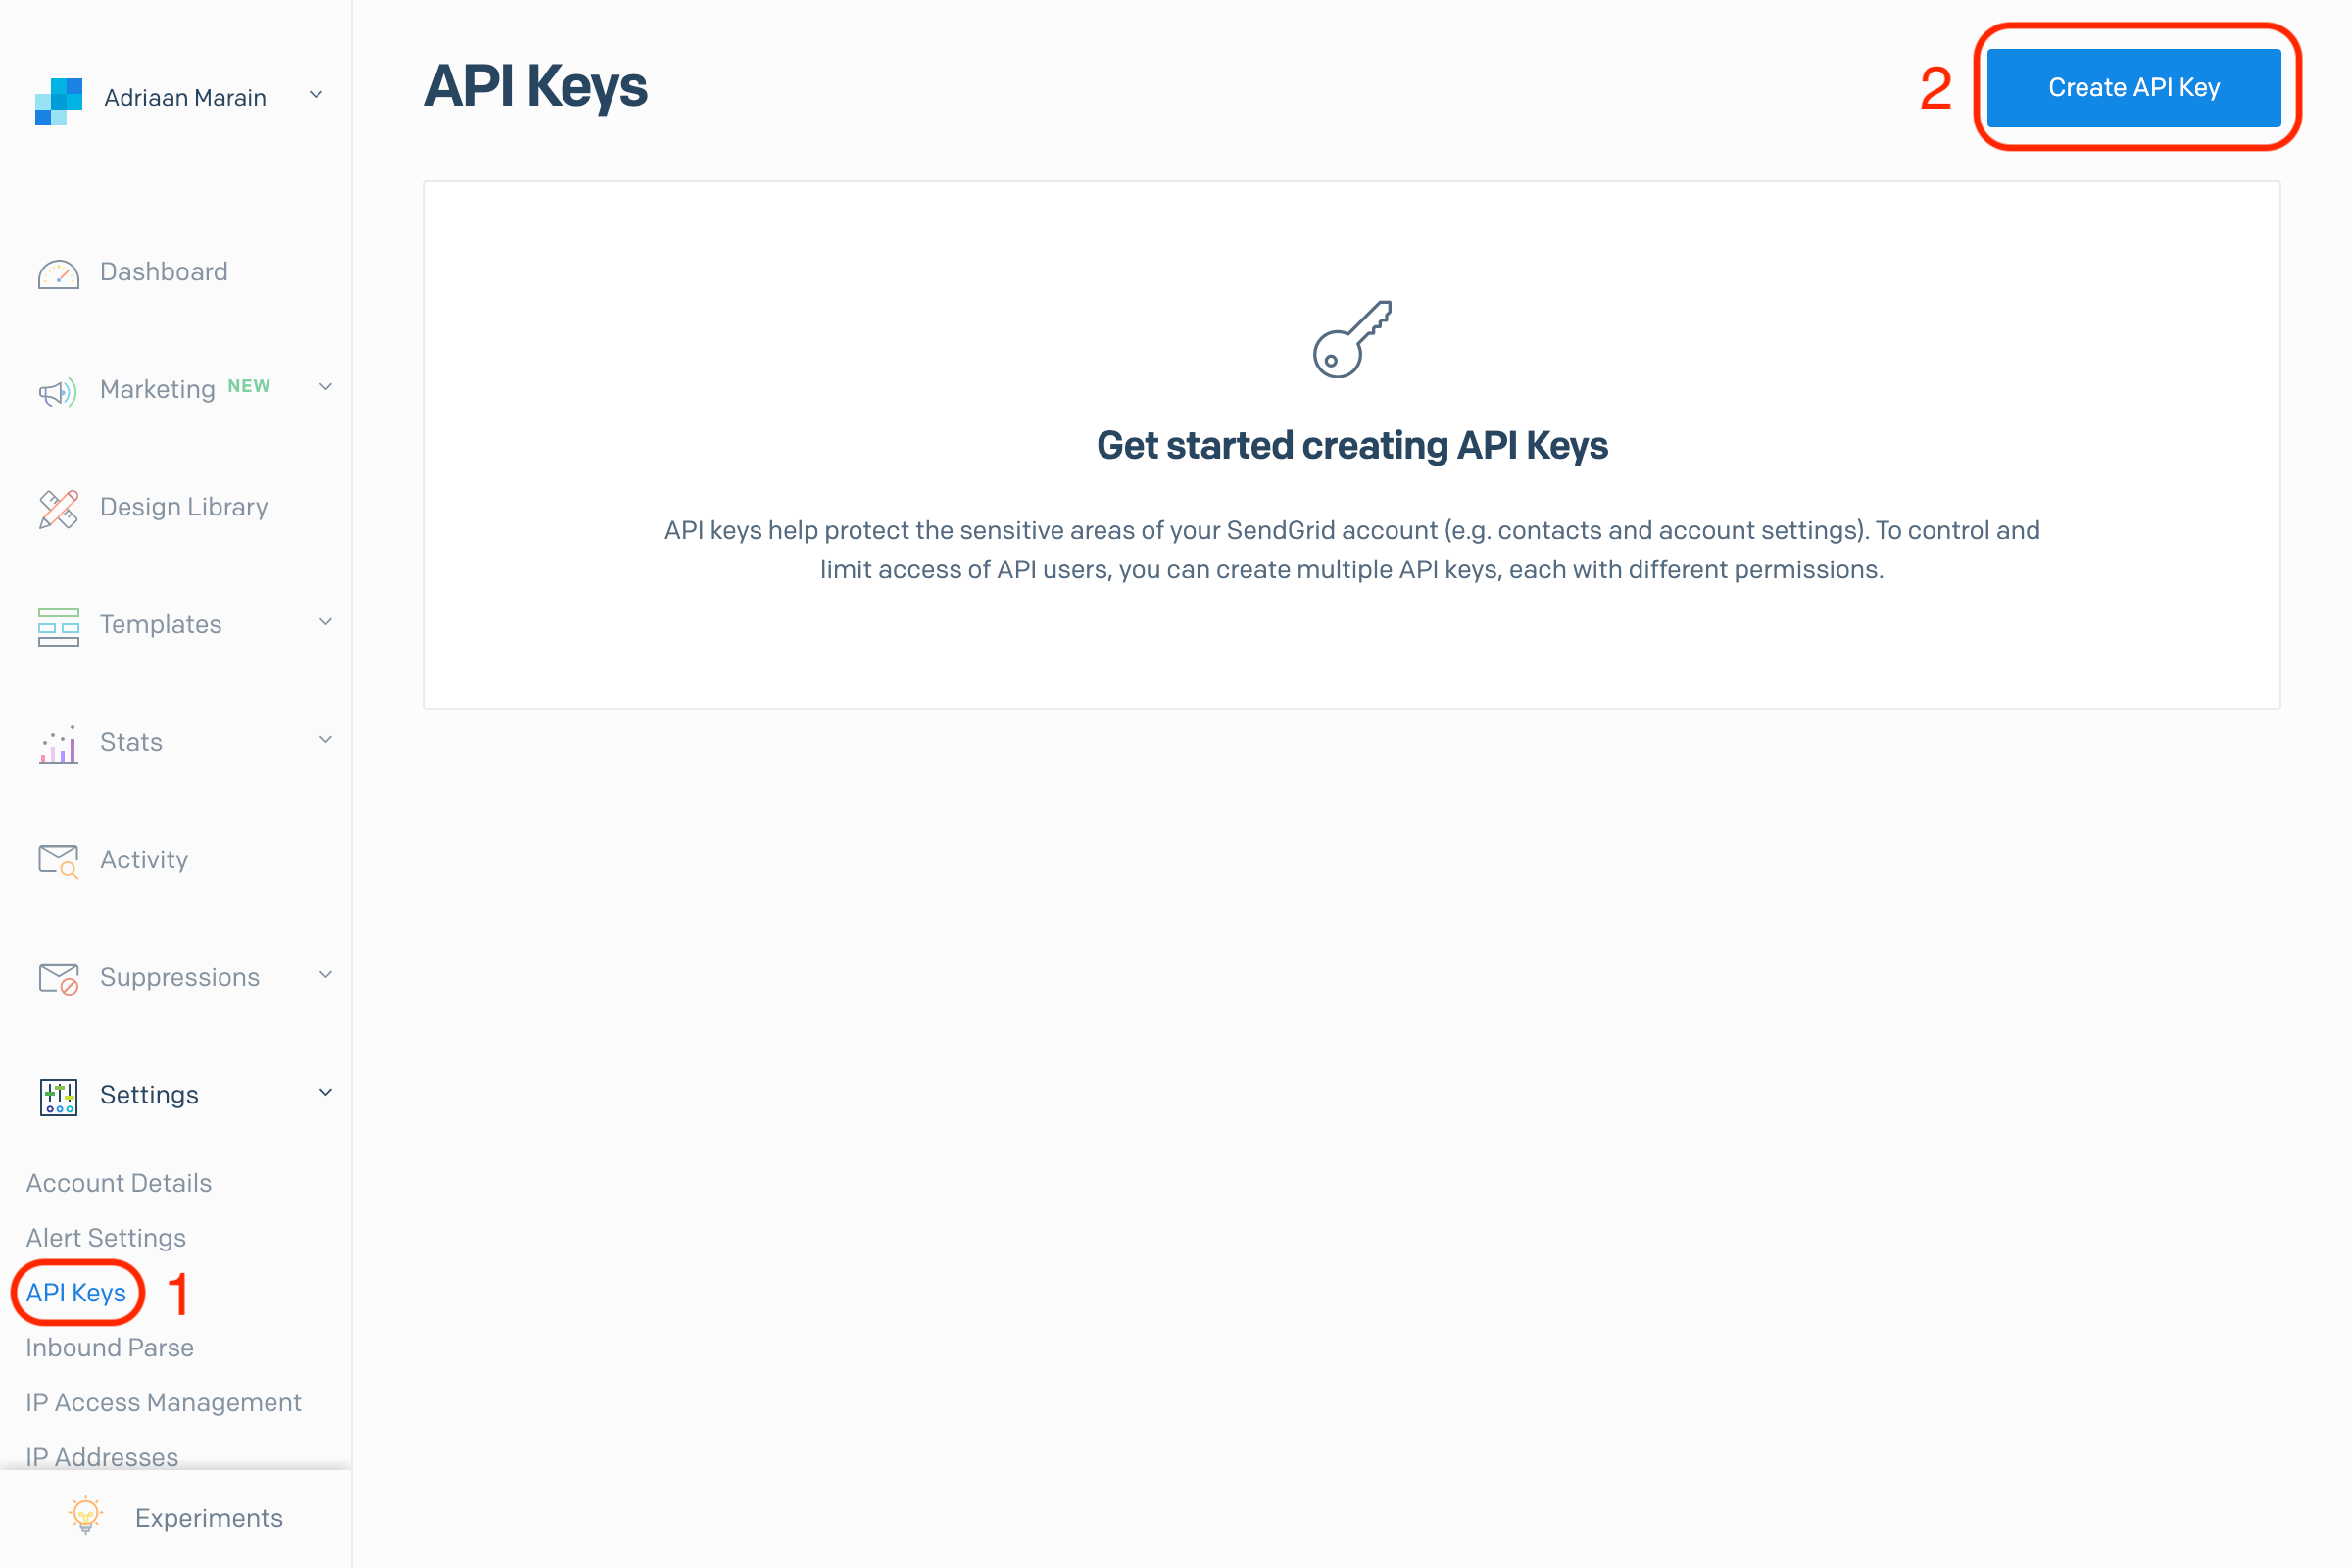
Setting up your email configuration with SendGrid is very easy. Open your SendGrid dashboard on the API keys page and press the Create API Key button in the top right corner:
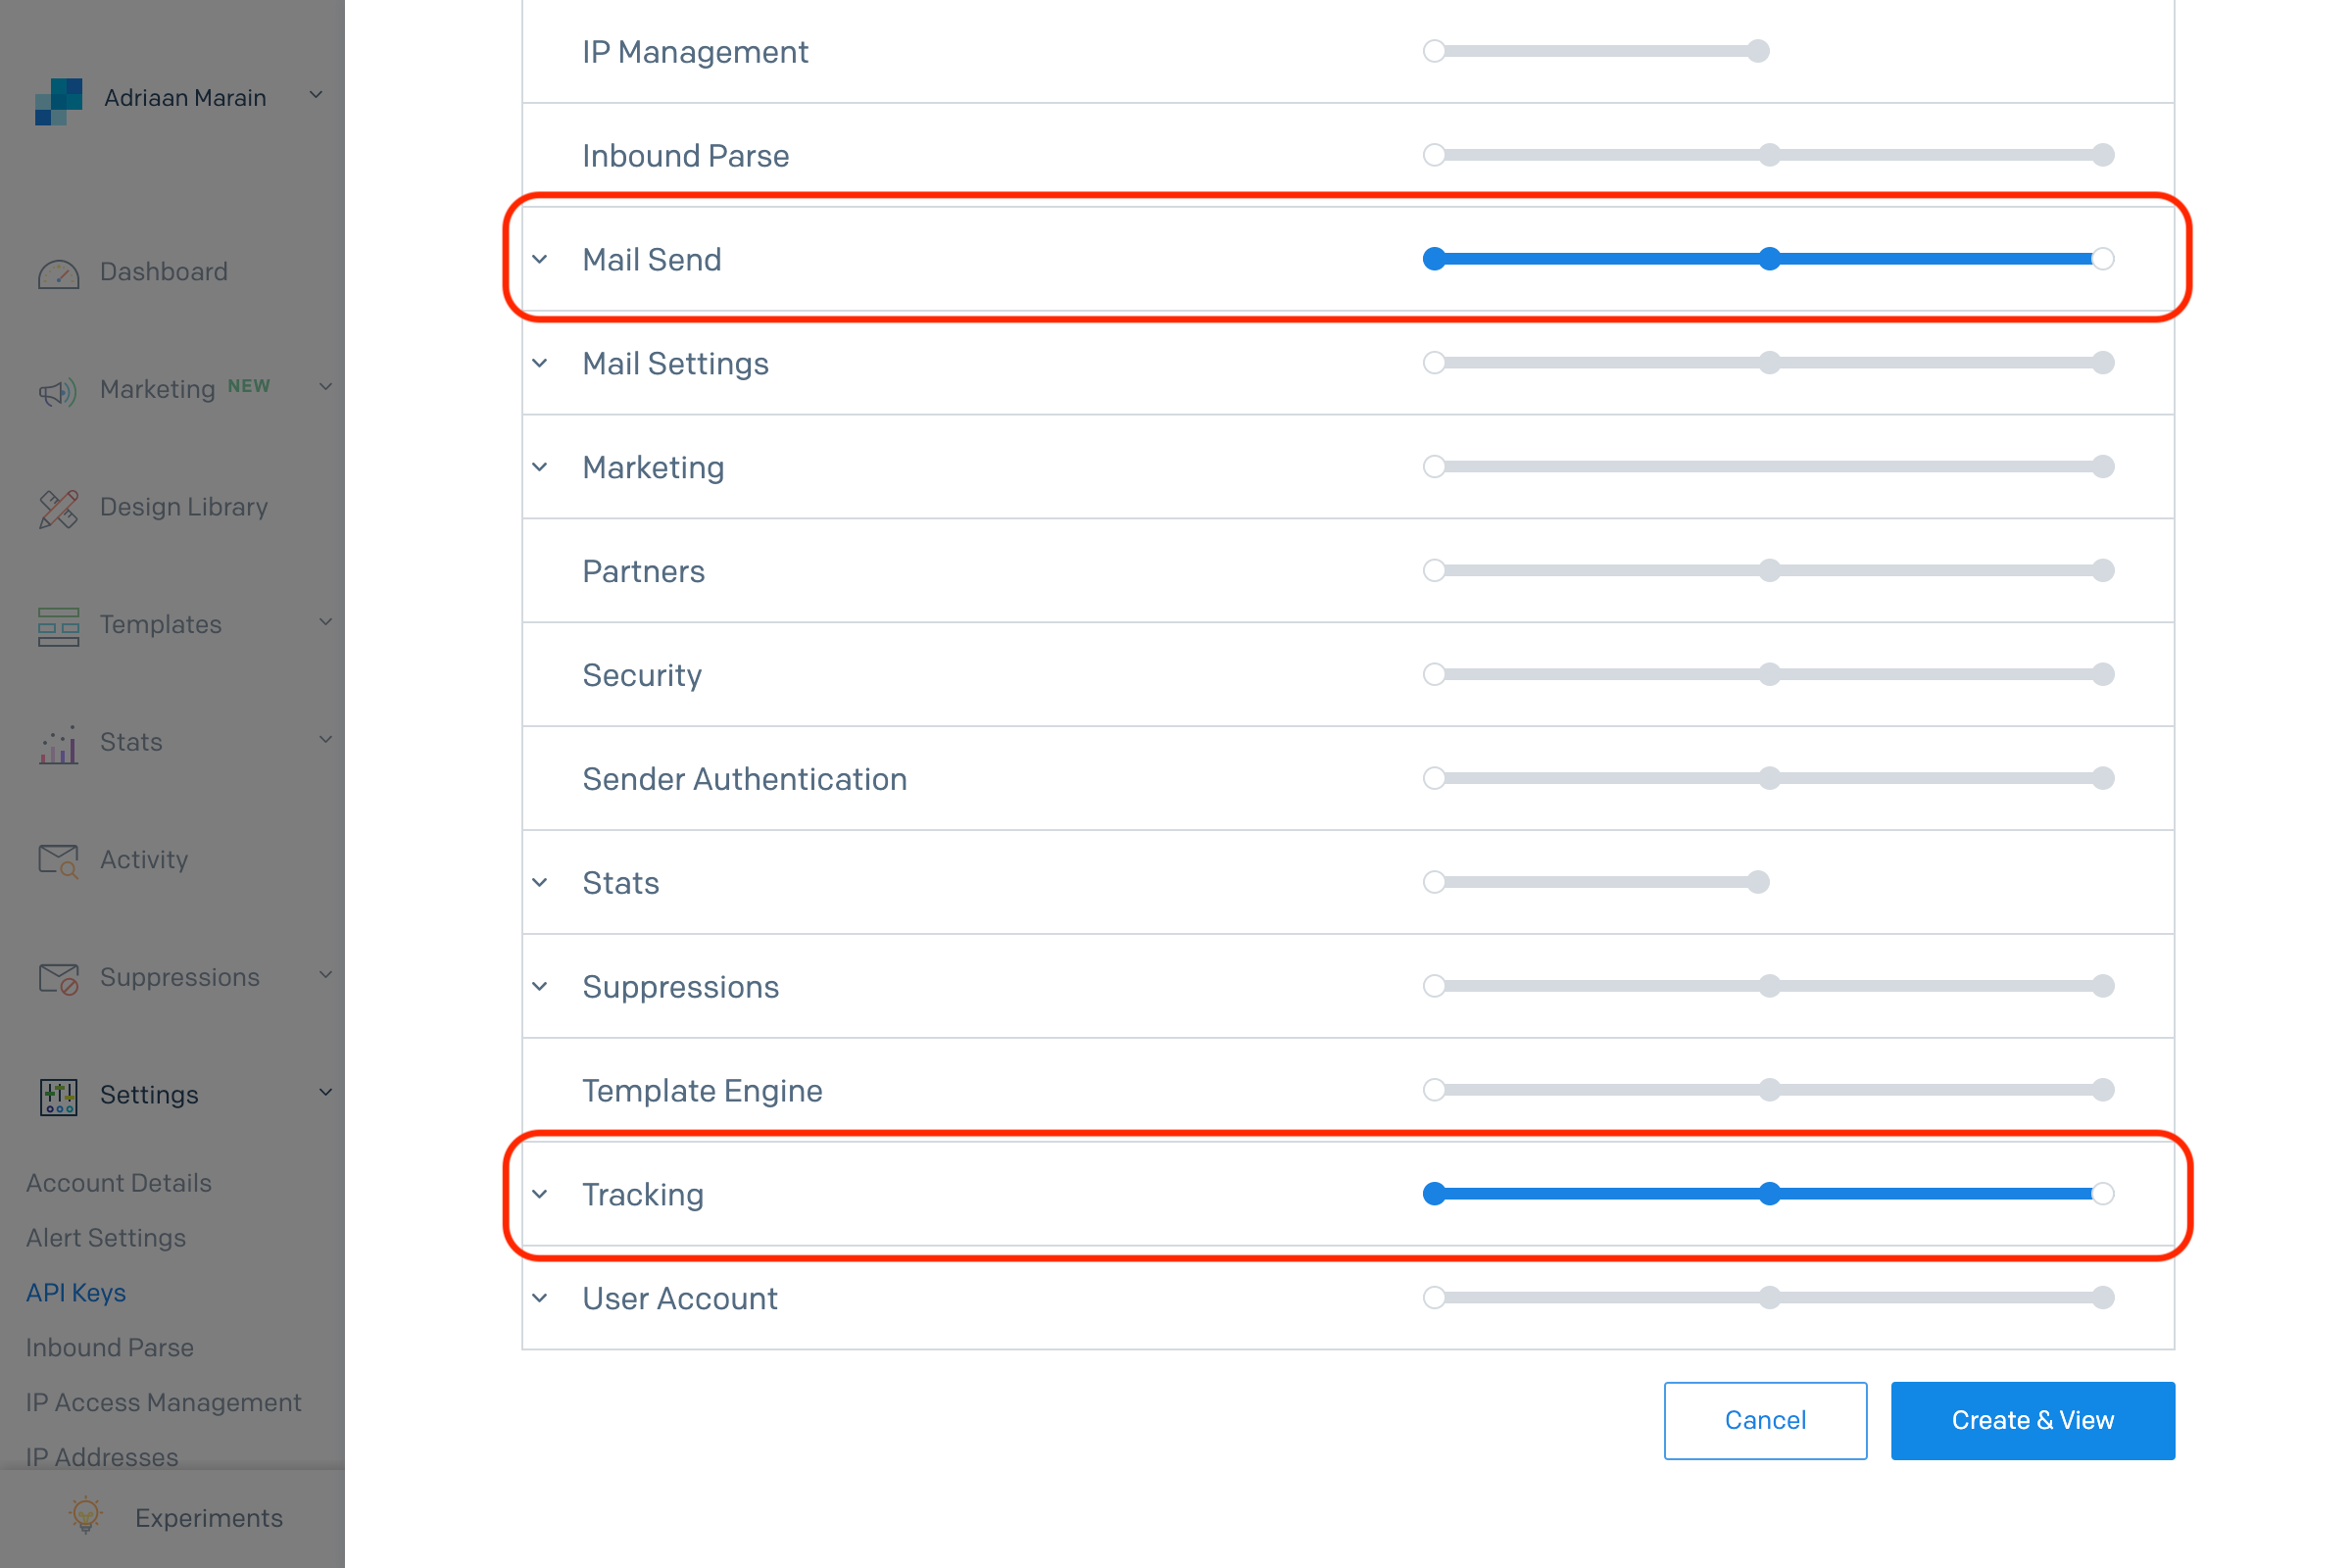
Choose a name for your API key, and select the Resticted Access permission. Mailcoach only needs the Mail Send and Tracking permissions:
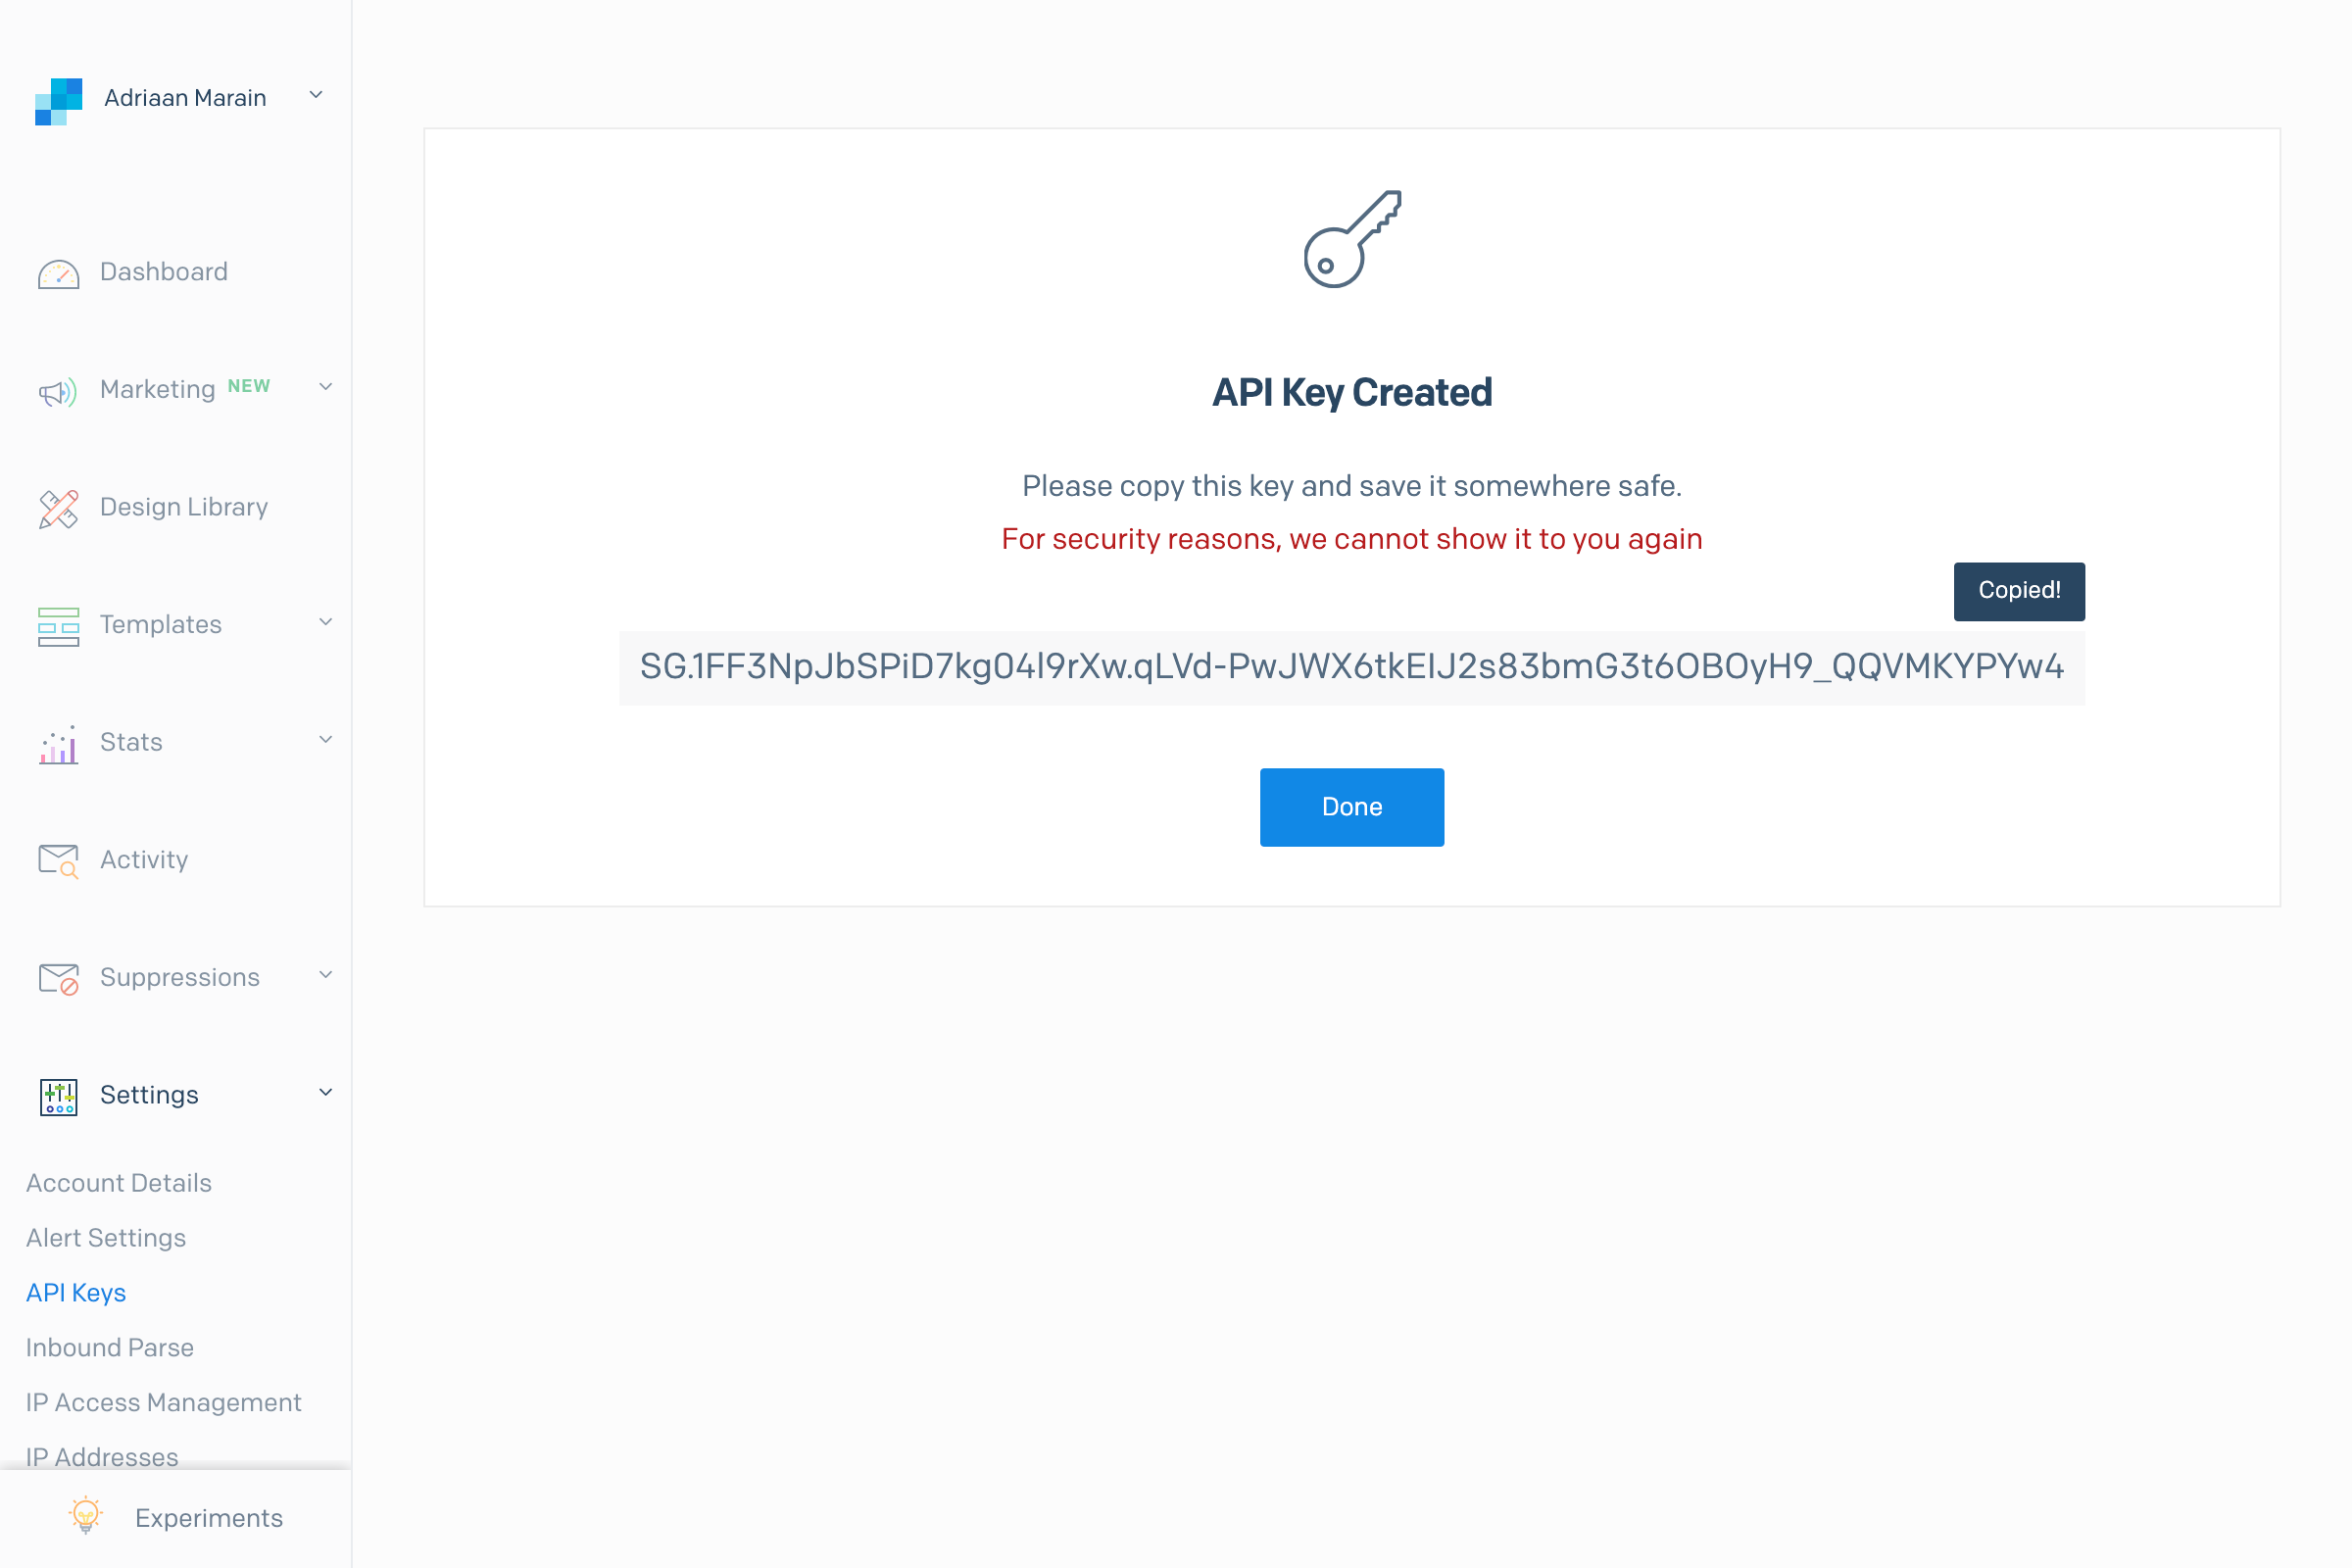
Create the API key, and click the text field on the next screen to copy the newly created key. Make sure to save this in a safe spot, like a secure password manager.
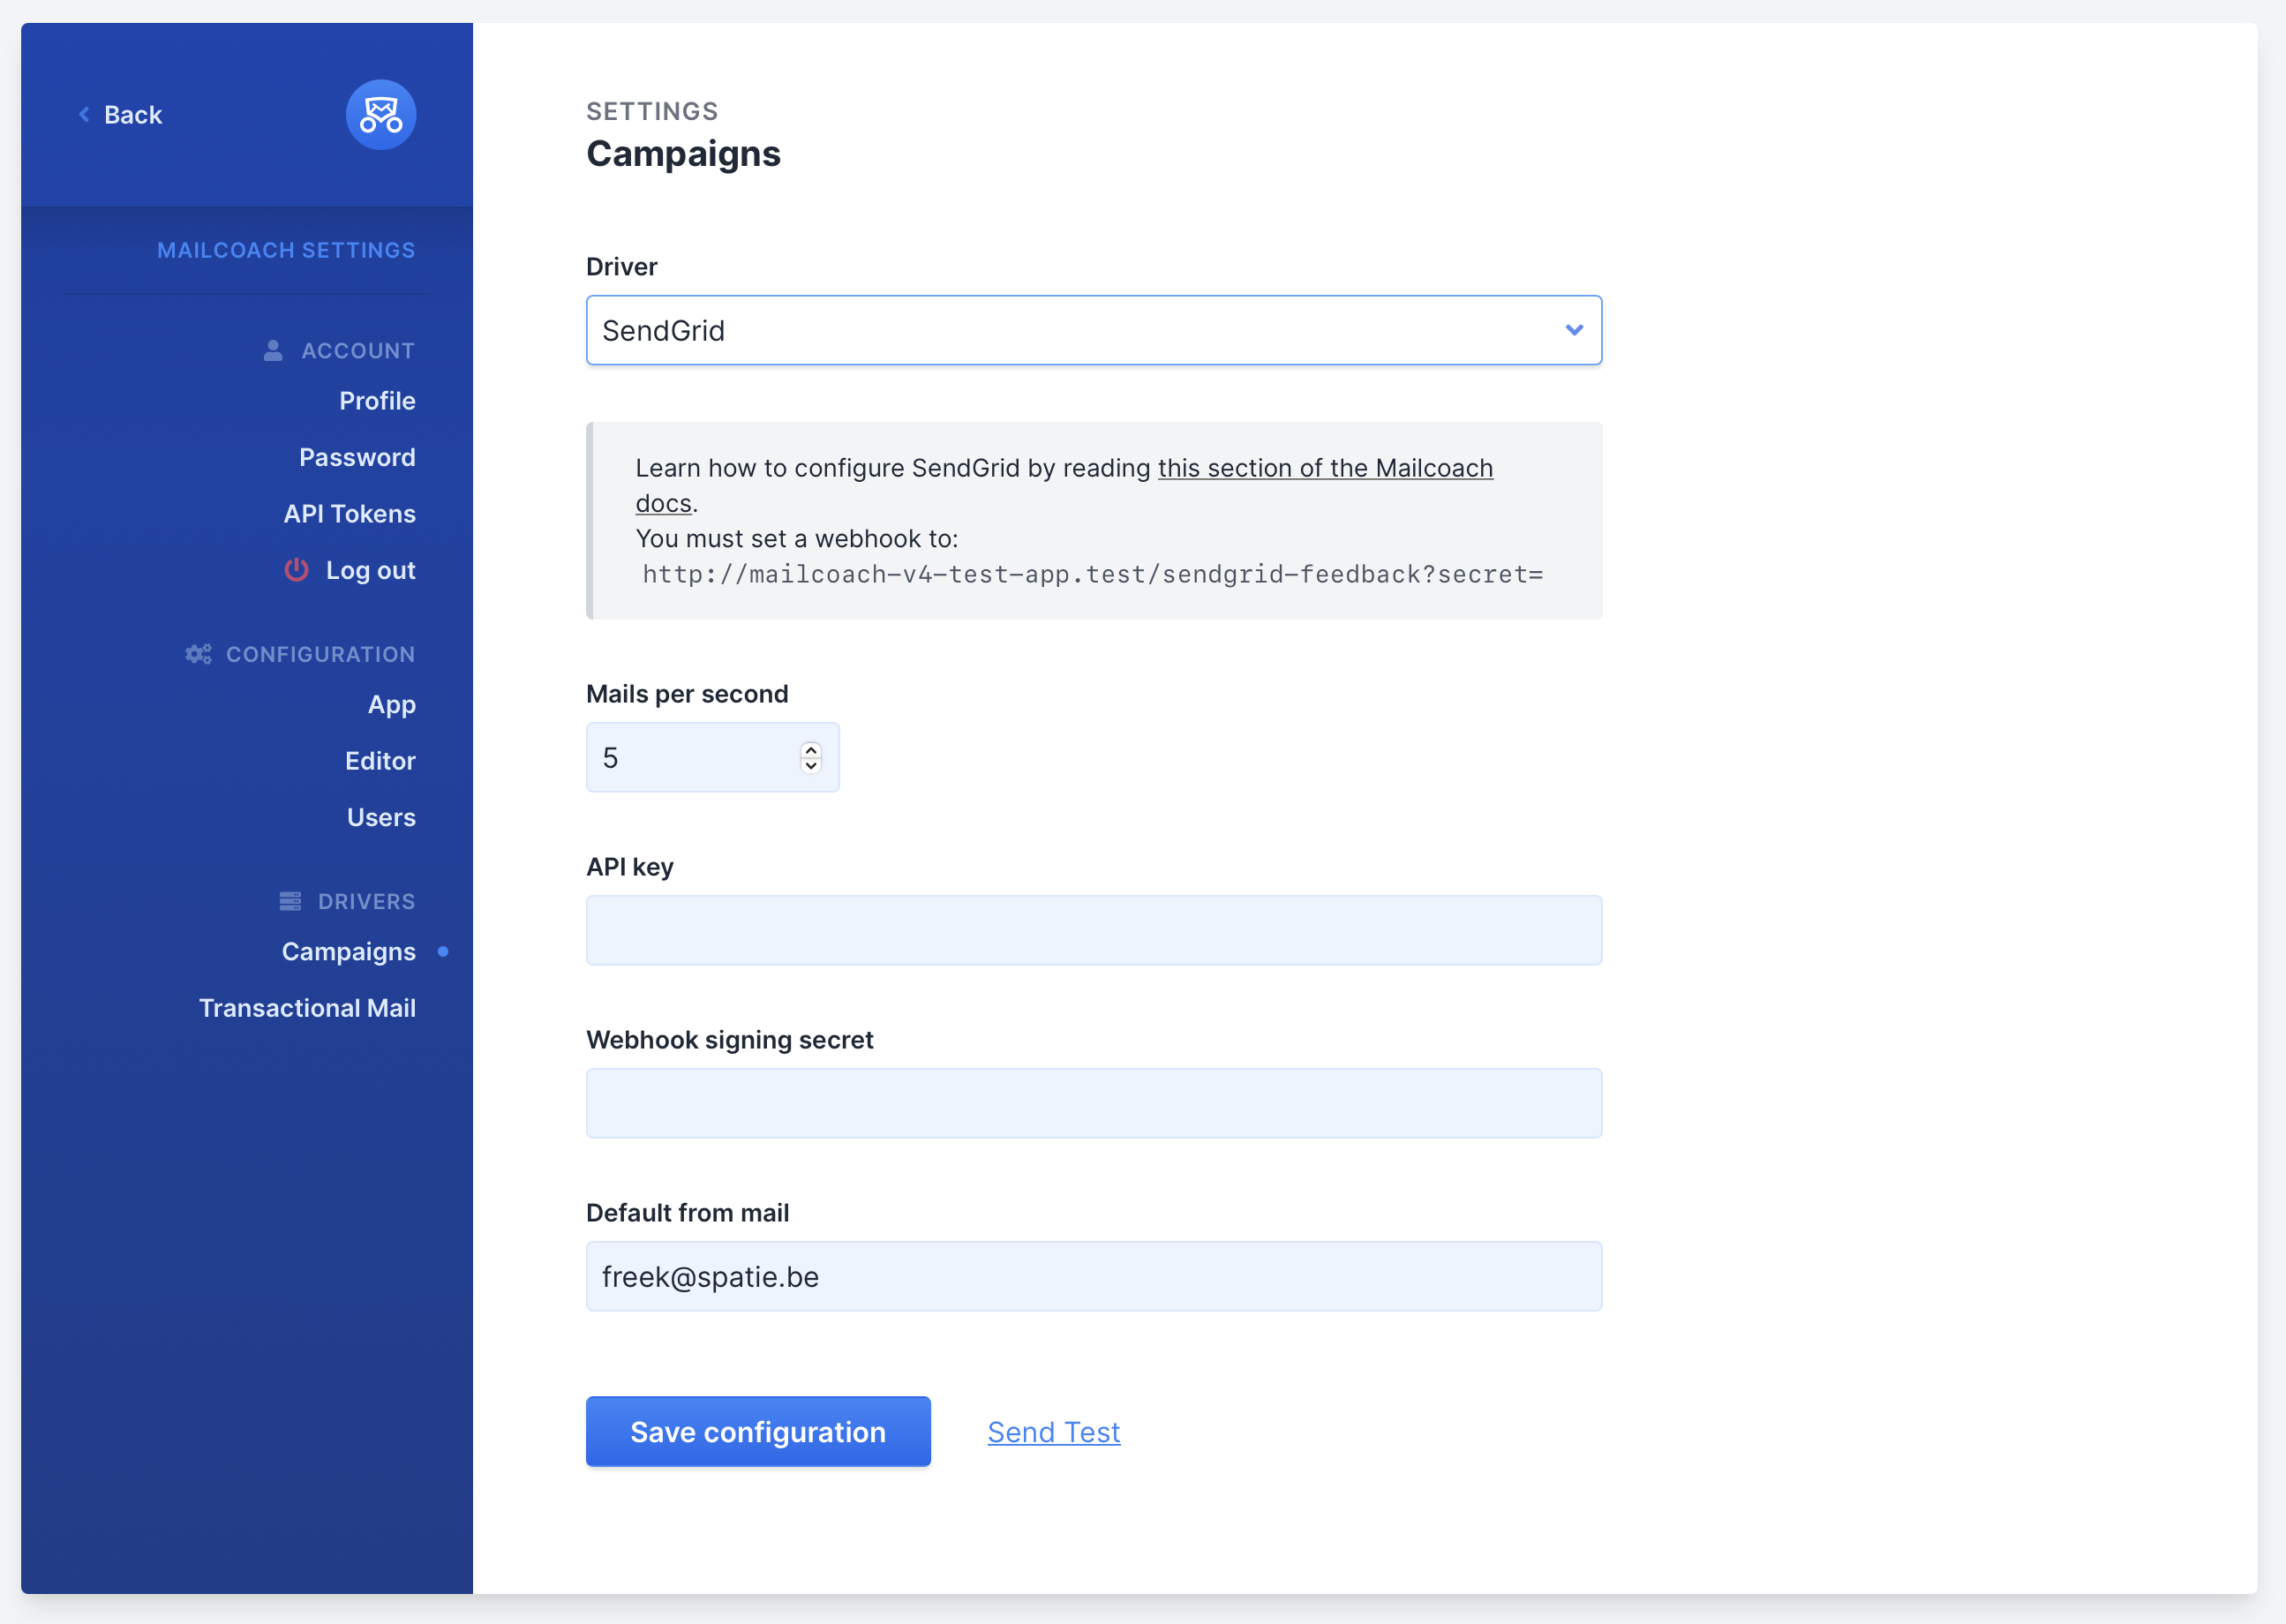
Go to your Mailcoach Mail configuration page (under your user menu), make sure you have selected SendGrid as your driver, and paste the API Key we just created there:
Tracking events
If you are not there already, go to your Mailcoach Mail configuration page (under your user menu), make sure your driver is set to SendGrid, and choose a value for your Webhook signing secret. This should be an unguessable string, but don’t use any passwords that you’re already using. This secret will be used by Mailcoach to verify incoming events from SendGrid.
Also, copy the webhook URL that is mentioned on the same page and save your configuration.
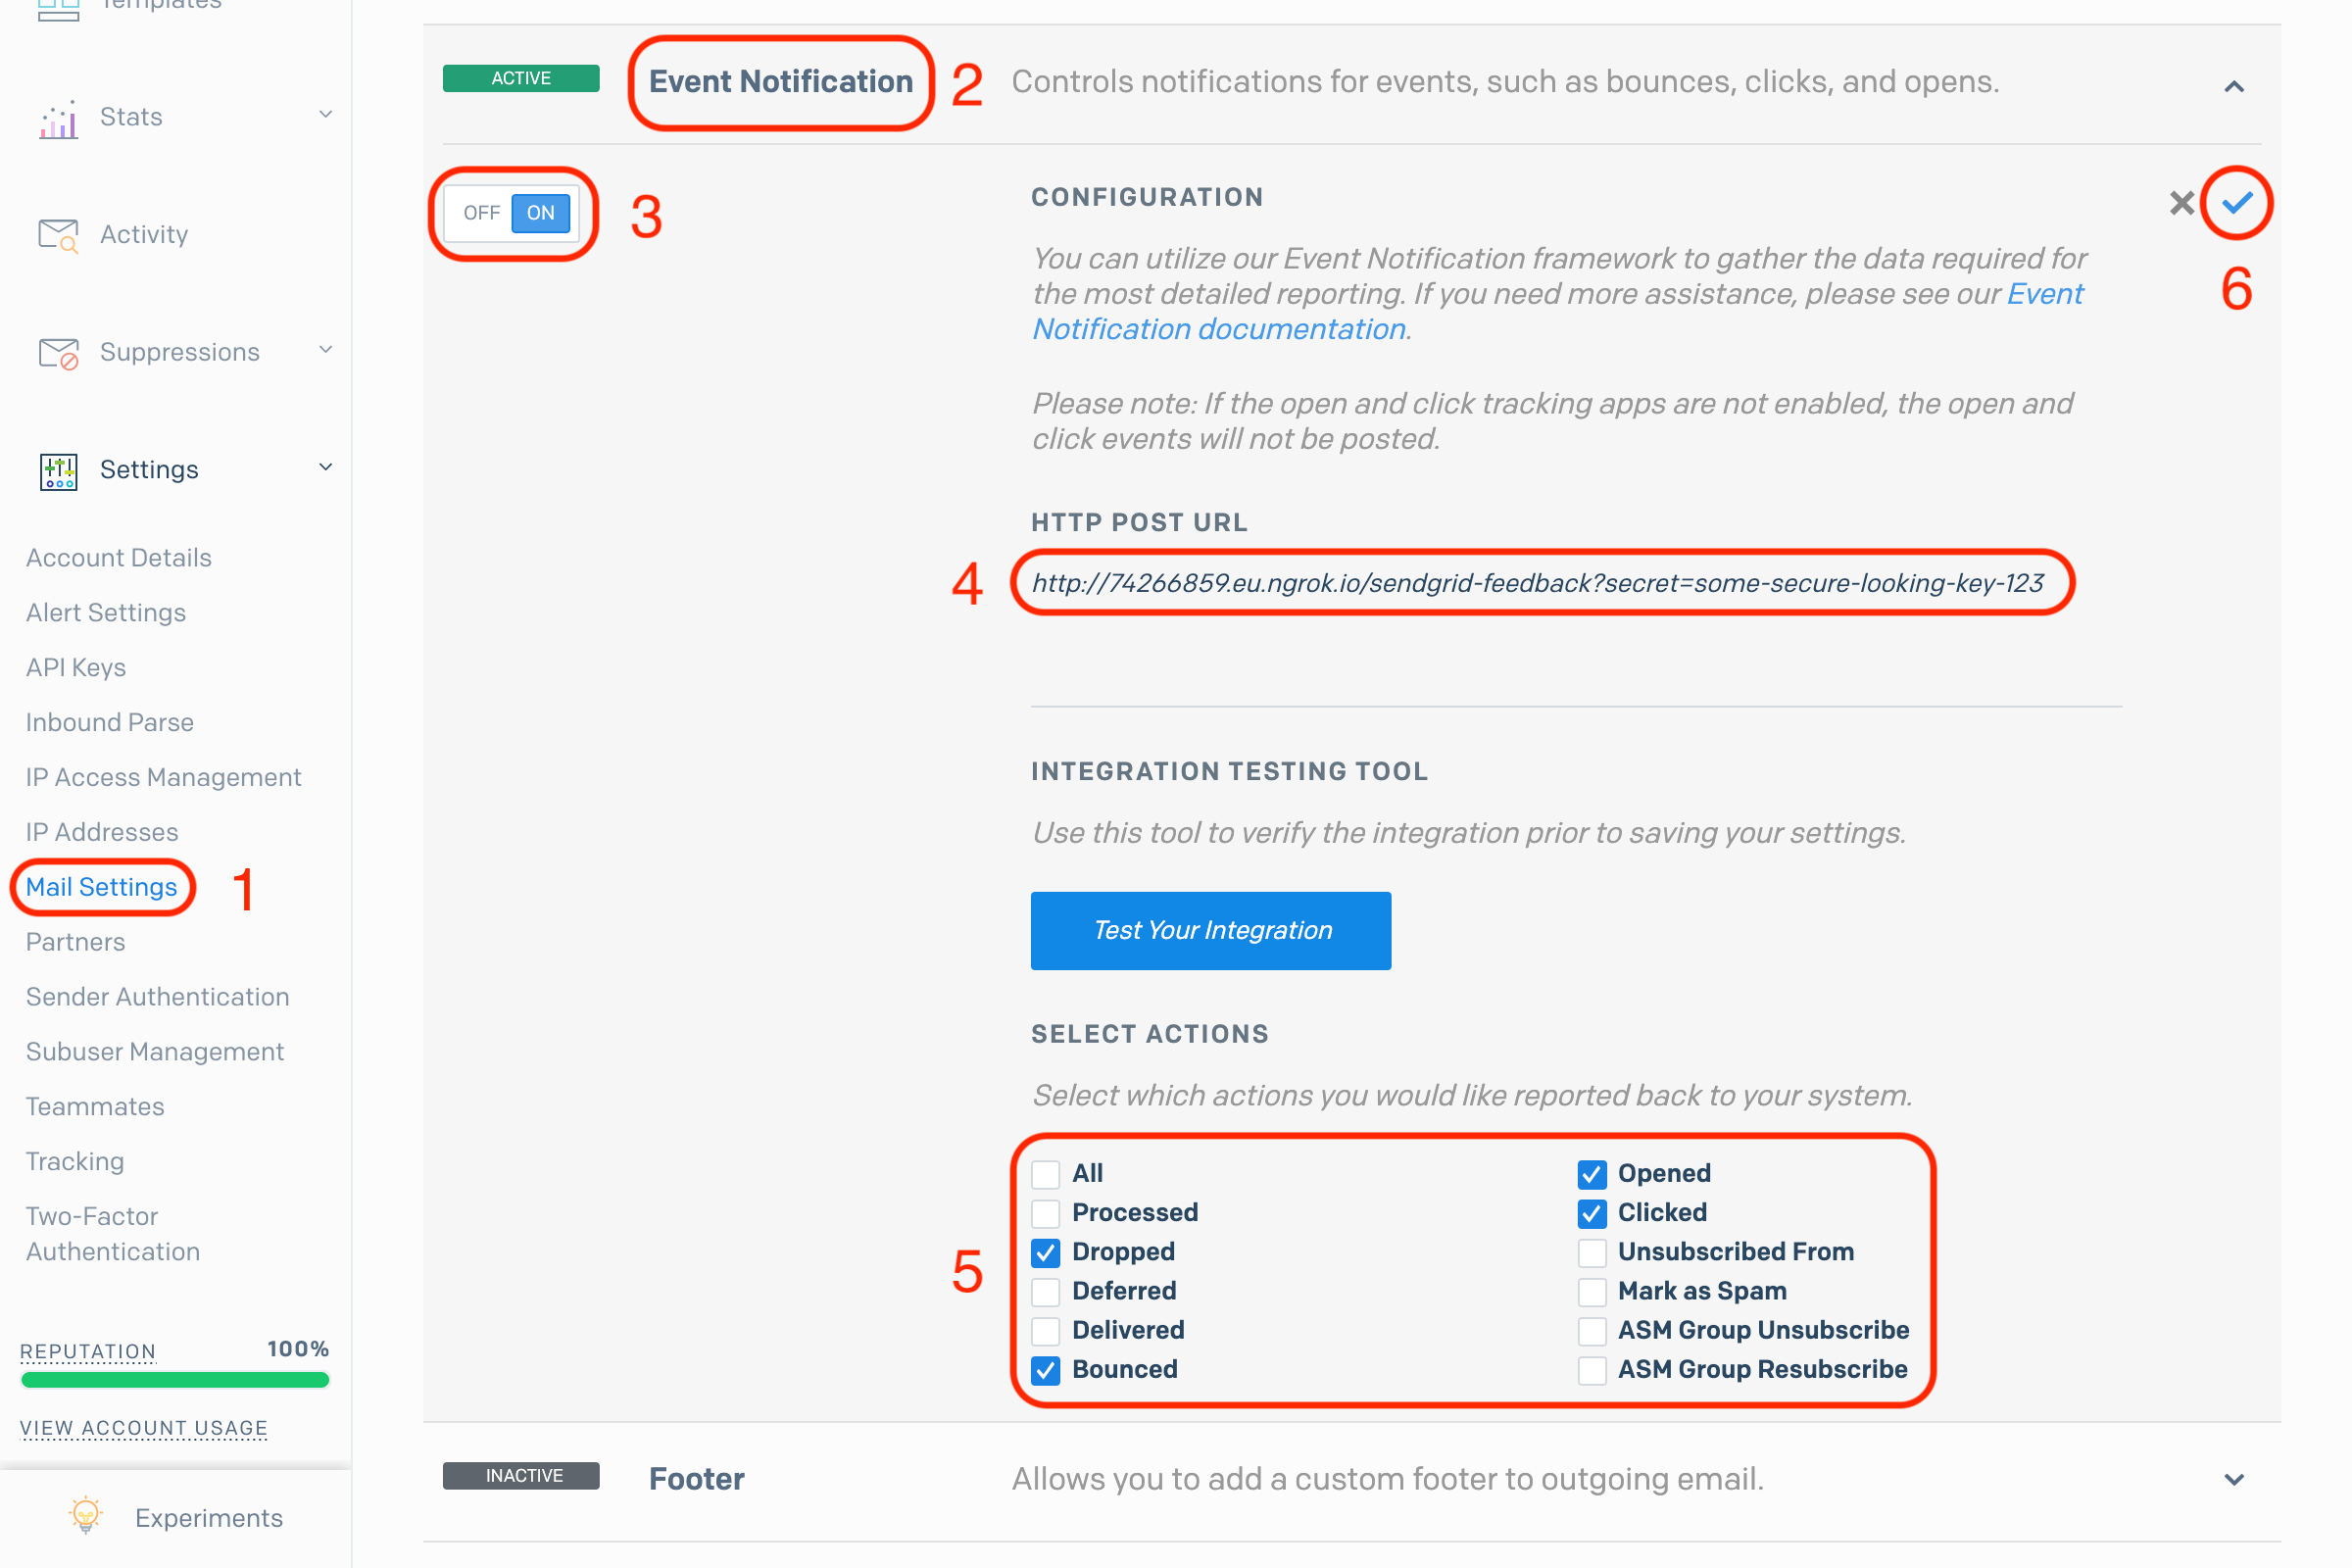
Go to your SendGrid dashboard, open the Settings menu and go to your Mail Settings. Open and enable the Event Notification setting. In the HTTP POST URL field, paste the webhook URL that you just copied, and replace YOUR-WEBHOOK-SIGNING-SECRET by the webhook signing secret that you chose in the last step.
At the bottom, enable these actions to be reported back to Mailcoach: Dropped, Bounced, Opened, and Clicked. Finally, press the blue checkmark in the top right corner to save your configuration:
Your SendGrid configuration should now be complete, and you can go ahead and try sending a test mail. It may go to your spam if you have not set up your domain settings.
Handling Sendgrid feedback in an existing Laravel app
You should only follow these instructions when you’ve installed Mailcoach in an existing app.
The spatie/laravel-mailcoach-sendgrid-feedback package can handle bounce feedback coming from Sendgrid. All e-mail address that permanently bounce will be unsubscribed from all lists.
You can install the add-on package via composer:
composer require spatie/laravel-mailcoach-sendgrid-feedback:^4.0
Adding the webhooks route
You must use this route macro in your route service provider. Do NOT apply the web group middleware to this route as that would cause an unnecessary session to be started for each webhook call.
You can replace sendgrid-feedback with any url you’d like.
Route::sendgridFeedback('sendgrid-feedback');
Configuring webhooks
At Sendgrid you must configure a new webhook.
At the webhooks settings screen at sendgrid you must add the Bounced, Opened, Clicked and Mark as Spam webhooks and point them to the route your configured. In the screenshot below we configured the webhooks using a ngrok.io domain with a ?secret=yolo-no-real-signature appended to the webhook url.
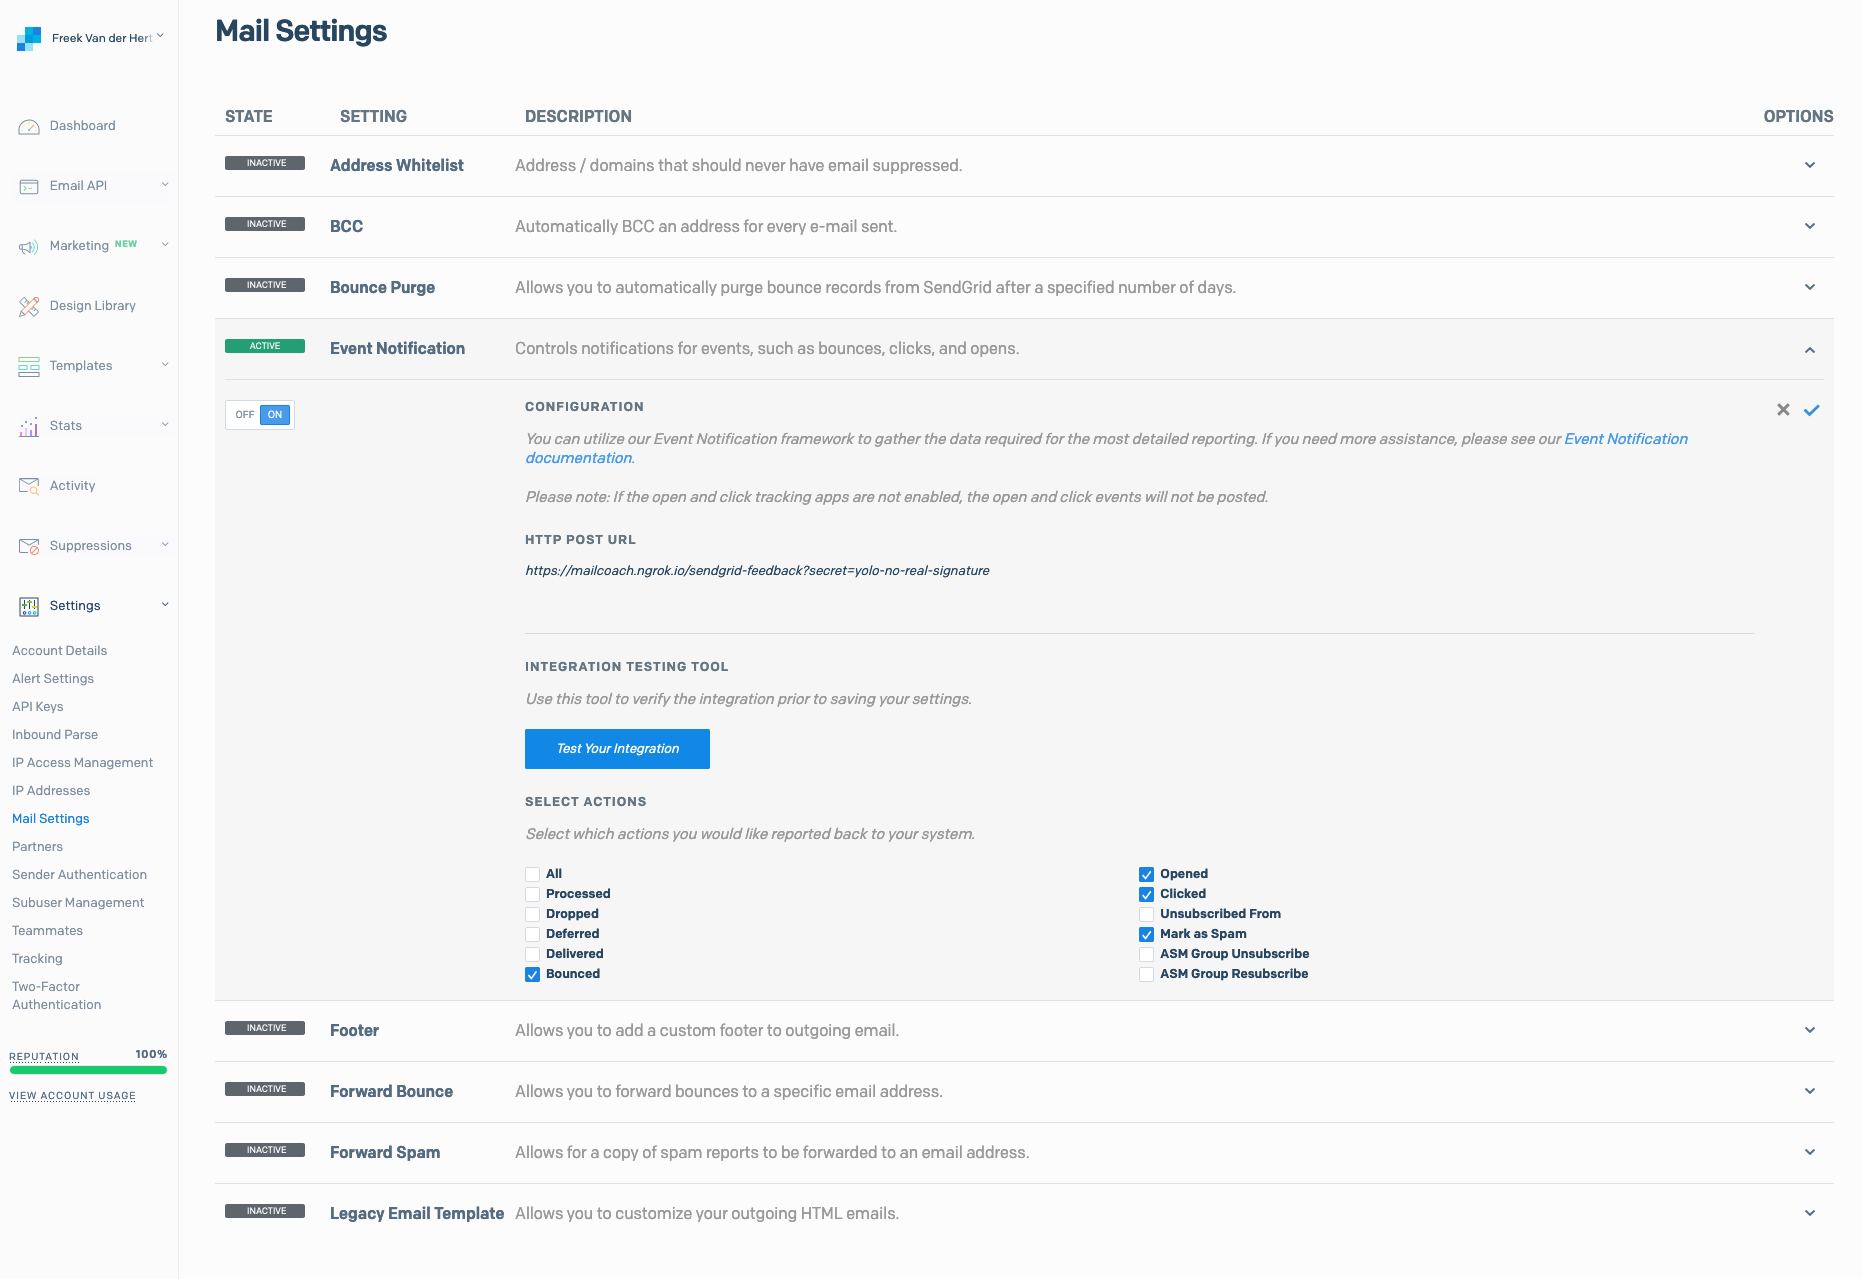
At the Tracking settings you must enable click and open tracking
![]()
In the mailcoach config file you must add this section.
// in config/mailcoach.php

    'sendgrid_feedback' => [
        'signing_secret' => env('SENDGRID_SIGNING_SECRET'),
   ],
In your .env you must add a key SENDGRID_SIGNING_SECRET with the Sendgrid signing secret you defined when setting up the webhook.
Using the correct mail driver
If you haven’t done so already, you must configure Laravel to use the Sendgrid driver. Follow the instruction in the mail section of the Laravel docs.
Informing Sendgrid
Before start sending campaigns via Sendgrid we highly recommend getting in touch with their support and let them now the amount of mails your email list contains. Usually they will adjust the sending limits of your account so it’s not a problem to send a large volumes in a short amount of time.