Postmark
On this page:
- Using Postmark in the Mailcoach standalone app
- Handling Postmark feedback in an existing Laravel app
Mailcoach supports sending mails via Postmark. This page contains instructions to set up Postmark in the standalone Mailcoach app and in a Laravel app with laravel-mailcoach.
Using Postmark in the Mailcoach standalone app
First off, make sure you have created an account with Postmark.
To get a 20% discount for the first three months on all subscriptions, you can use this coupon code: POSTMARKLOVESMAILCOACH20.
Configuring Postmark
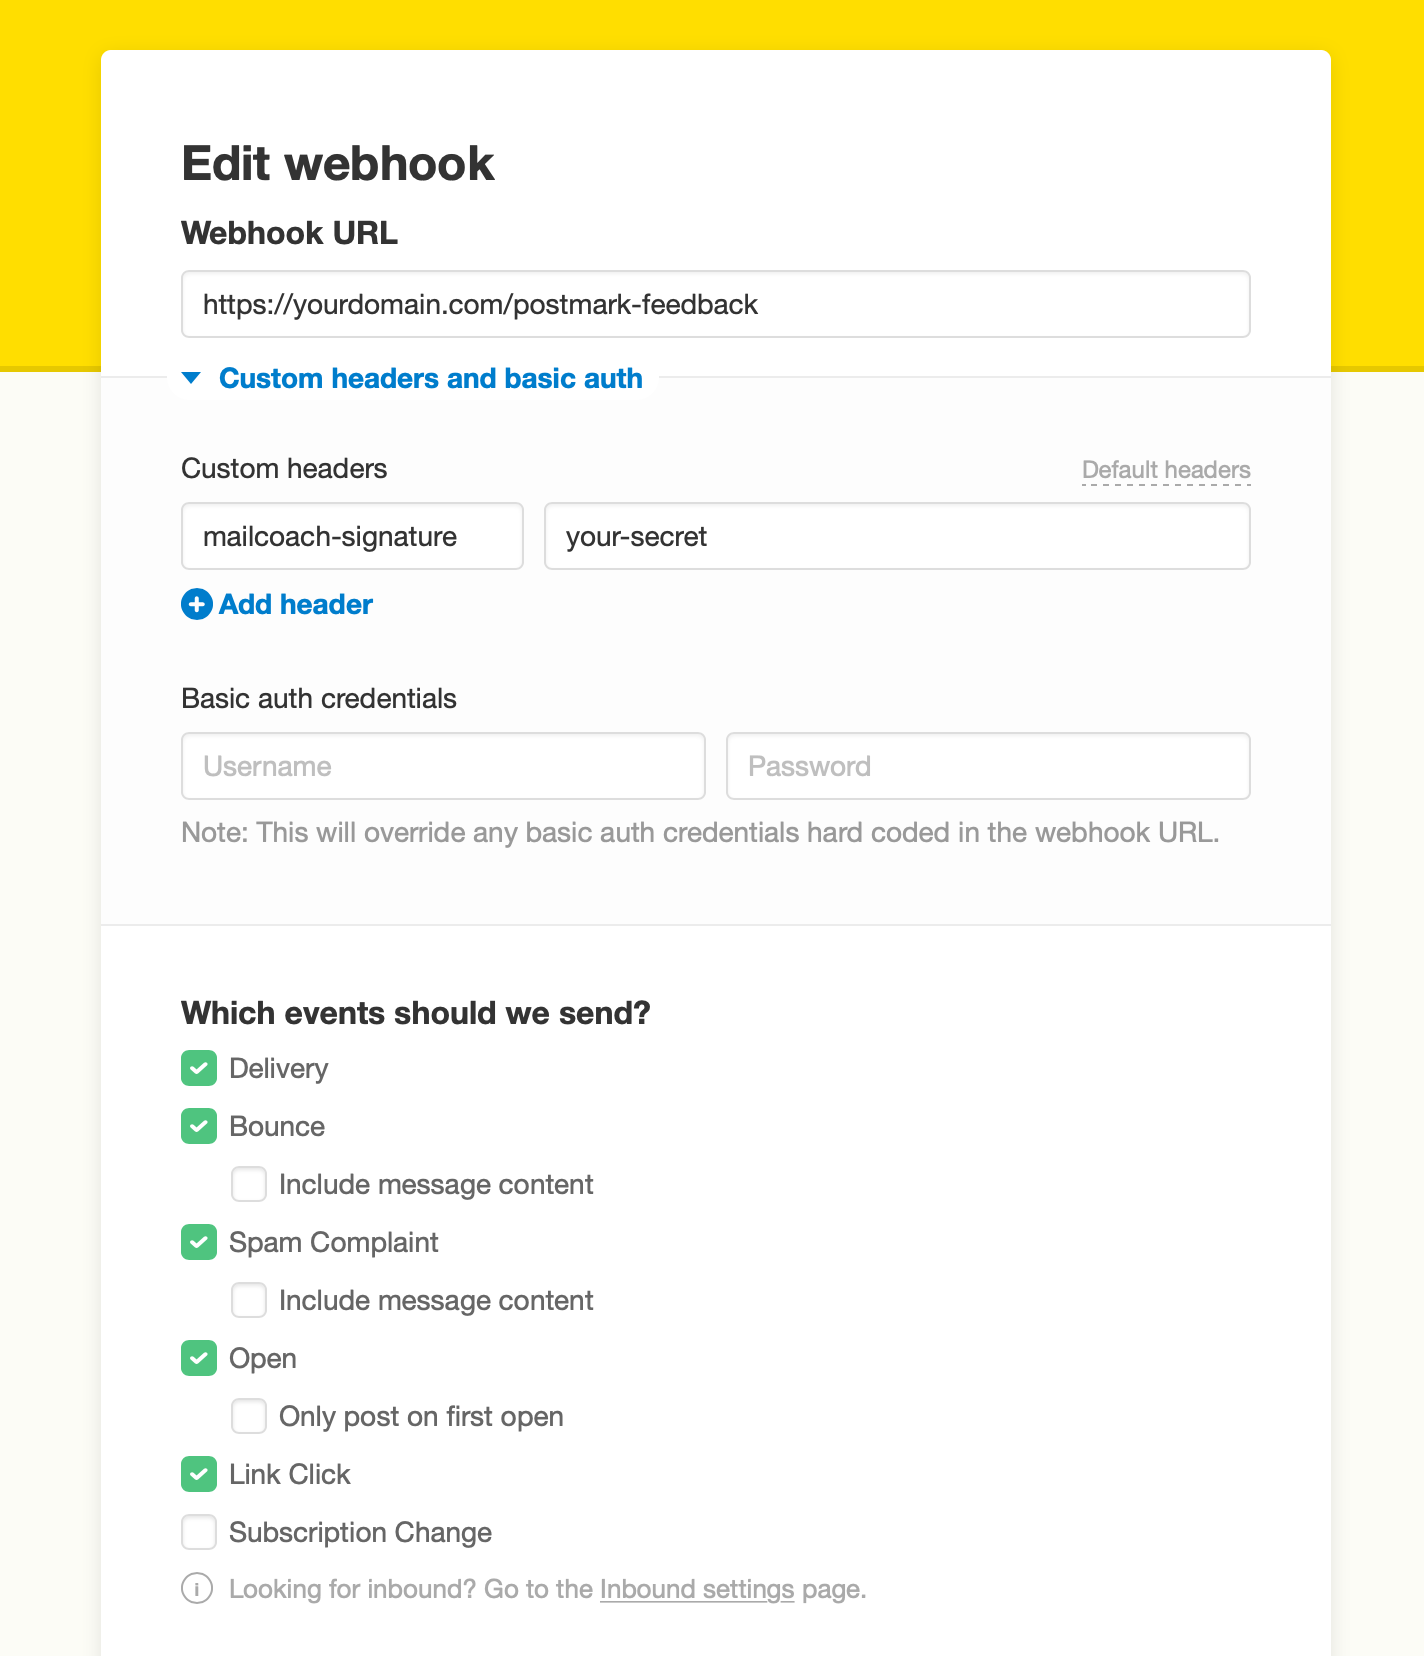
At Postmark you must configure a new webhook.
The webhook should be sent to https://<your-domain>/postmark-feedback
You should add a custom header named mailcoach-signature, and you can choose a value that you should keep secret. You must turn on the Open, Bounce, Spam Complaint and Link Click.

On the settings screen in Postmark, you should also enable open and link tracking.
![]()
Configuring Mailcoach
On the Mail configuration settings screen in Mailcoach, you’ll have to fill in these settings.
- Mails per second: to not overwhelm Postmark with mail requests, send this to a sensible value. In many cases
10will be sufficient - Server token: you can get the right value on the Postmark account details screen
- Signing secret: this should be set to the value you specified for the
mailcoach-signatureheader. - Message stream (optional): the Postmark Broadcast message stream
Handling Postmark feedback in an existing Laravel app
You should only follow these instructions when you’ve installed Mailcoach in an existing app.
The spatie/laravel-mailcoach-postmark-feedback package can handle bounce feedback coming from Postmark. All e-mail addresses that permanently bounce will be unsubscribed from all lists.
You can install the add-on package via composer:
composer require spatie/laravel-mailcoach-postmark-feedback:^3.0
Adding the webhooks route
You must use this route macro in your route service provider. Do NOT apply the web group middleware to this route as that would cause an unnecessary session to be started for each webhook call.
You can replace postmark-feedback with any url you’d like.
Route::postmarkFeedback('postmark-feedback');
Configuring webhooks
At Postmark you must configure a new webhook.
At the webhooks settings screen on Postmark, you must specify the webhook URL. That url should start with the domain you installed mailcoach on, followed by /postmark-feedback.
You should add a custom header named mailcoach-signature, and you can choose a value that you should keep secret.
you must add the Open, Bounce, Spam Complaint and Link Click webhooks and point them to the route you configured.

On the settings screen in Postmark, you should also enable open and link tracking
![]()
In the mailcoach config file you must add this section.
// in config/mailcoach.php

    'postmark_feedback' => [
        'signing_secret' => env('POSTMARK_SIGNING_SECRET'),
   ],
In your .env you must add a key POSTMARK_SIGNING_SECRET the value should be set to the value you specified in the mailcoach-signature on the Postmark webhook settings screen:
POSTMARK_SIGNING_SECRET==
Setting the message stream in your Laravel app
This package automatically adds the correct X-PM-Message-Stream header for Postmark Broadcast support. Make sure the name of your configuration set is available under the mailcoach.postmark_feedback.message_stream configuration key.
Here’s an example for a configuration set that is named newsletters:
// in config/mailcoach.php

'postmark_feedback' => [
    'message_stream' => 'newsletters',
]
Using the correct mail driver
If you haven’t done so already, you must configure Laravel to use the Postmark driver. Follow the instruction in the mail section of the Laravel docs.