Amazon SES
On this page:
- Using Amazon SES in the Mailcoach standalone app
- Handling Amazon SES feedback in an existing Laravel app
Mailcoach supports sending mails via Amazon SES. This page contains instructions to set up Amazon SES in the standalone Mailcoach app and in a Laravel app with laravel-mailcoach.
Using Amazon SES in the Mailcoach standalone app
To send mails with Amazon SES, you need to do some configuration in the AWS dashboard first. To get started, open your AWS dashboard, select your preferred region and go to Simple Email Service under Services.
Firstly, you need to verify your domain and the email address mails will come from (your From email in Mailcoach lists). Both of these are out of the scope of this tutorial, so we refer you to SES’ documentation. You can send campaigns from SES without verifying your domain, however, this might cause your mails to be flagged as spam by mail clients, and you will not be able to track any statistics from your campaigns.
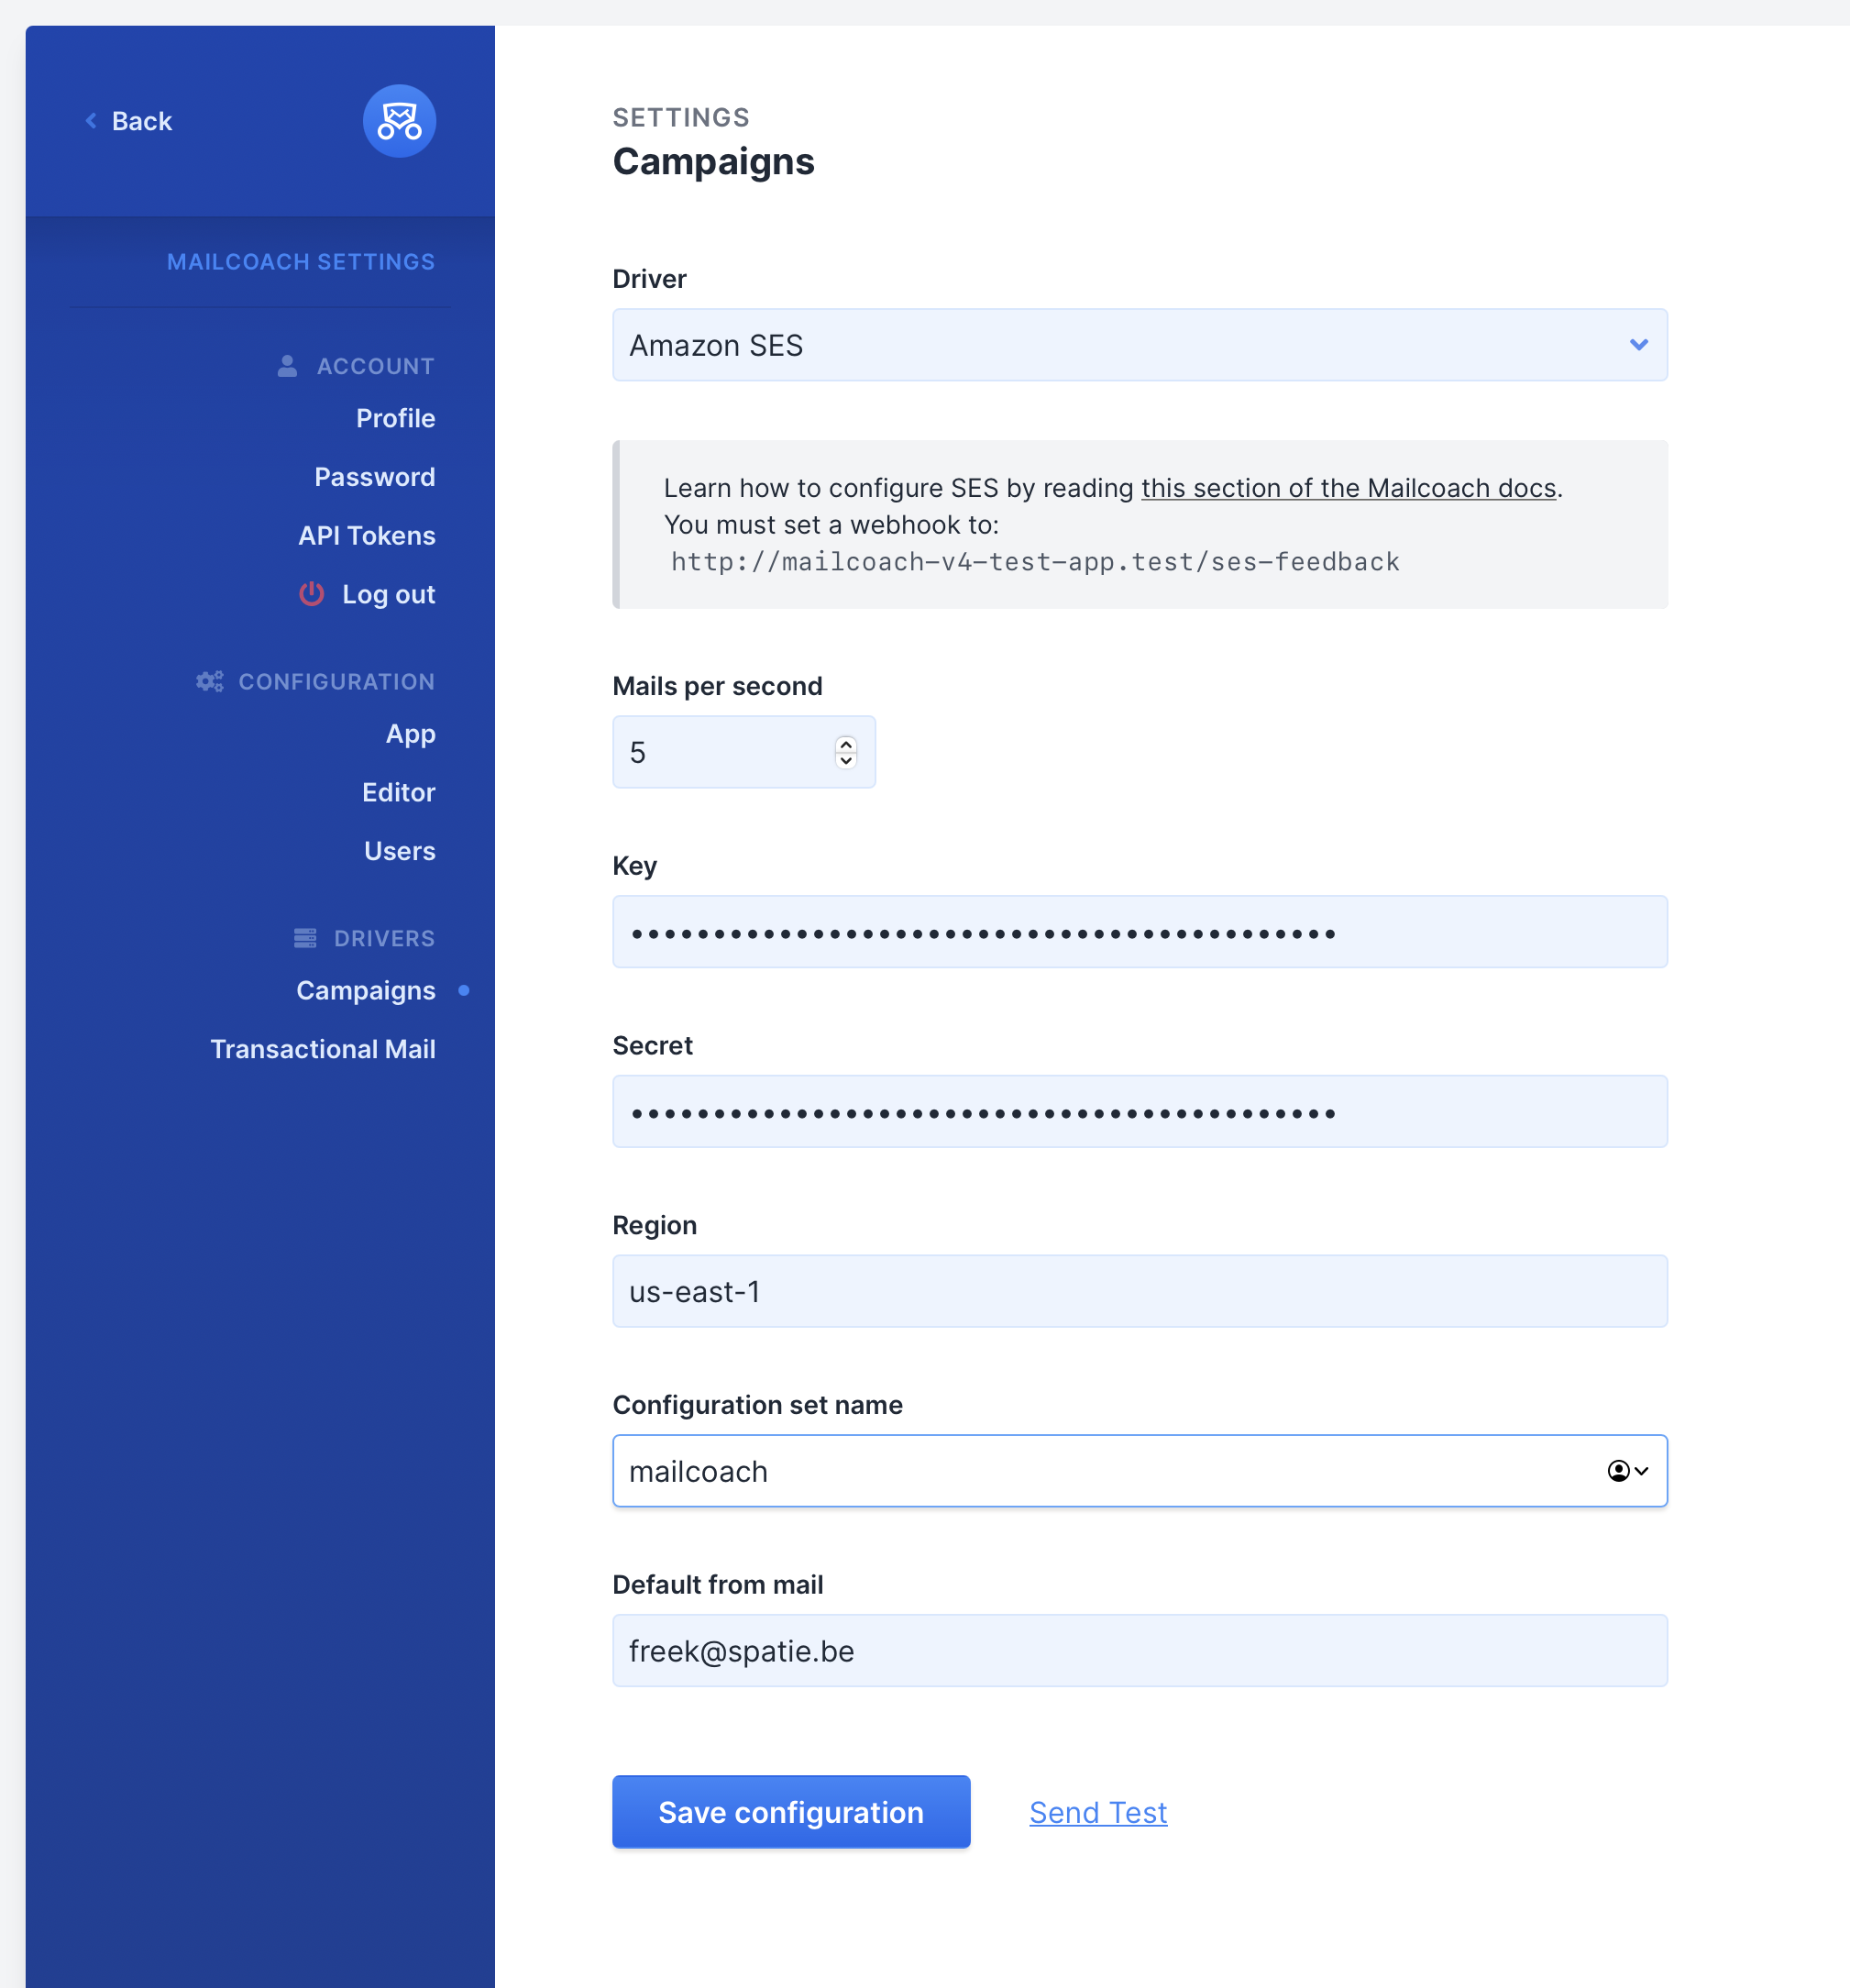
The value for the mails per second field depends on your AWS account and settings. A good starting point is 5 mails per second.
Key and Secret (sending emails)
Your SES key and secret, or Access Key ID and Secret Access Key as they are called in AWS, are the credentials Mailcoach needs to be able to send emails using SES. To know more about these keys, read about them in the AWS documentation.
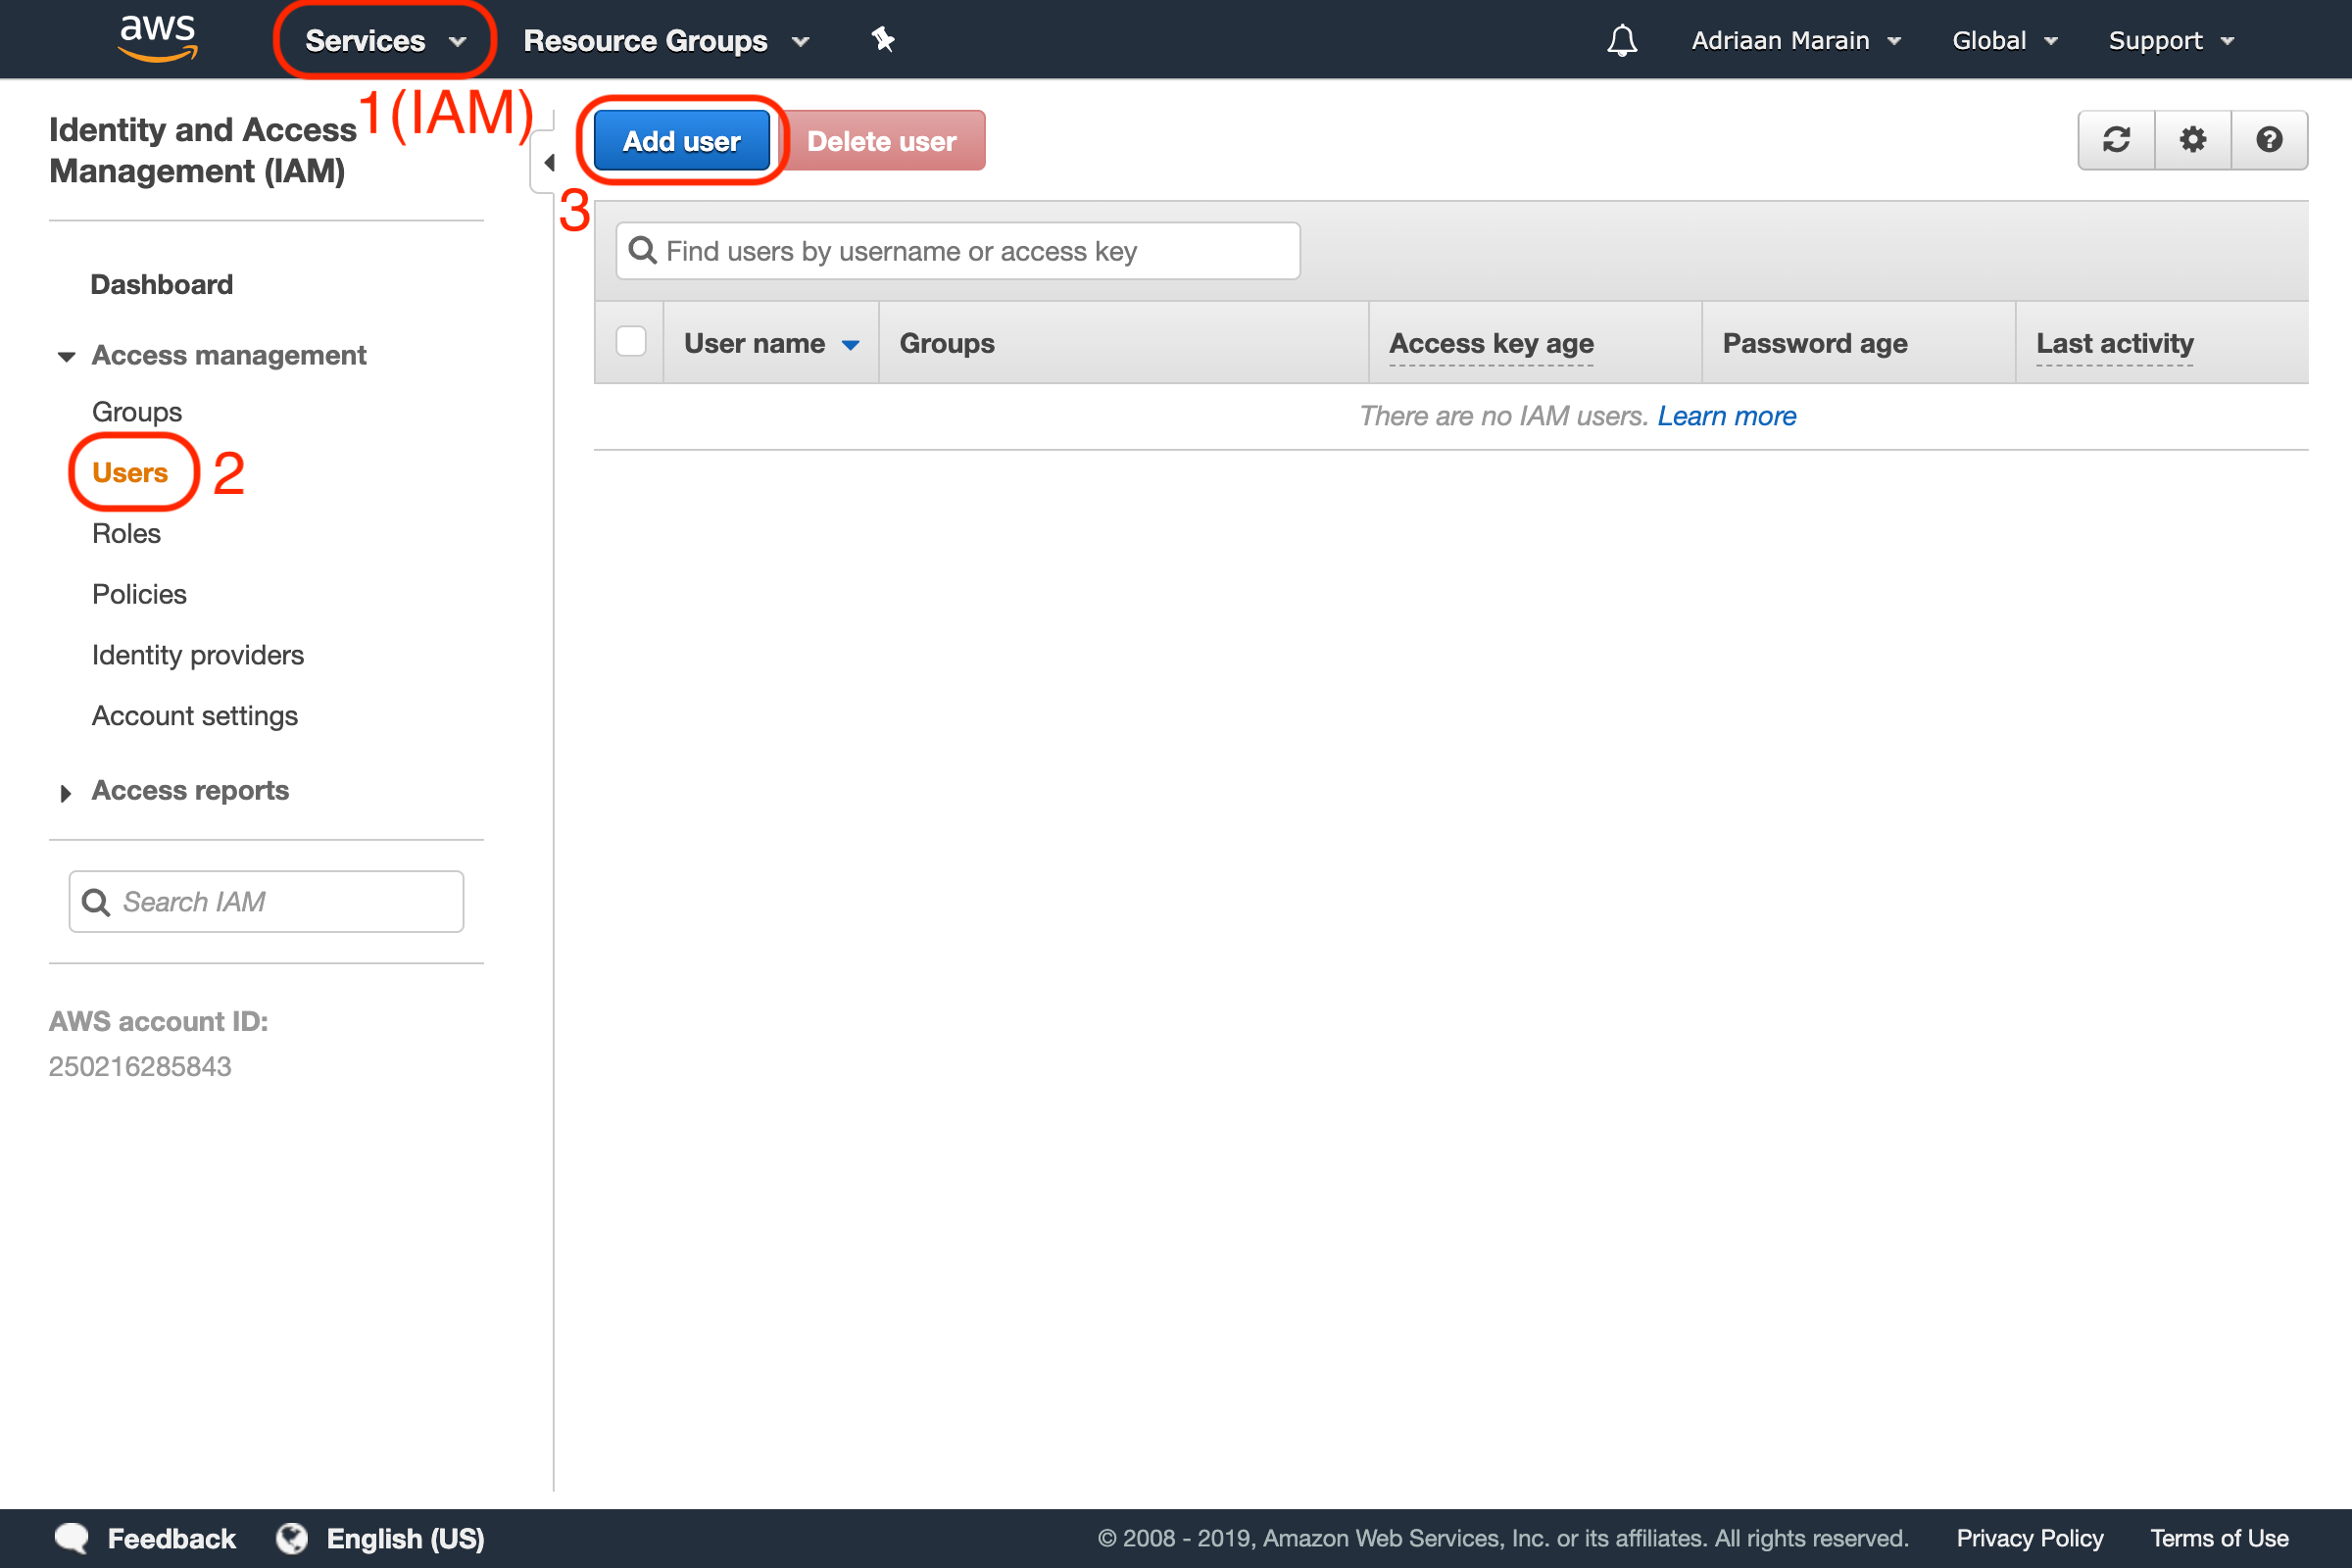
To get your key and secret, you need to create a new user. Go to the IAM service in AWS, and then to Users under Access management and press the Add user button:
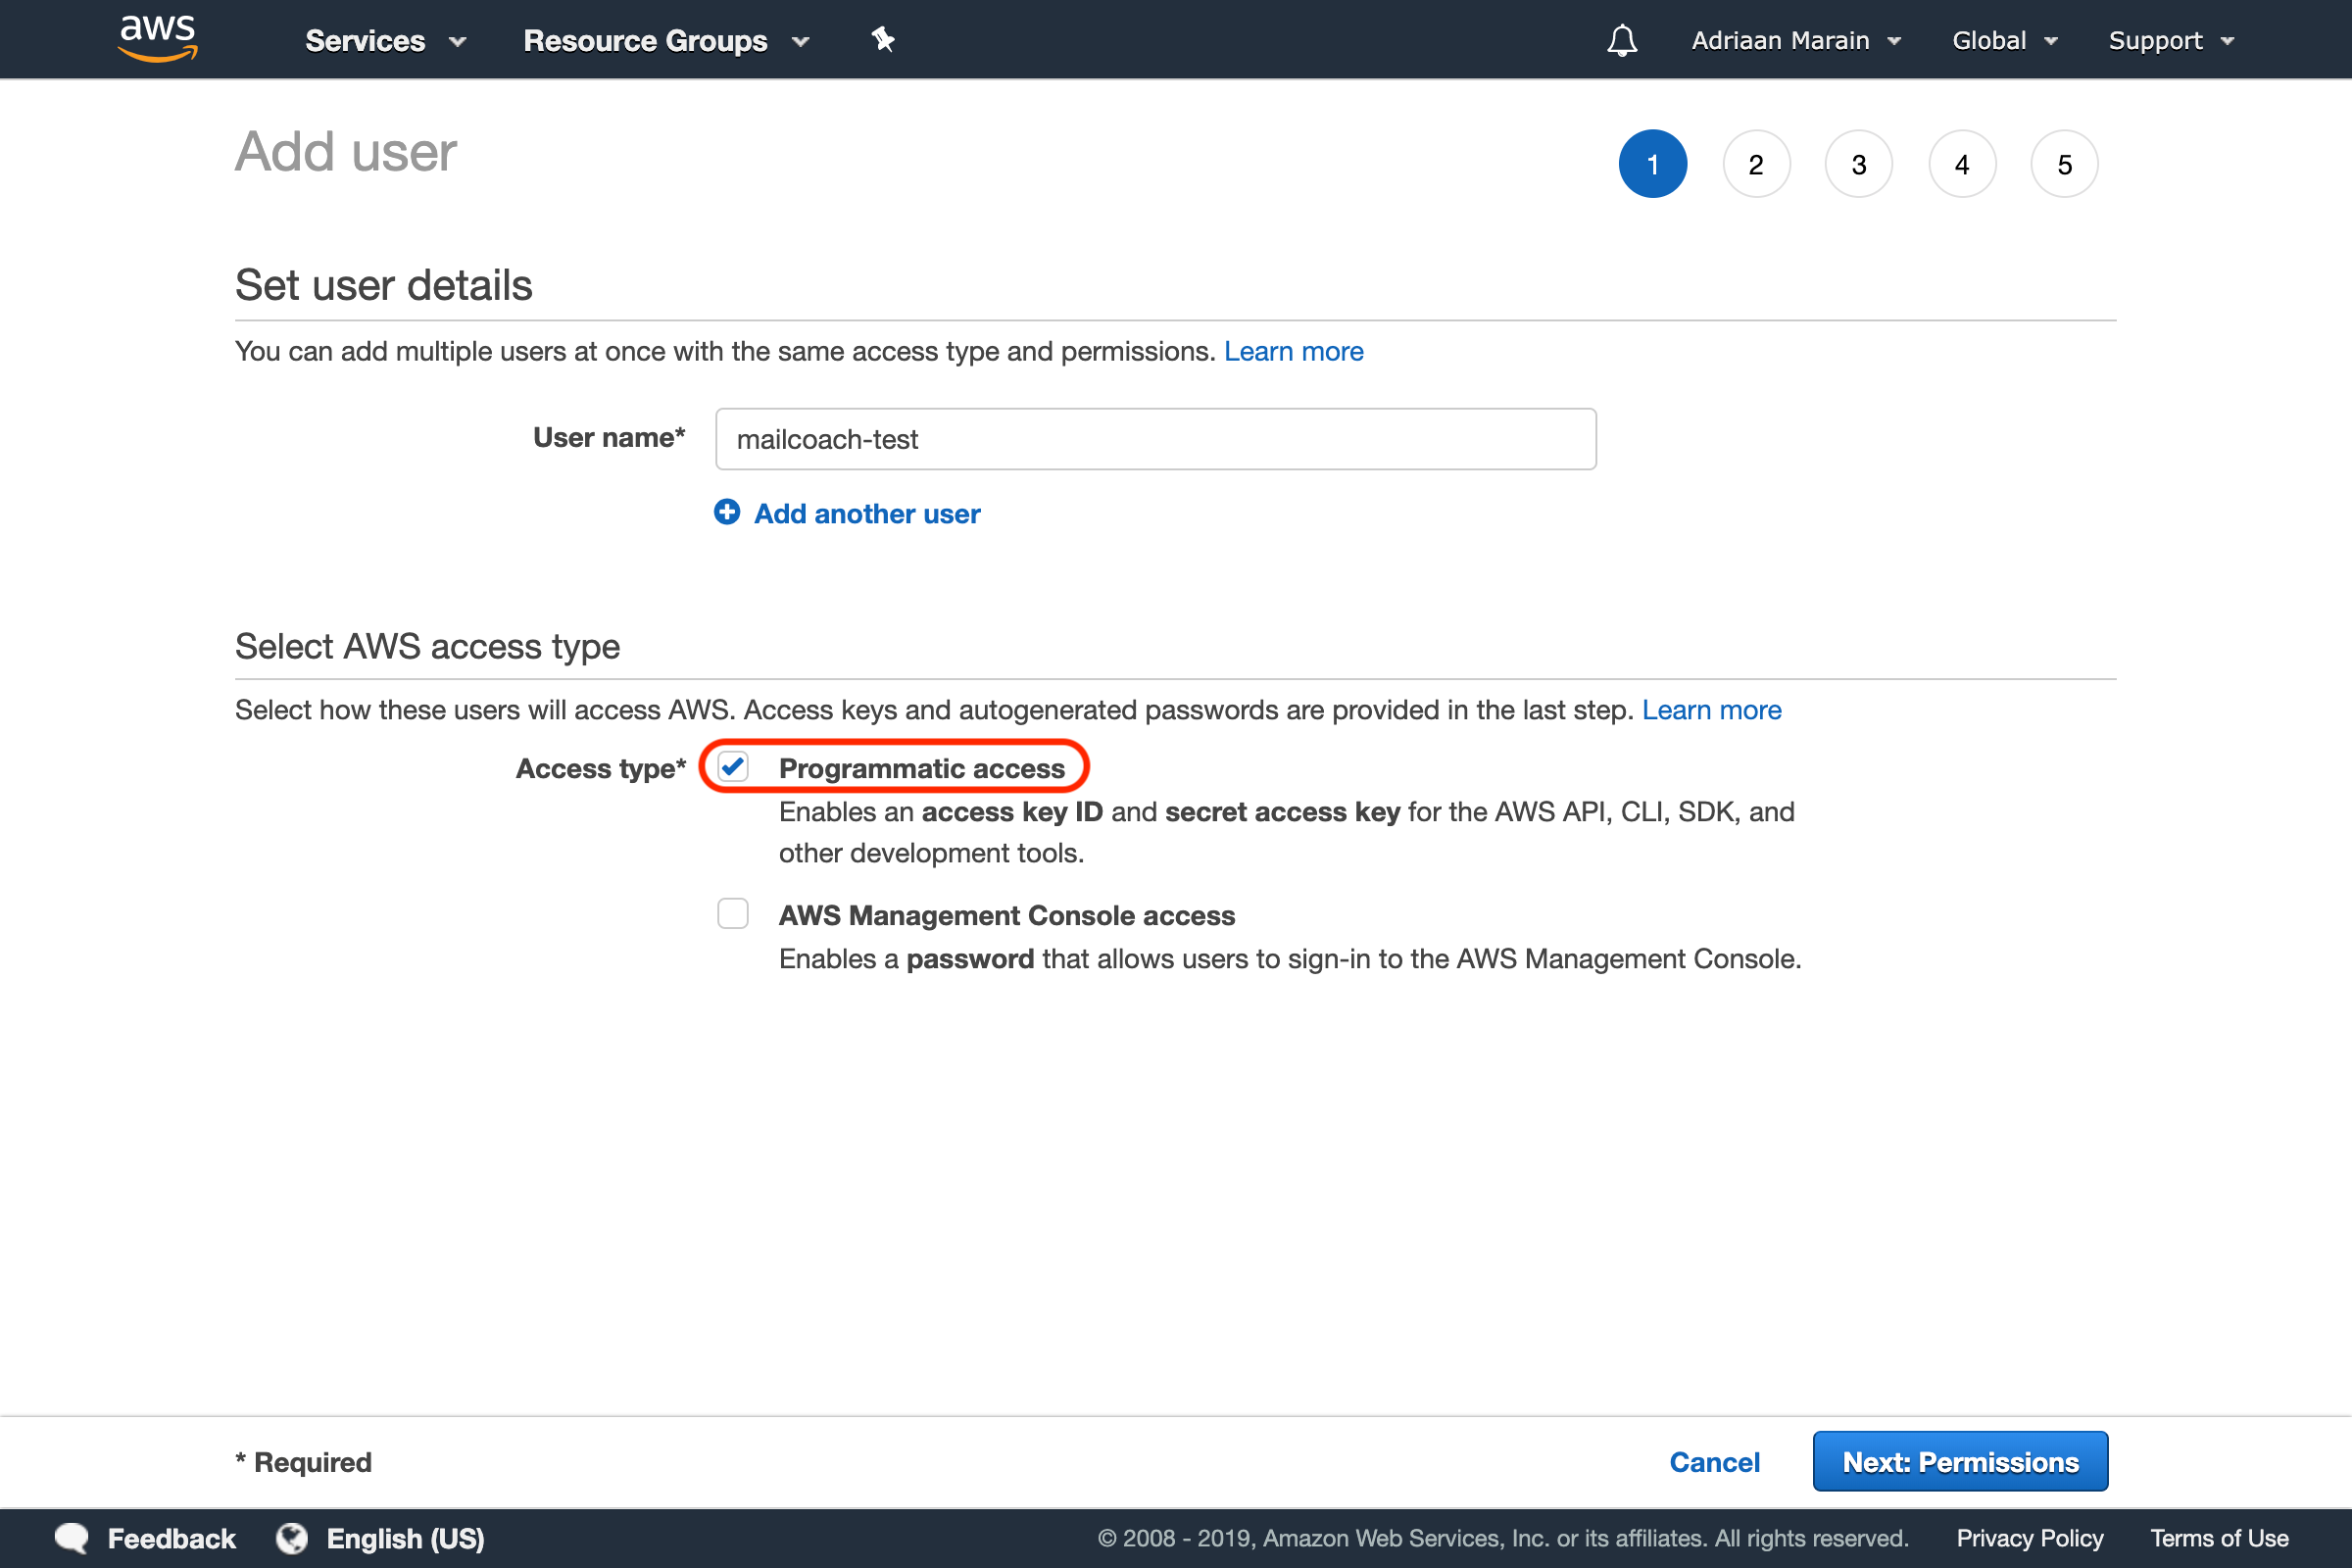
Choose a name for your new user, and make sure to enable Programmatic access. This allows it to send requests to the AWS API, and is required to be able to send mails from a third party platform (like Mailcoach):
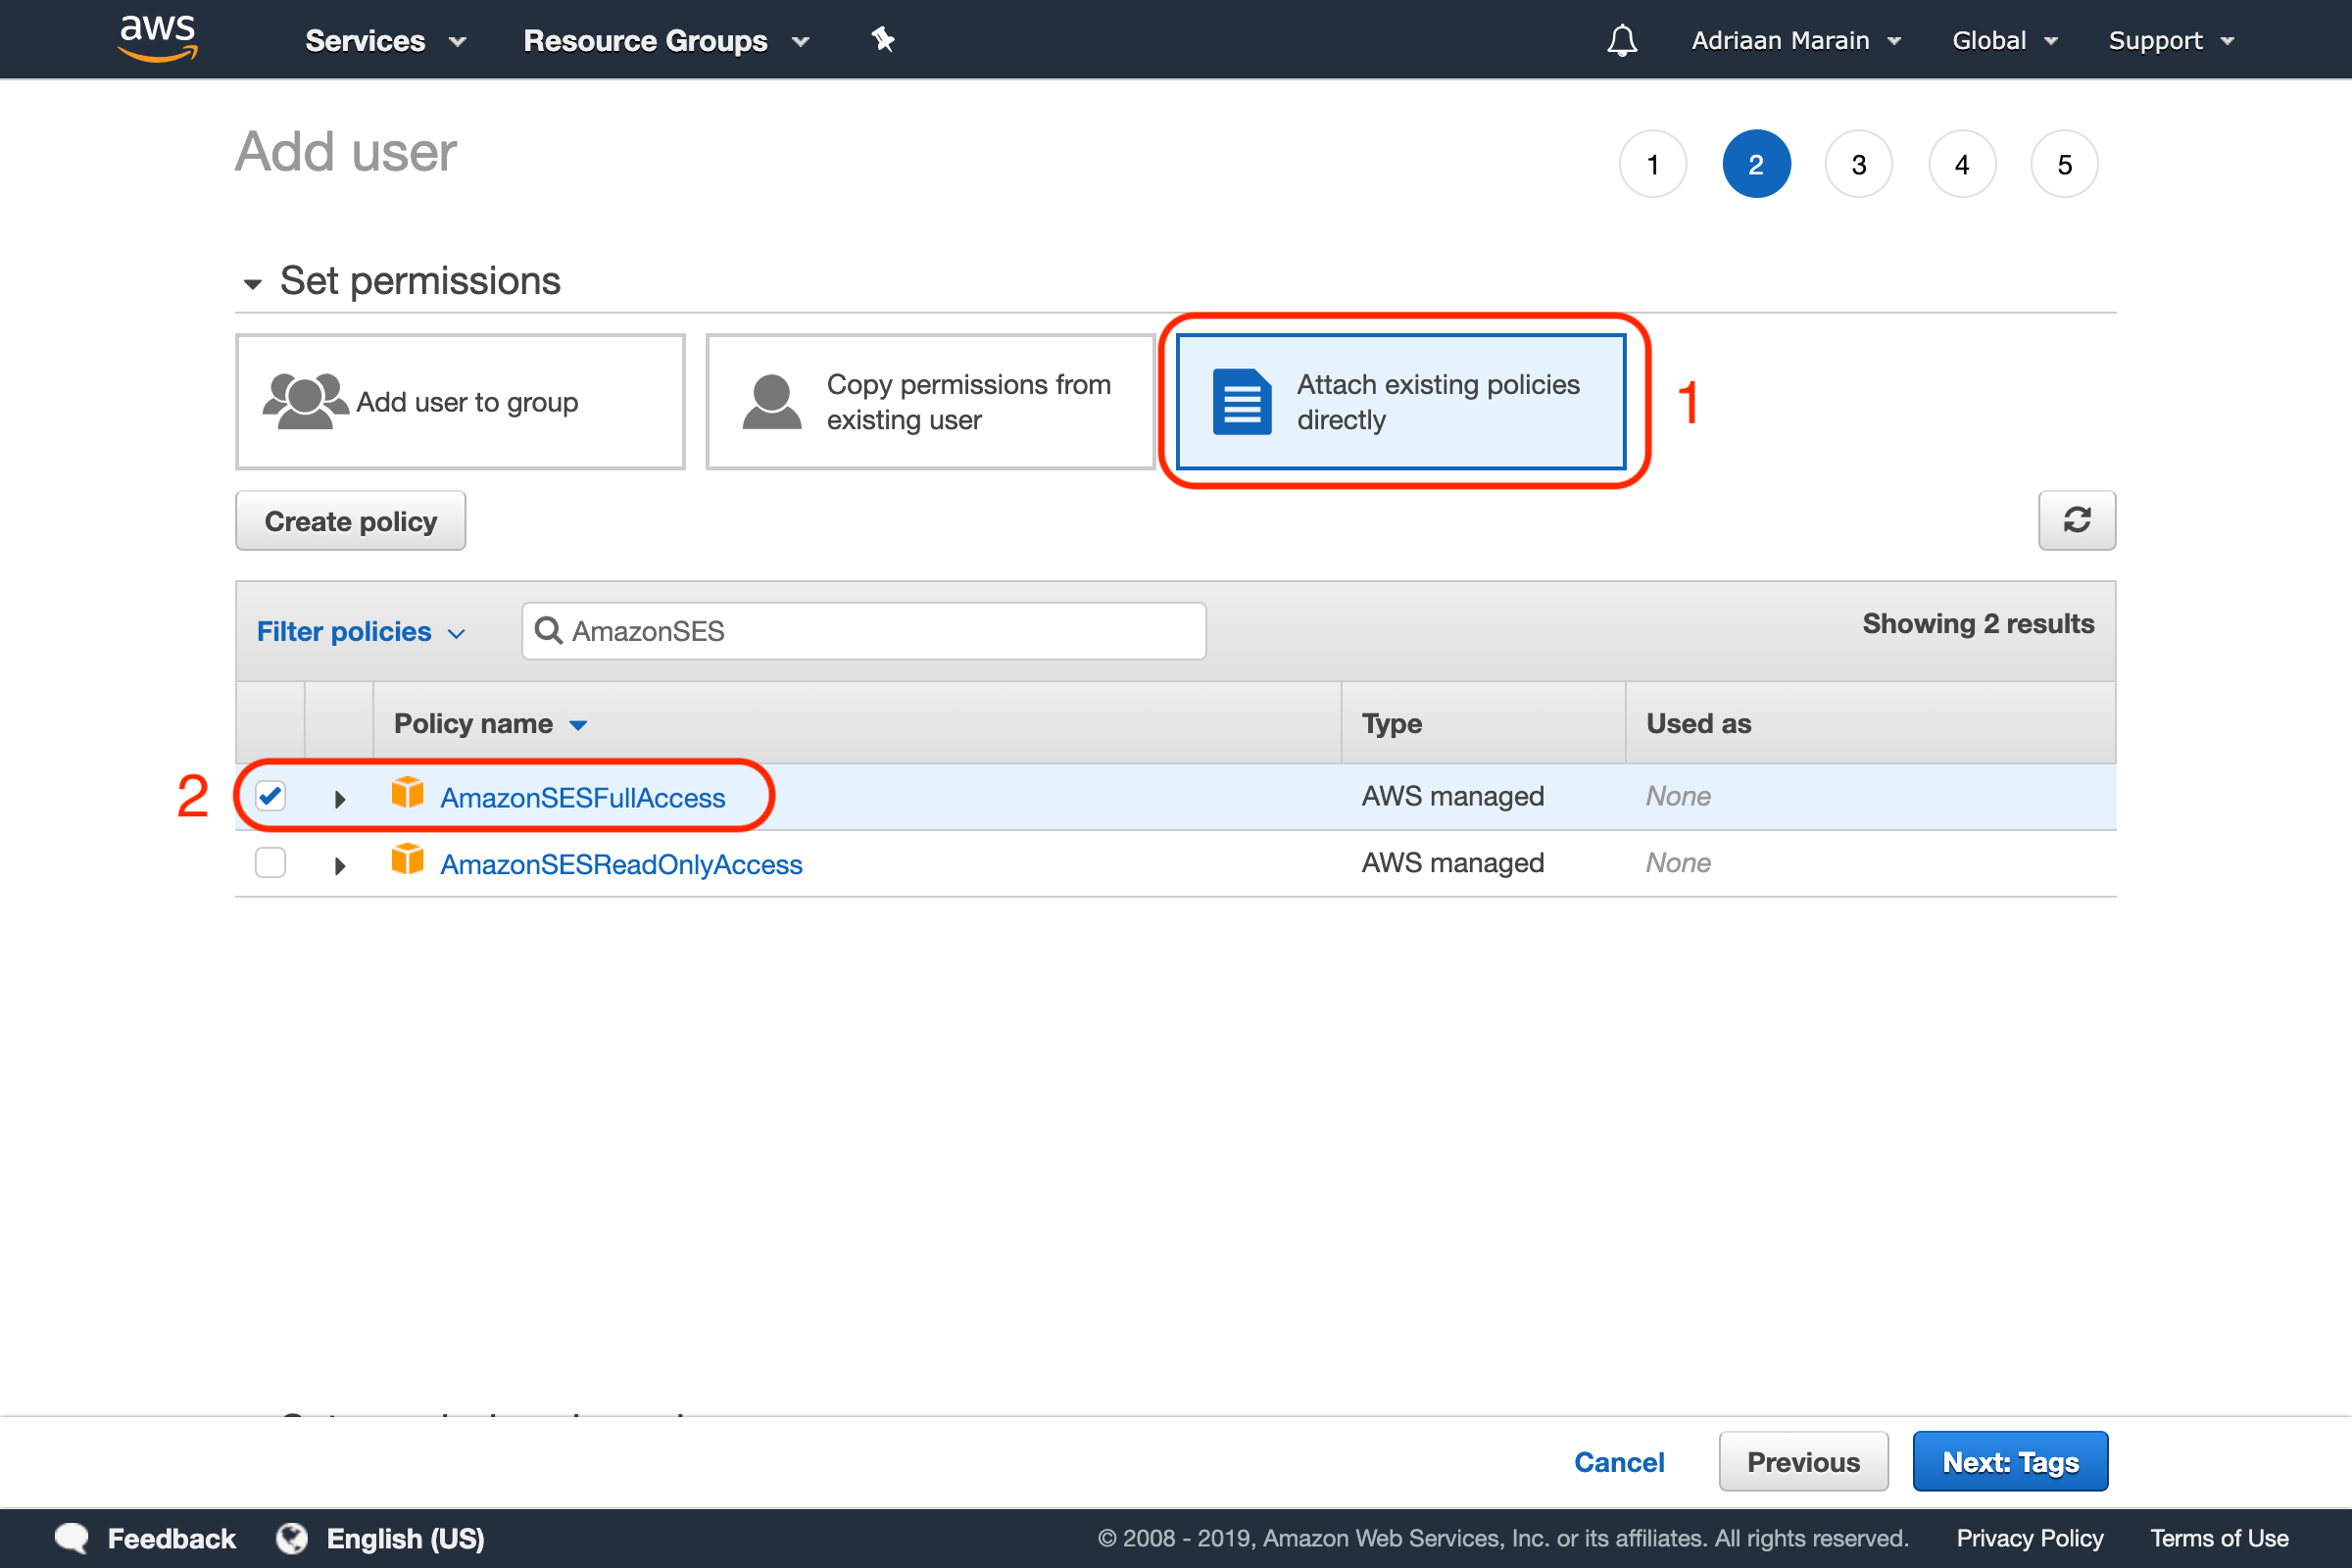
Go to the next page, and set the permissions for the user. Since we won’t be creating multiple users in this tutorial, we will simply use the Attach existing policies directly option to add the AmazonSESFullAccess permission to this user:
Go over to the next page. We are skipping tags for now and continuing to the Review page. Make sure the details are correct and verify creating the user.
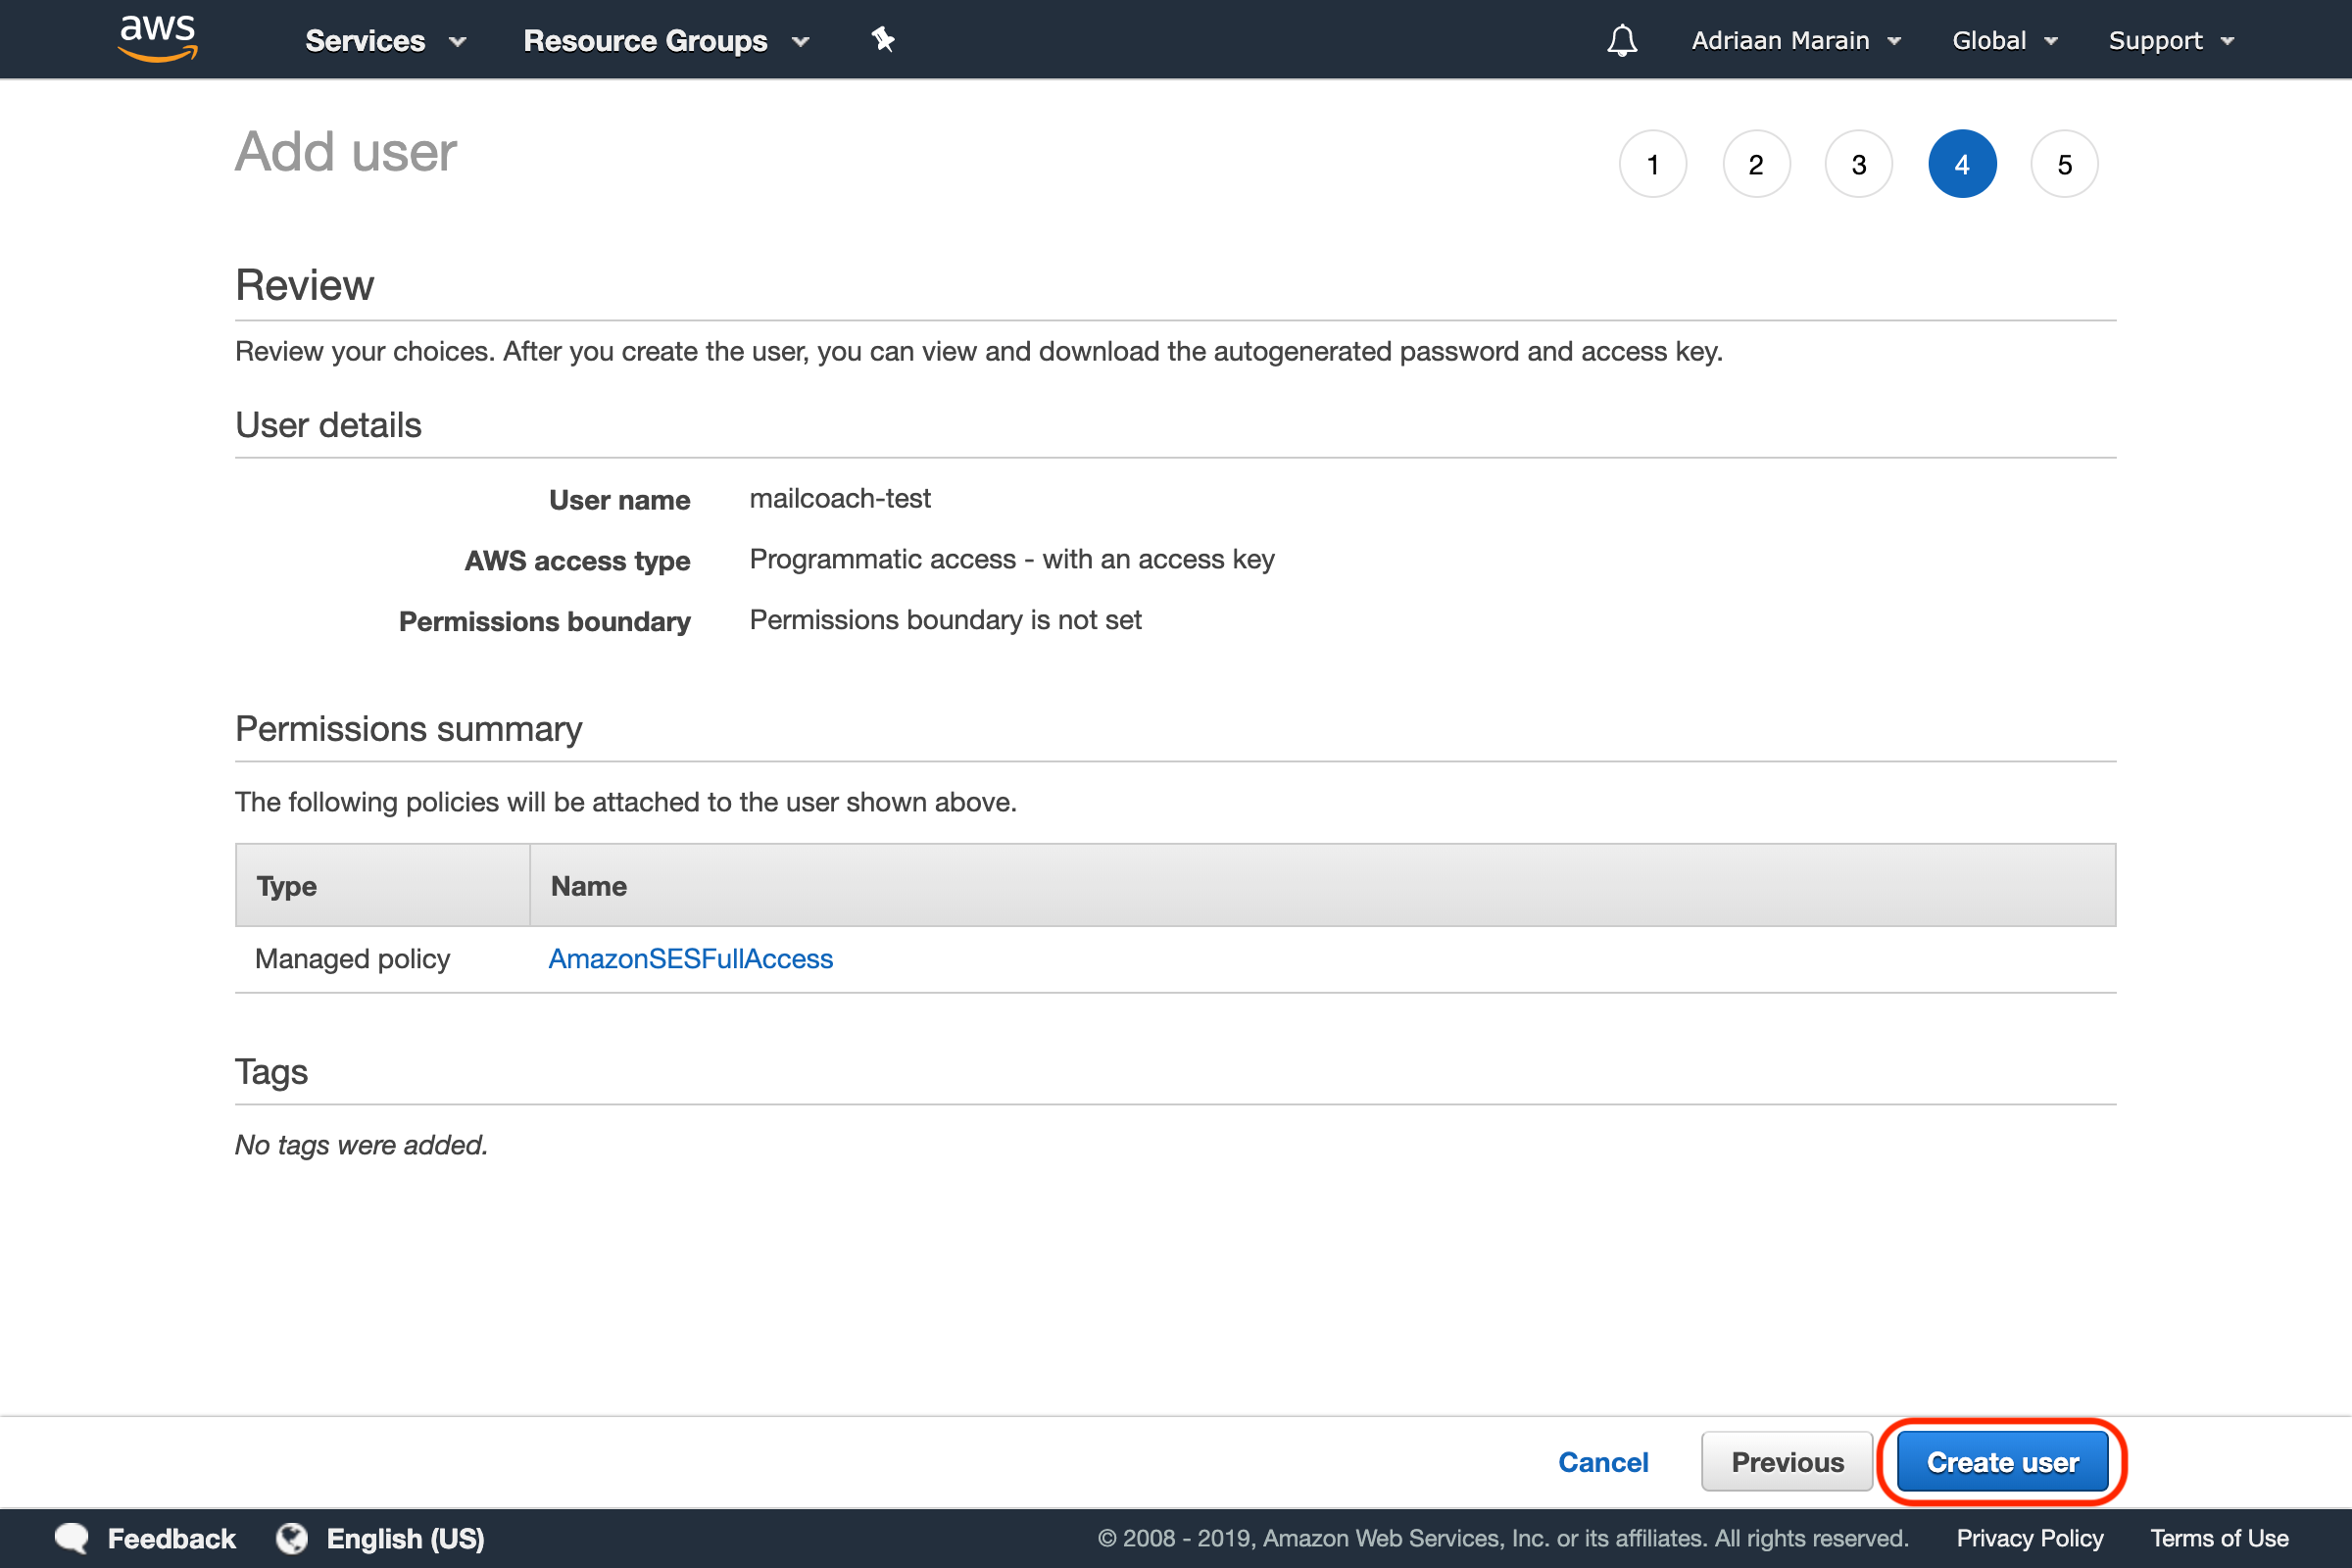
If everything went OK, you should now be able to see your user’s Access Key ID and Secret access key:
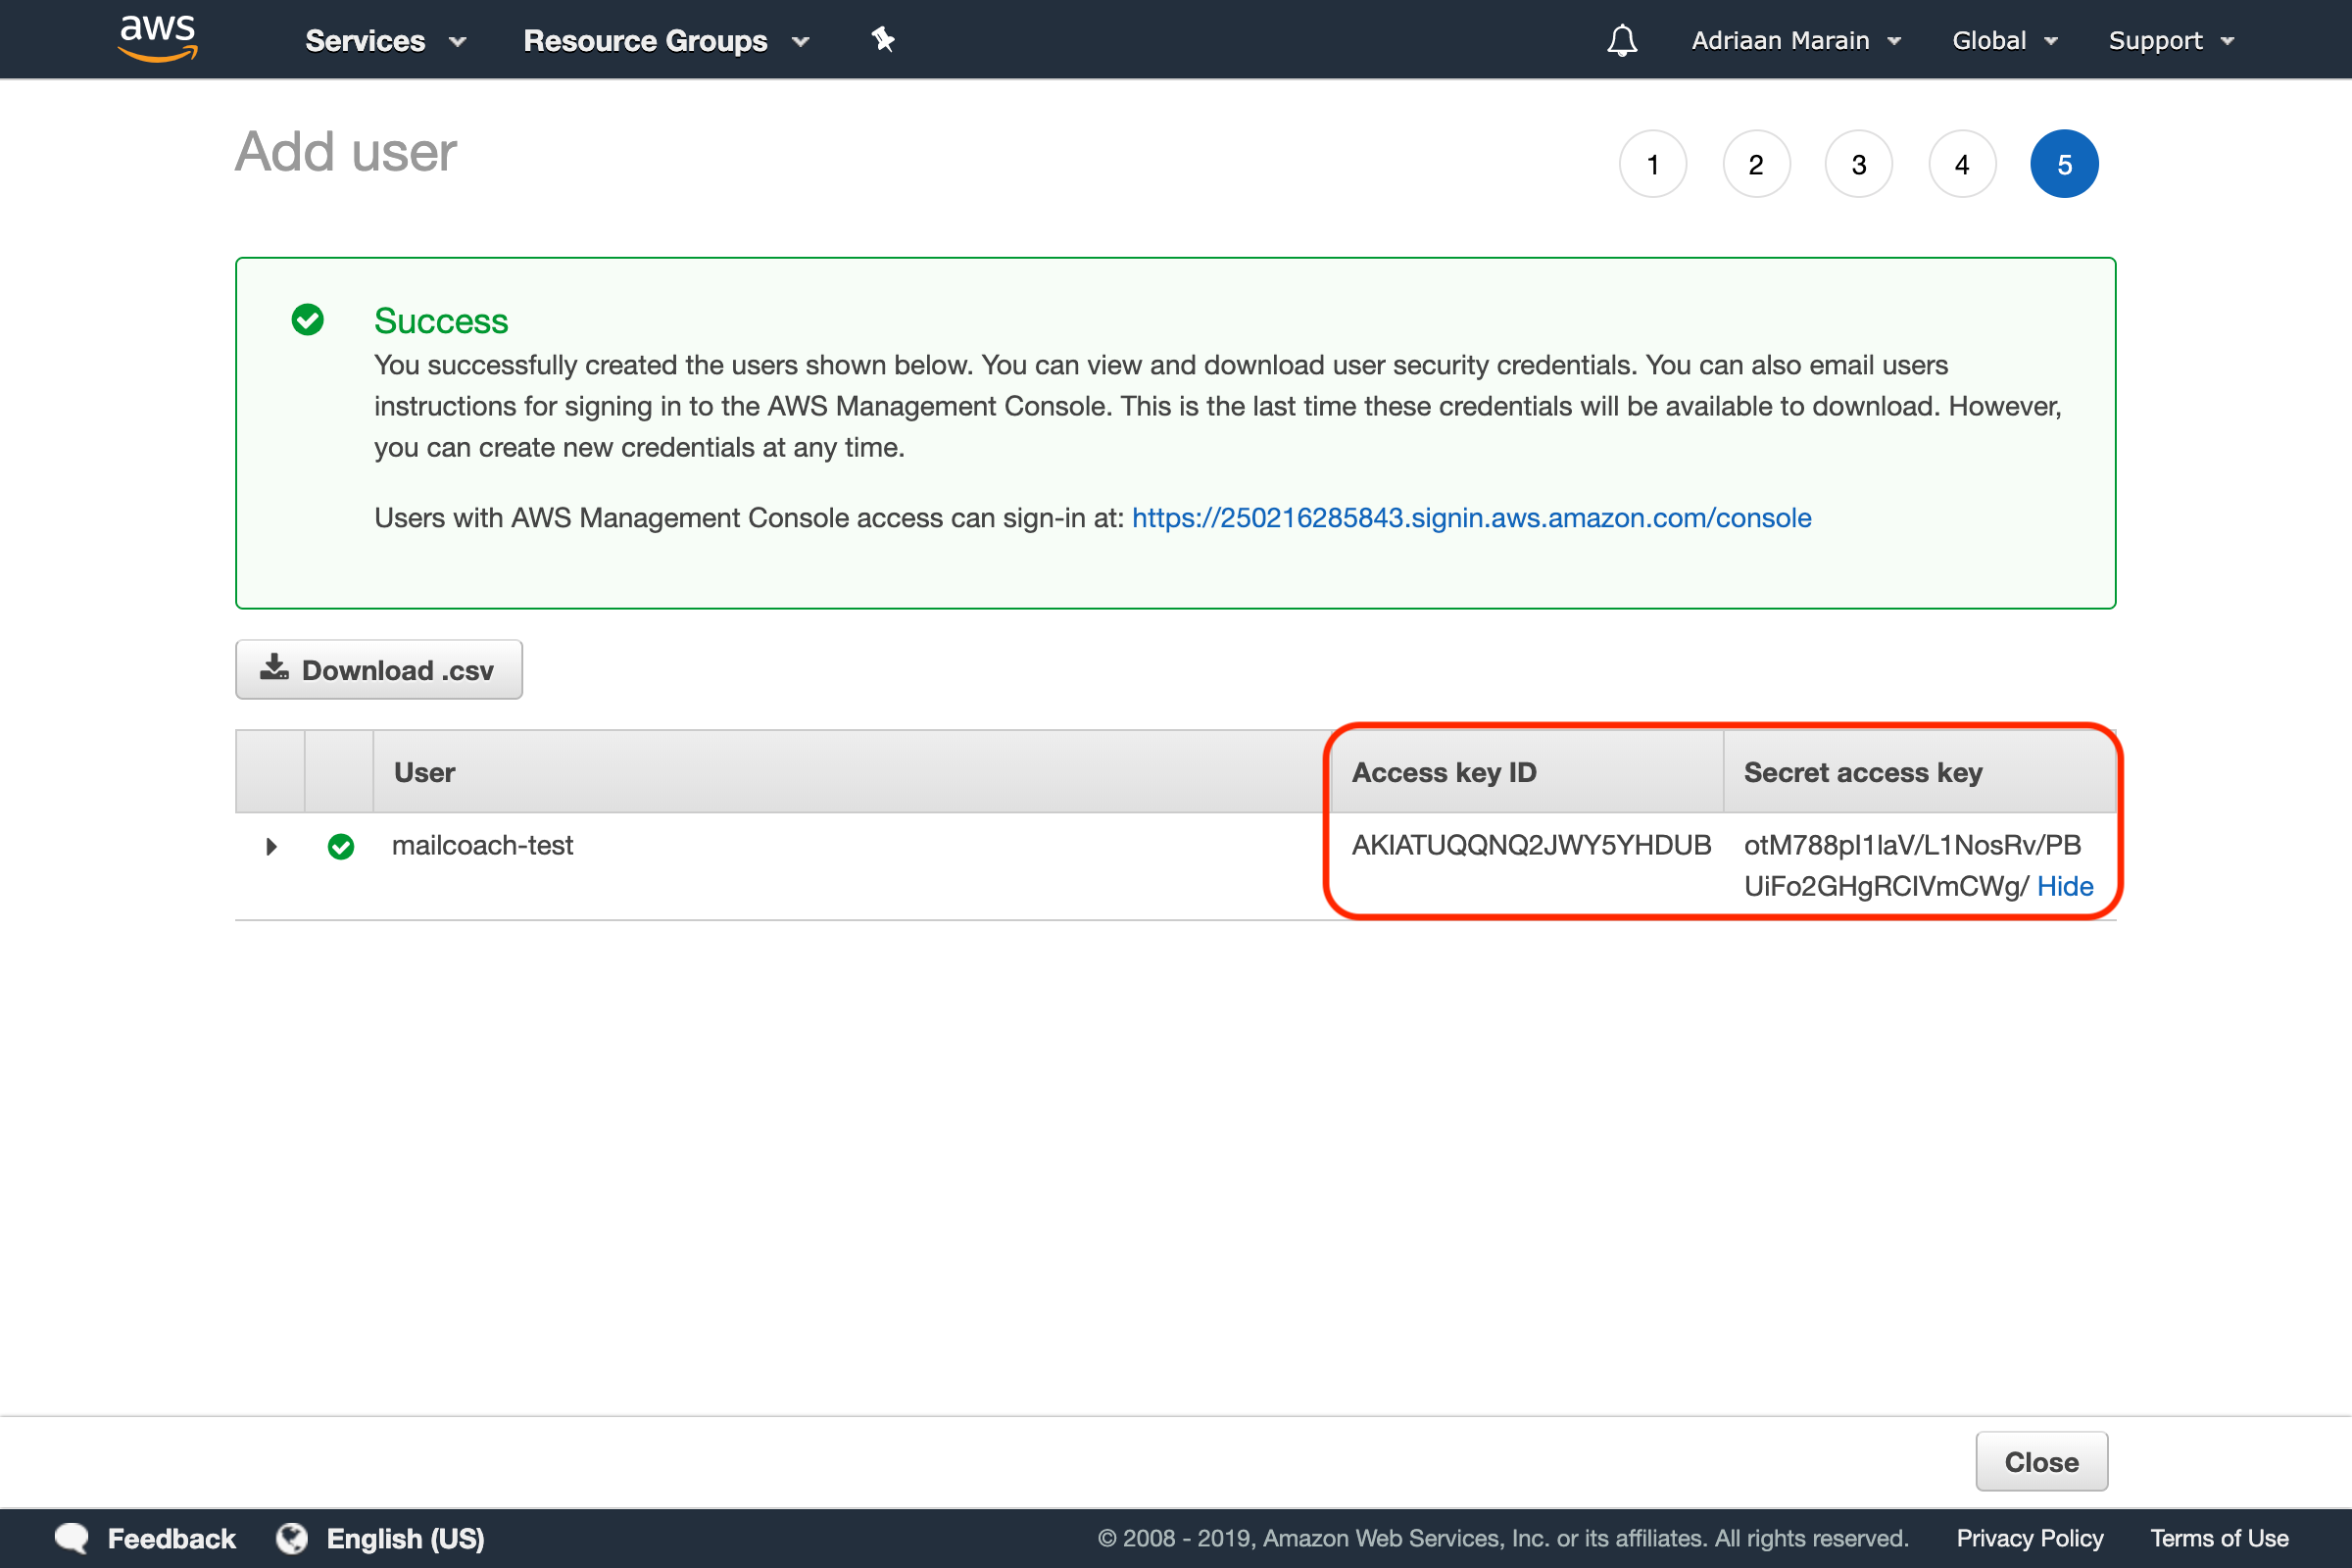
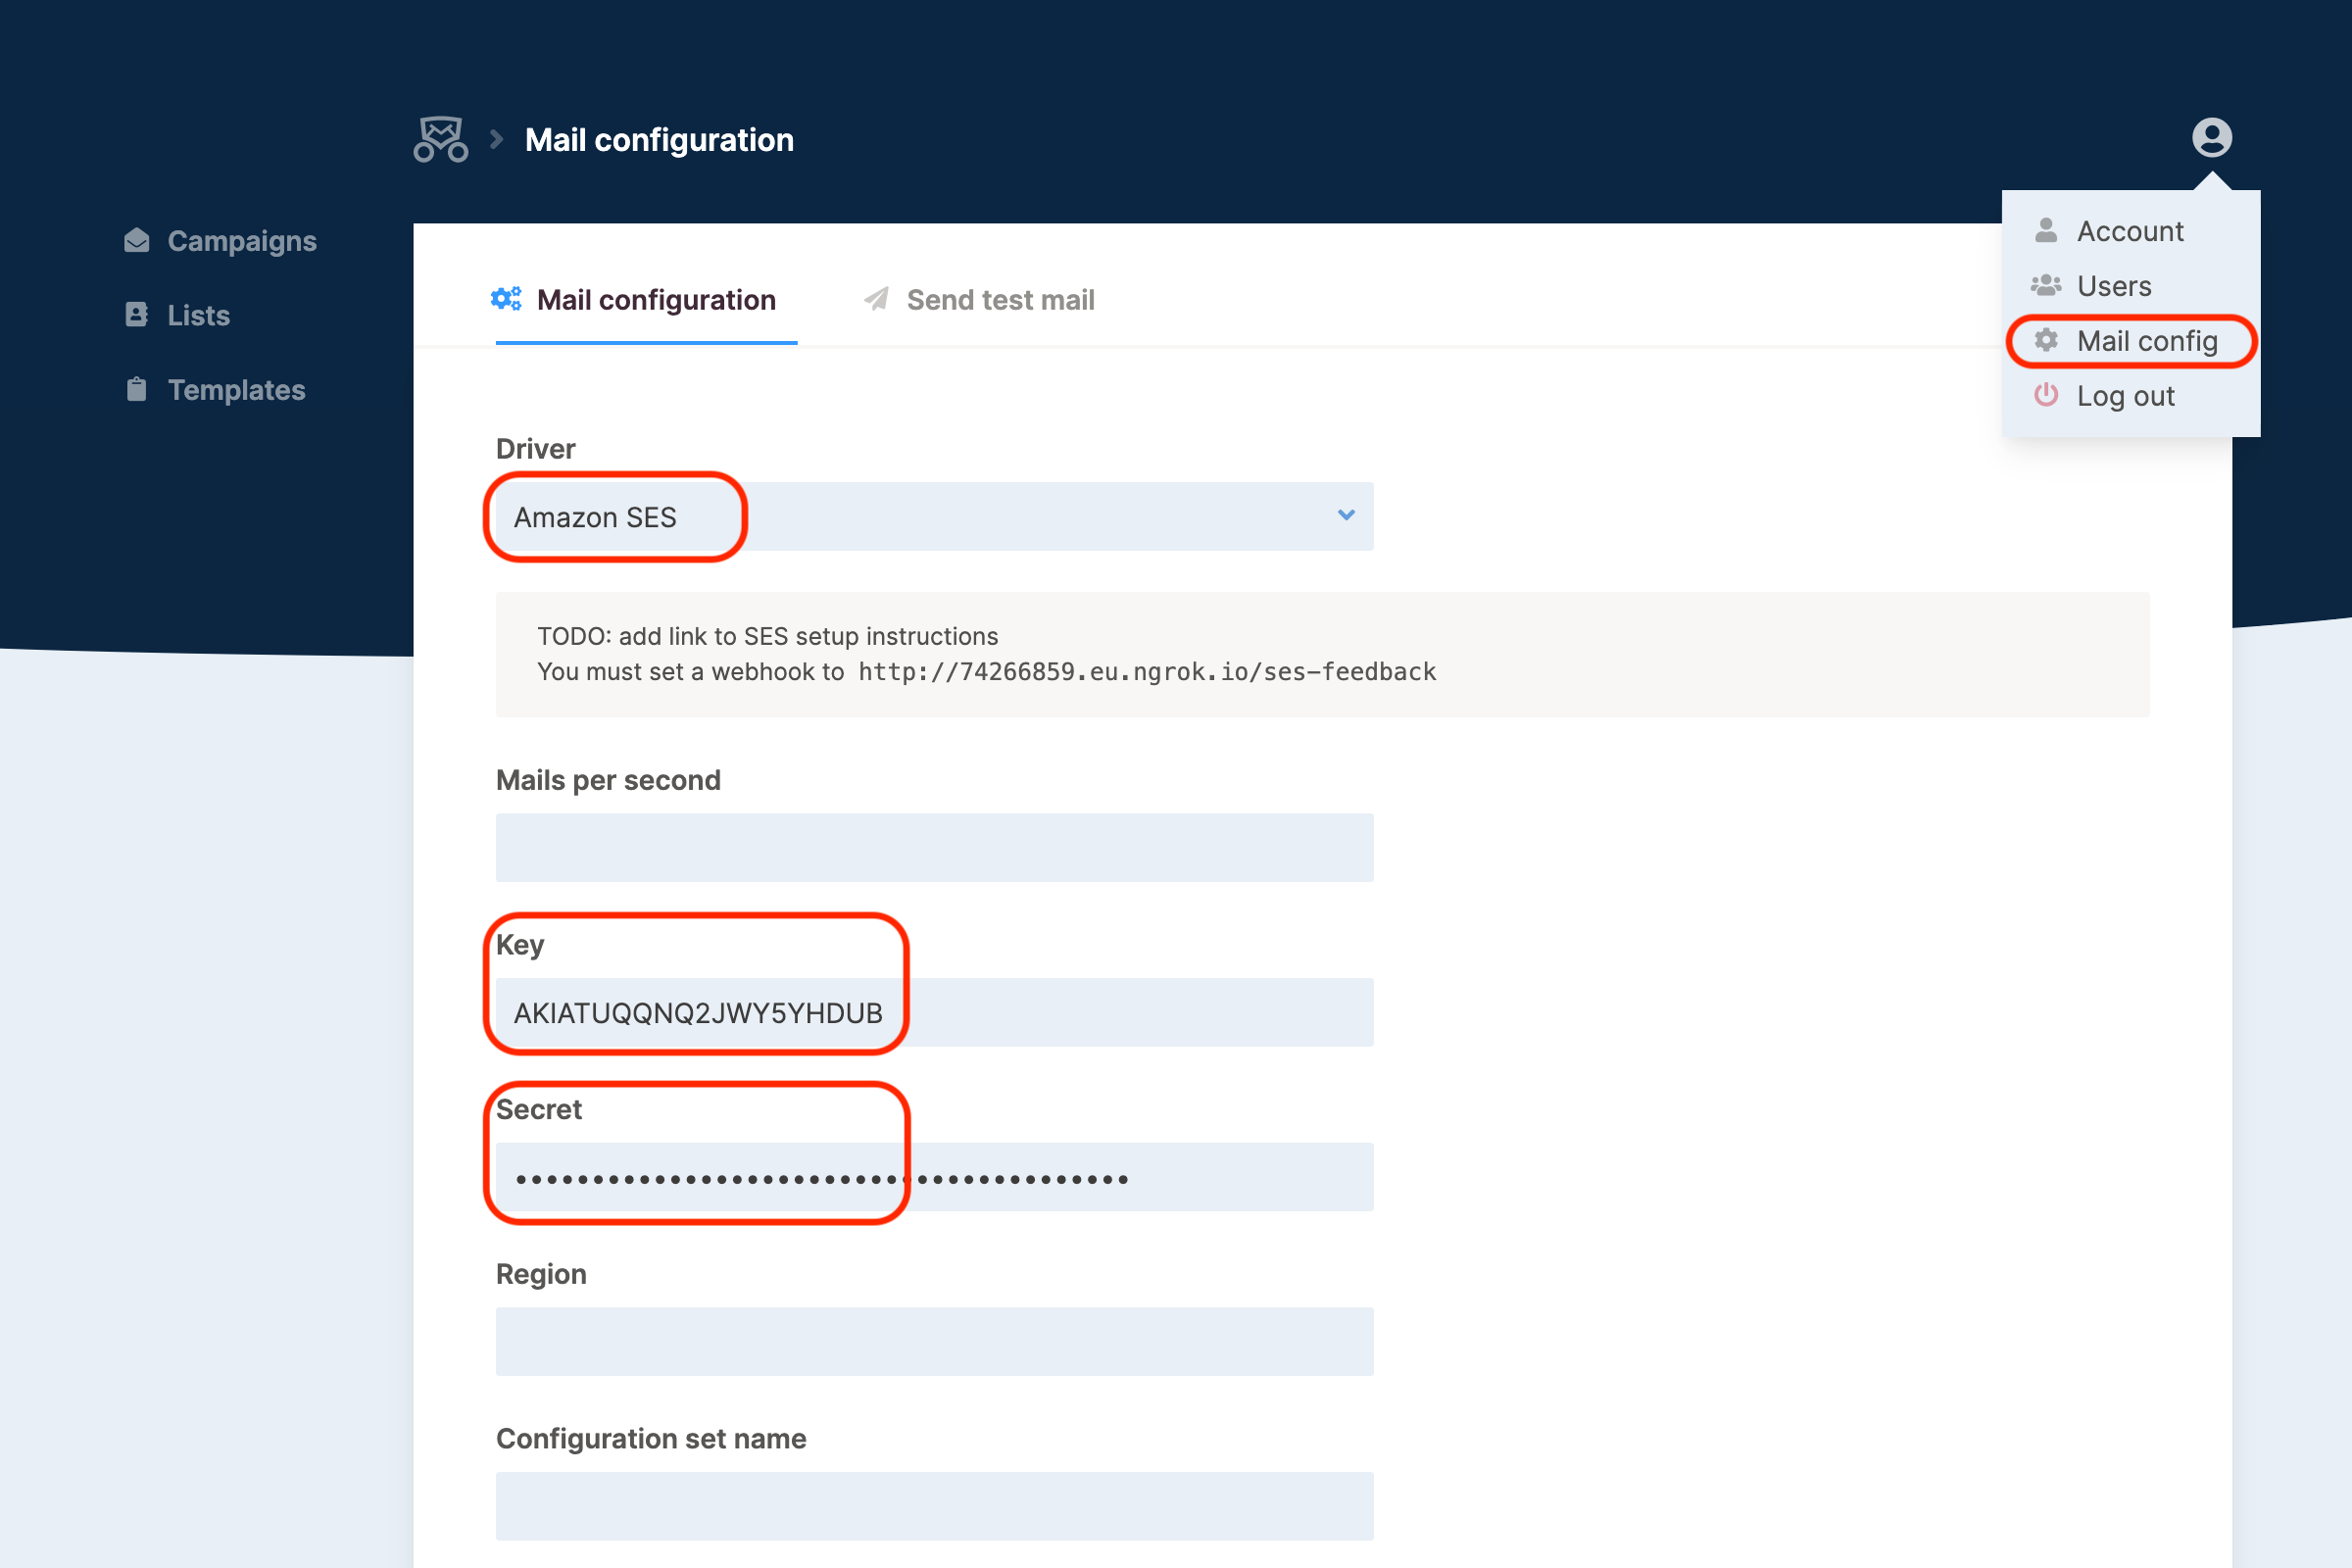
Go to the Mailcoach Mail Configuration page (in the user menu in the top right), make sure you have selected the Amazon SES driver and enter the Key and Secret:
Configuration Set (tracking events)
Amazon SES requires users to track any bounced messages, you need to create an SES Configuration Set so Mailcoach can track these.
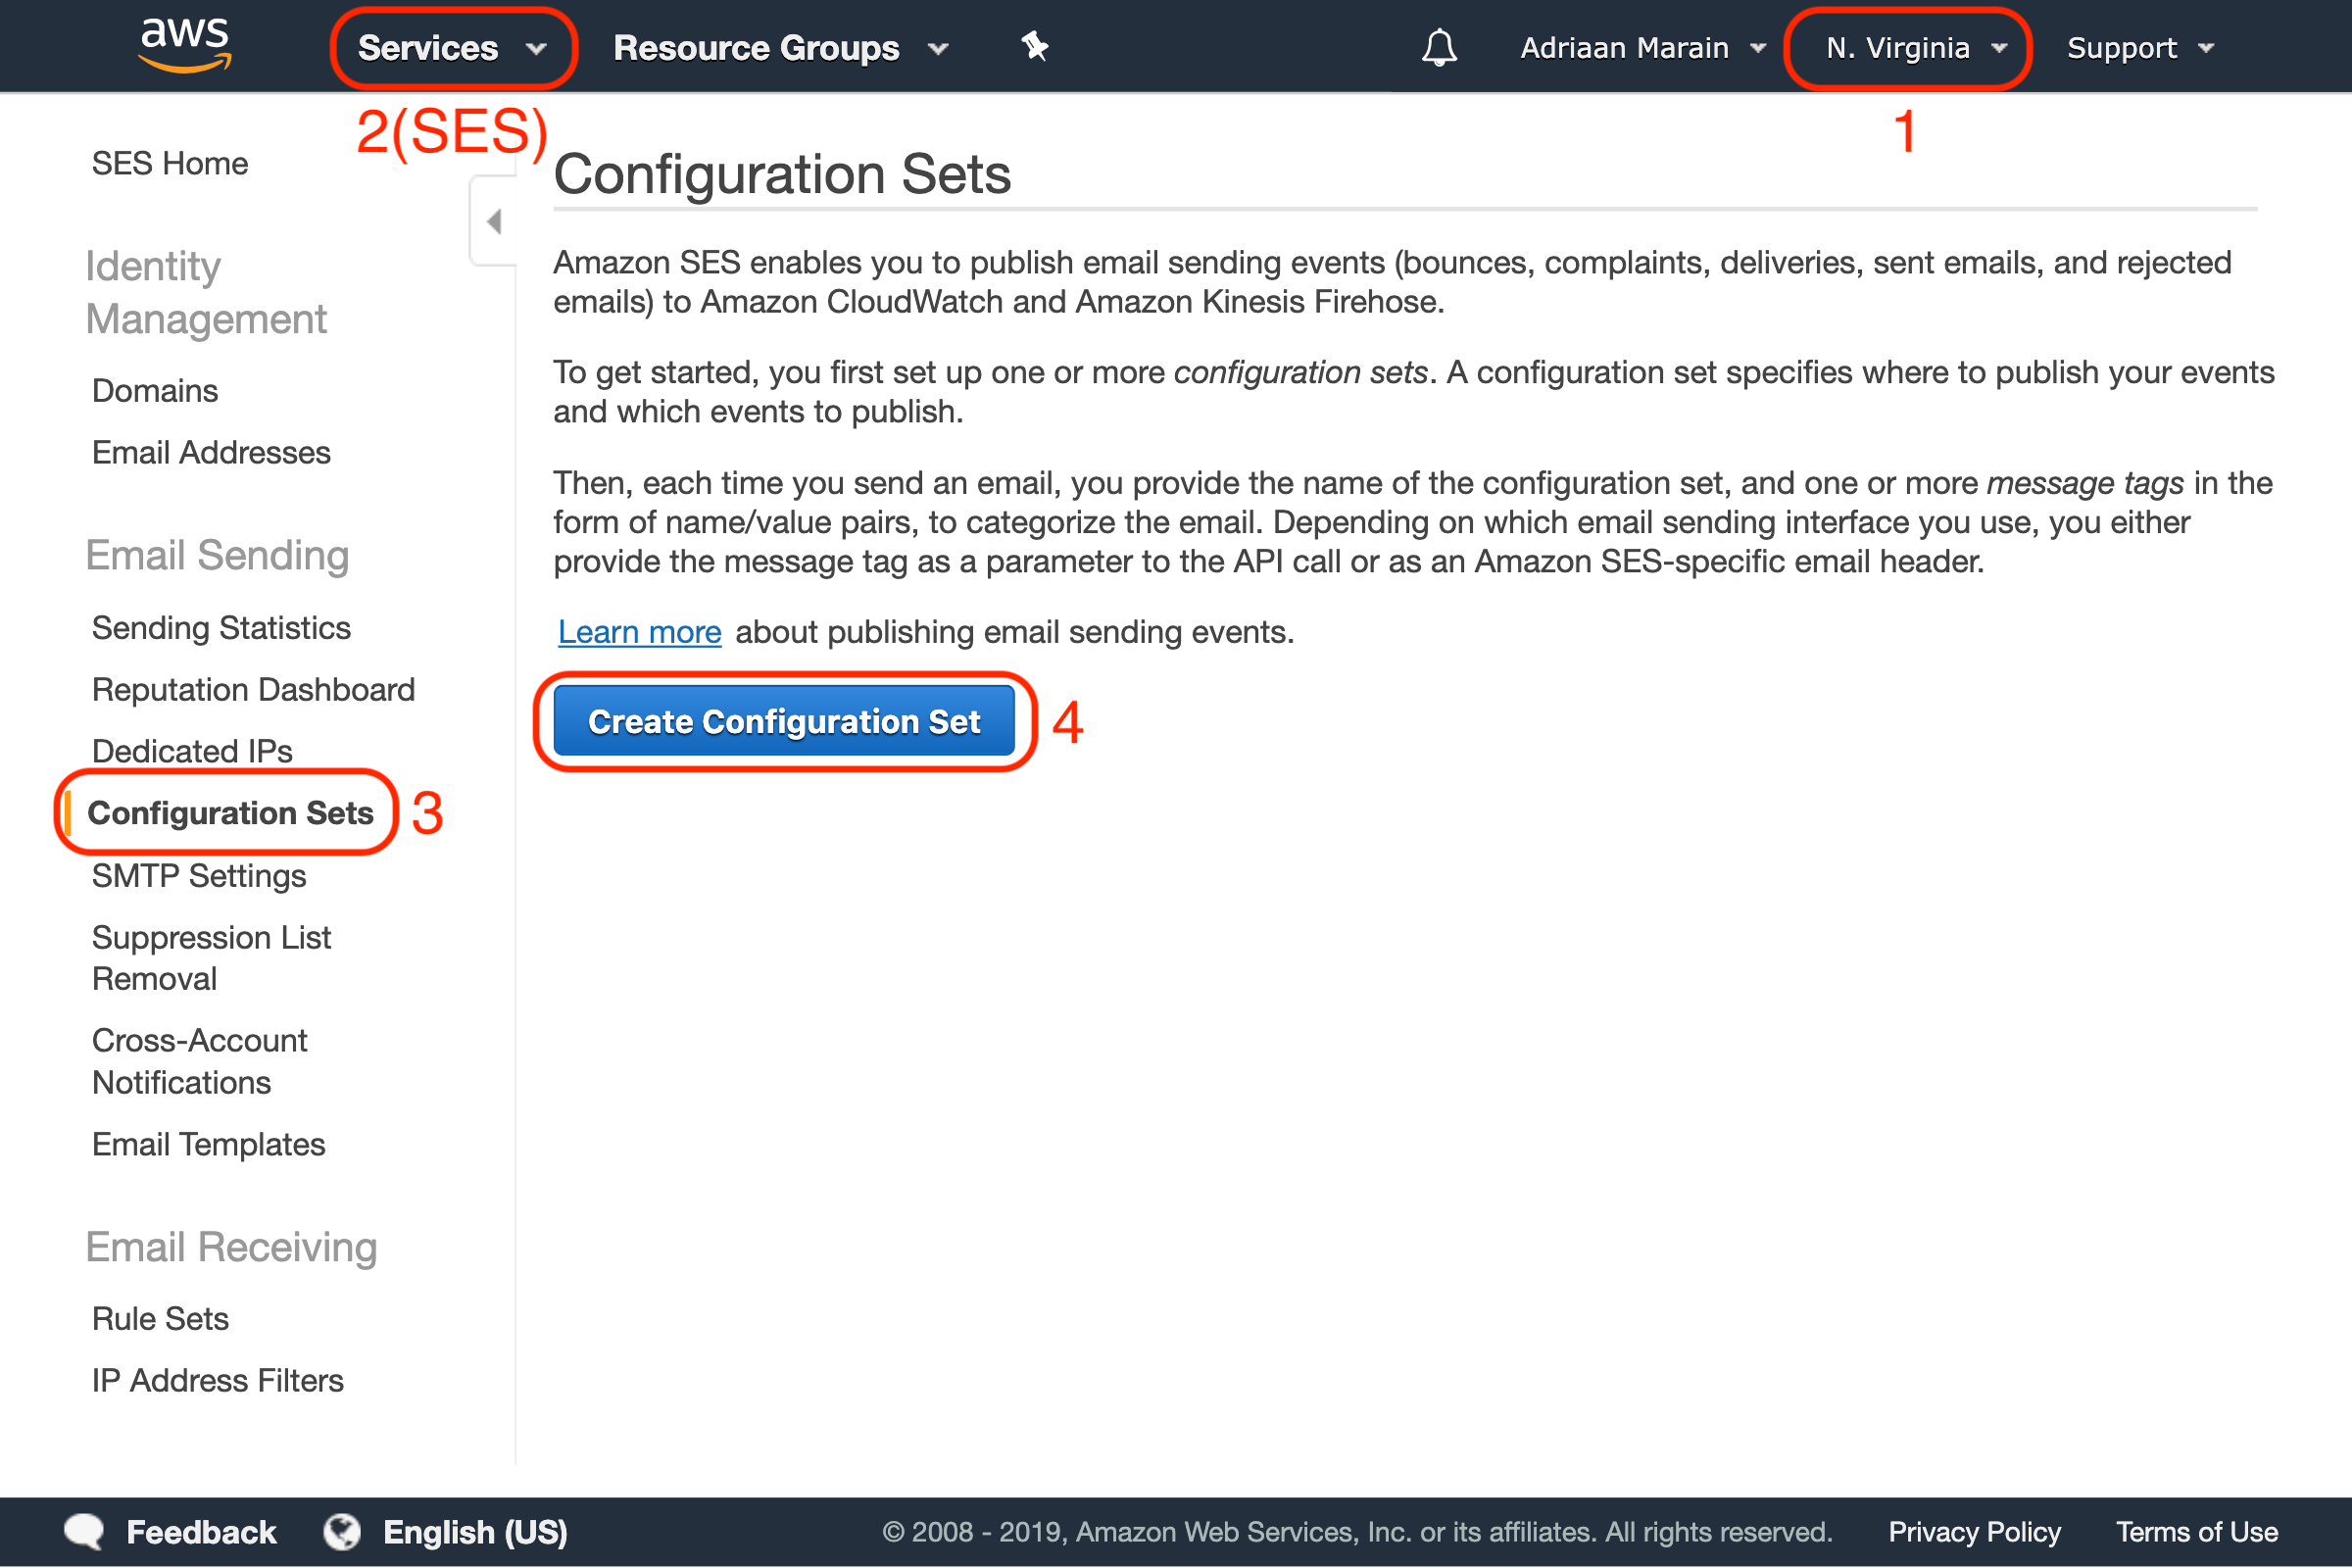
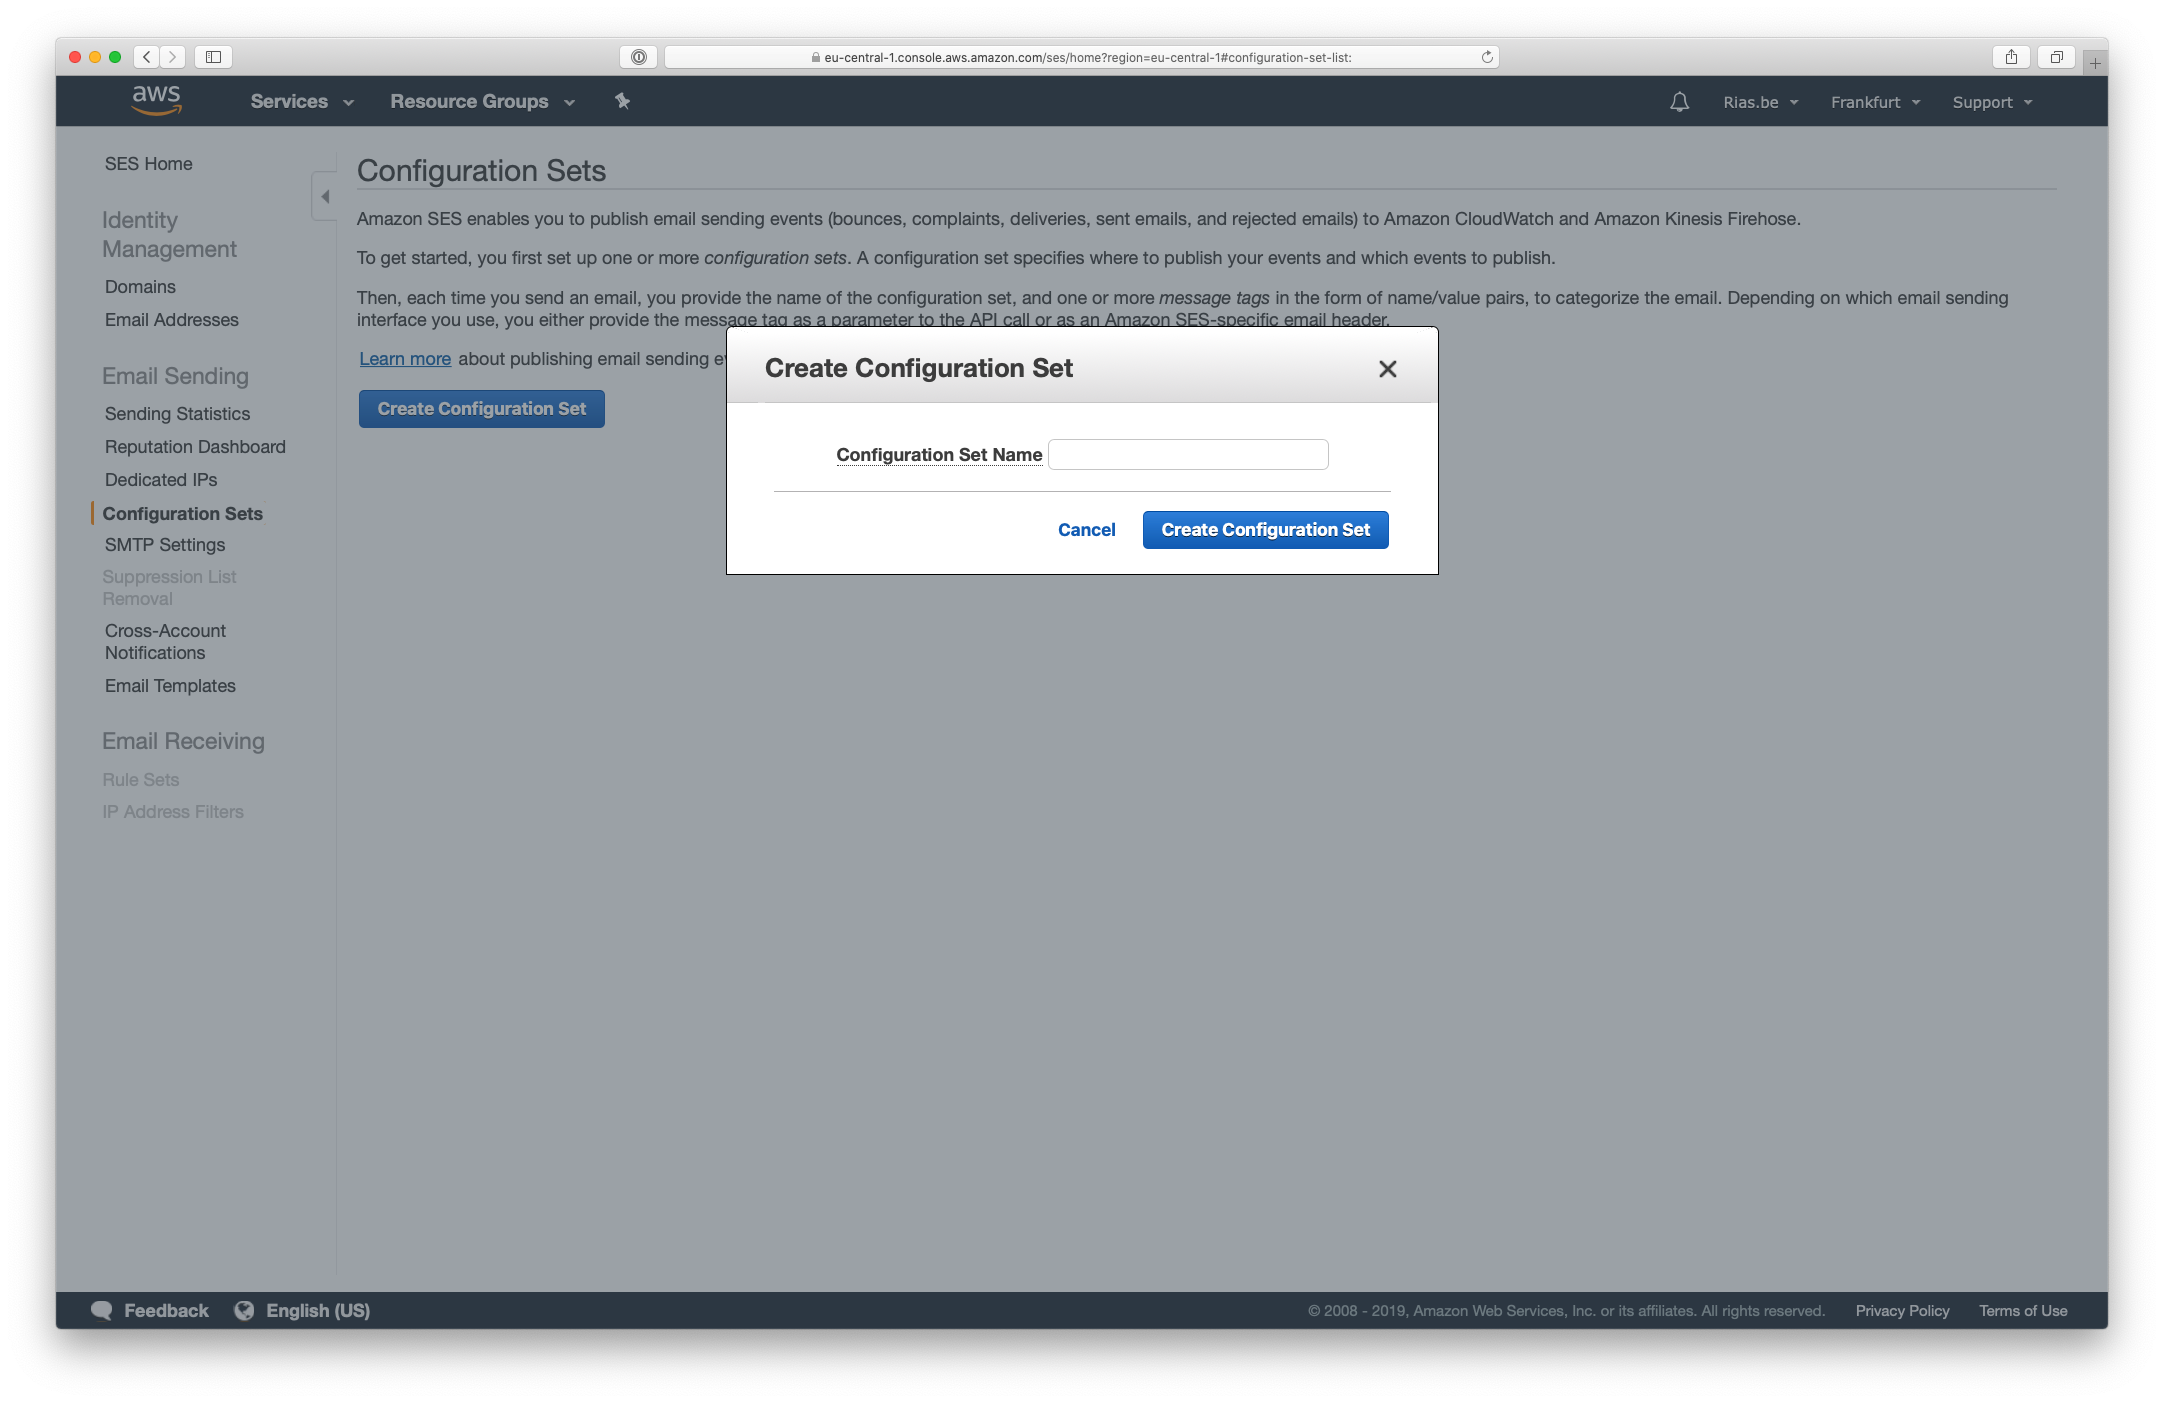
Open your AWS Dashboard and make sure you still have the same AWS region selected as where you verified your domain and sending email address. Go to the Simple Email Service under Services, and find the Configuration Sets menu item under Email Sending. Press the Create Configuration Set button:
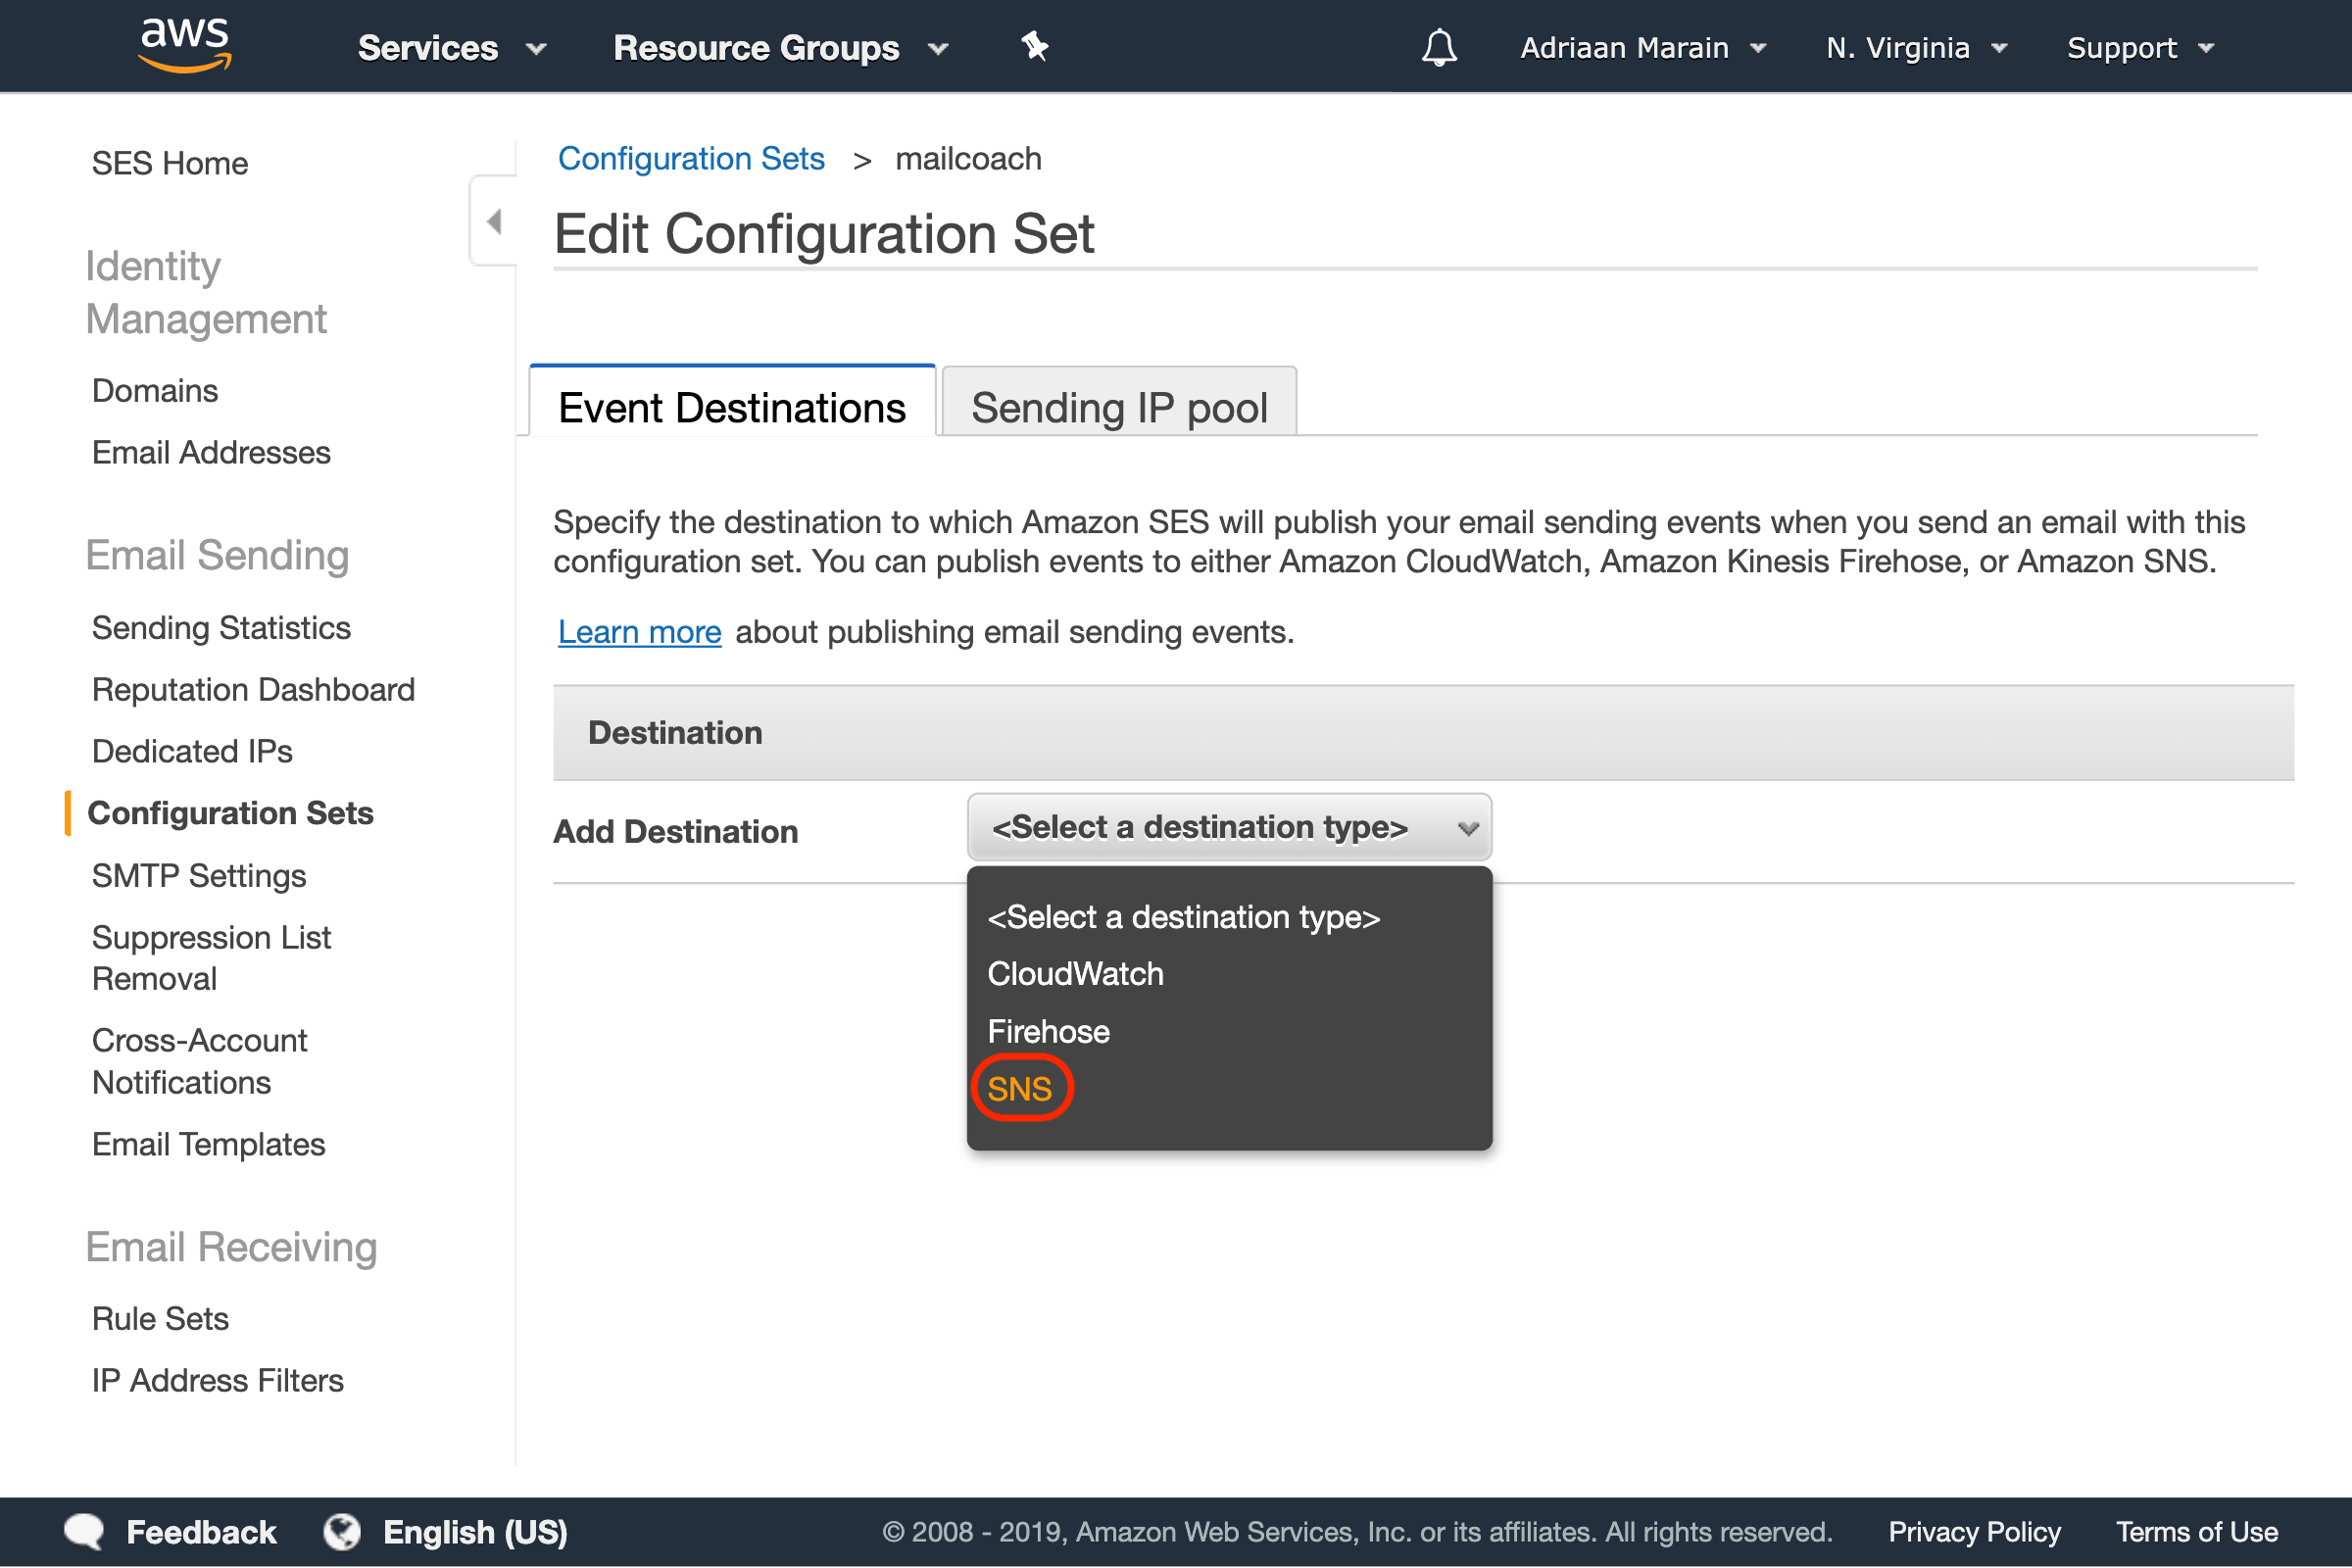
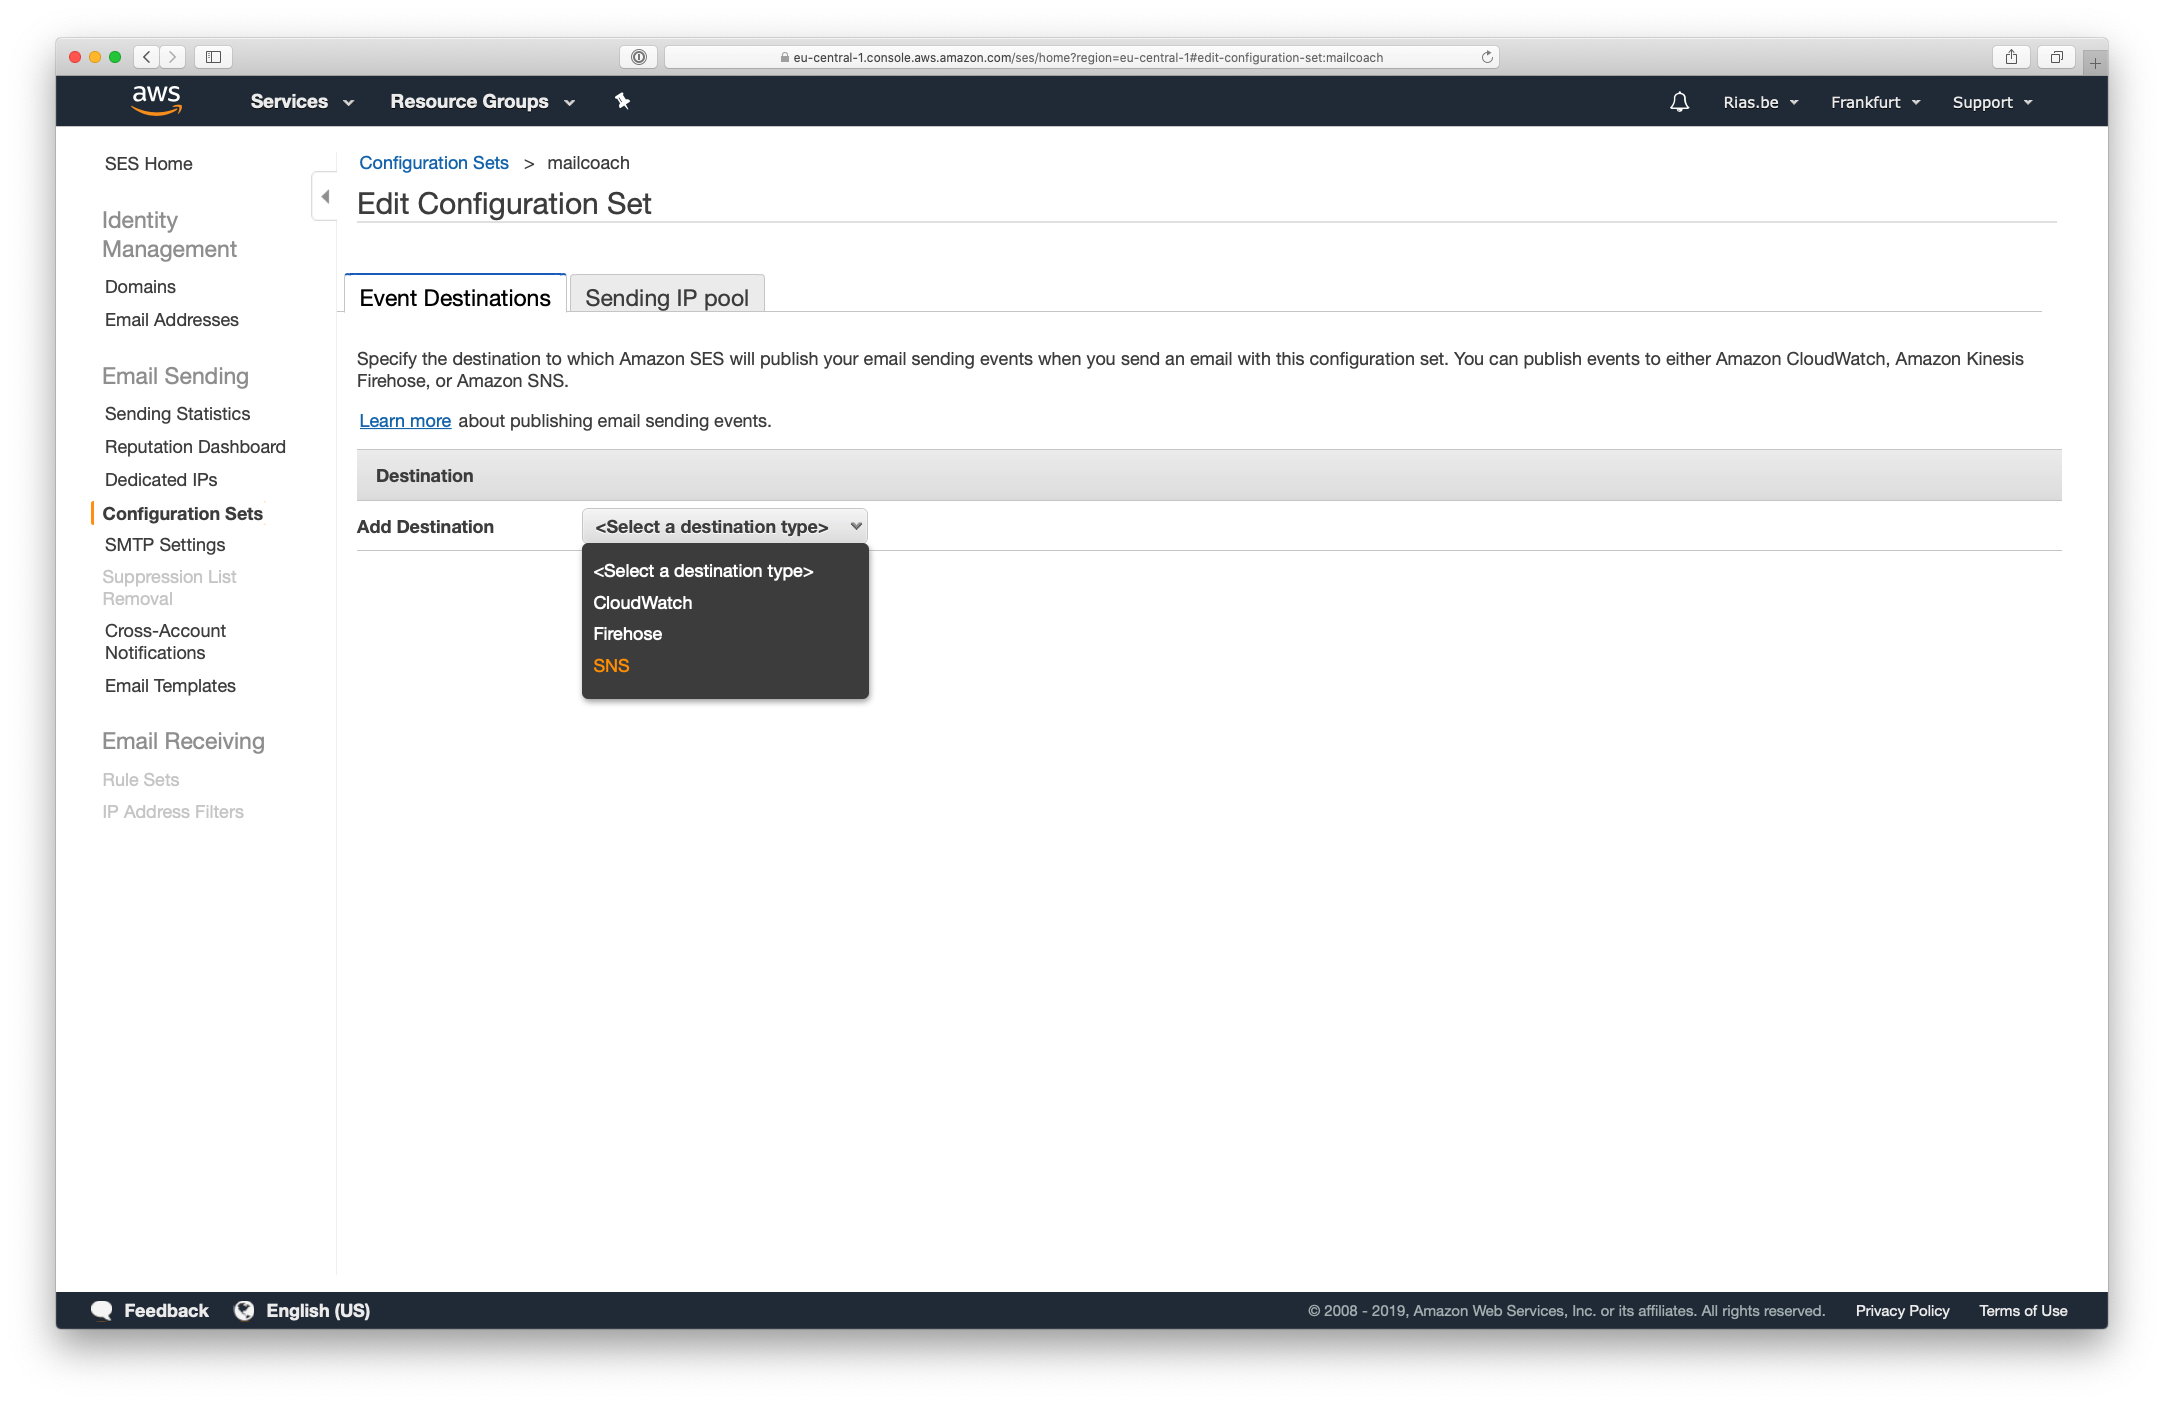
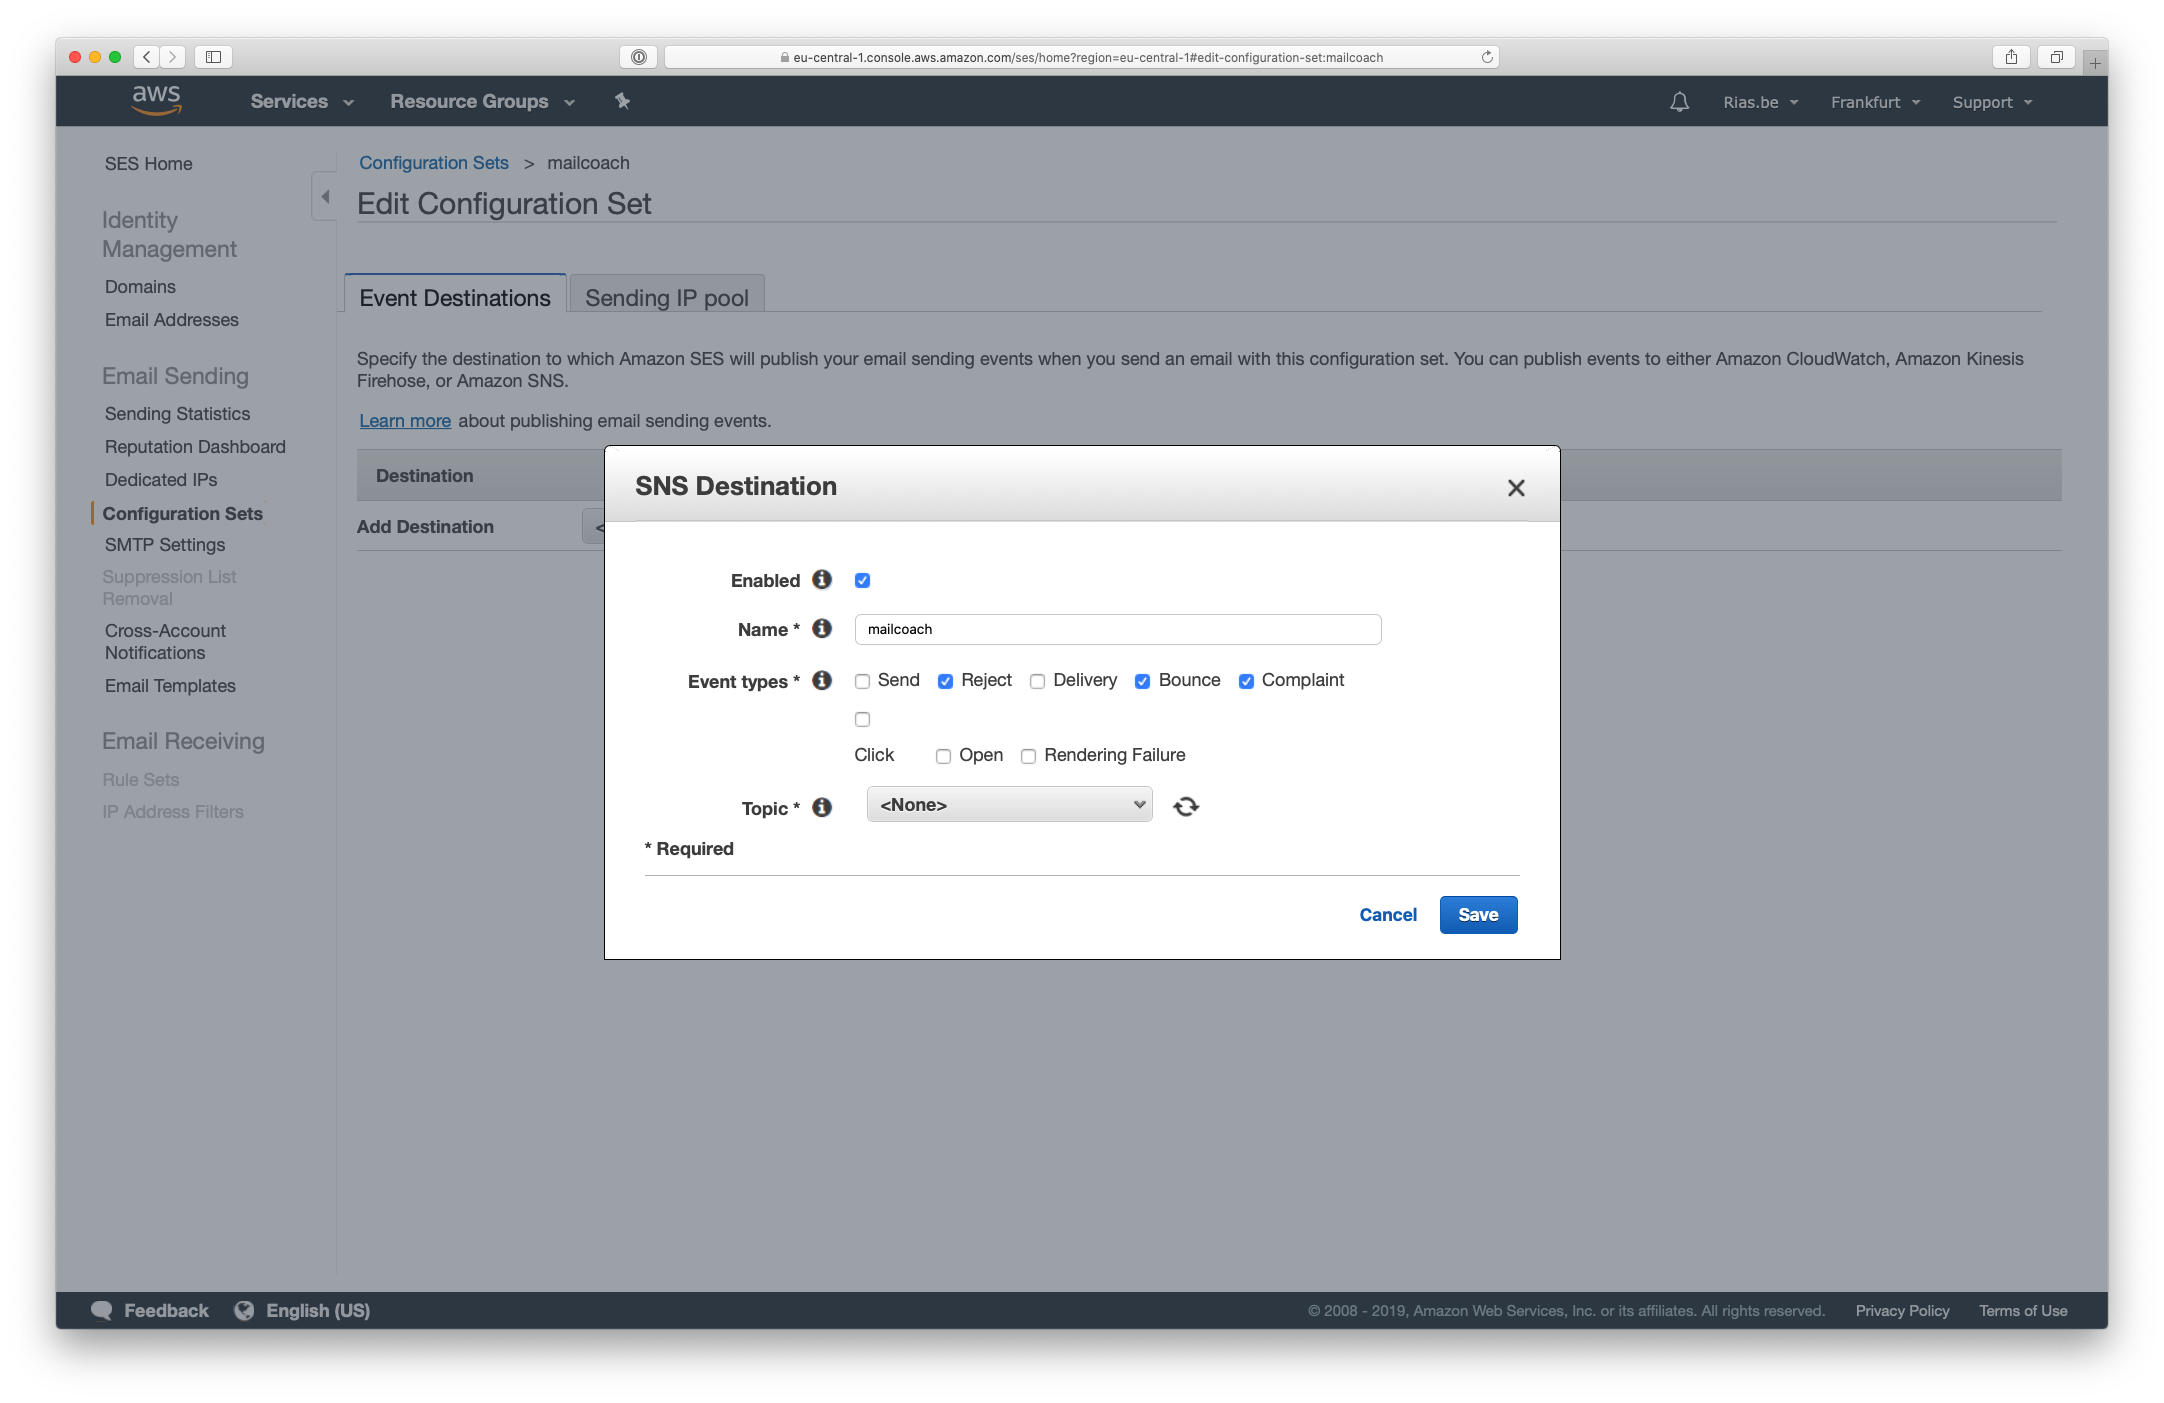
Choose a name for your configuration set and create it, then click the newly created item in the list to add some events destinations. Click the Select a destination type dropdown and select the SNS option:
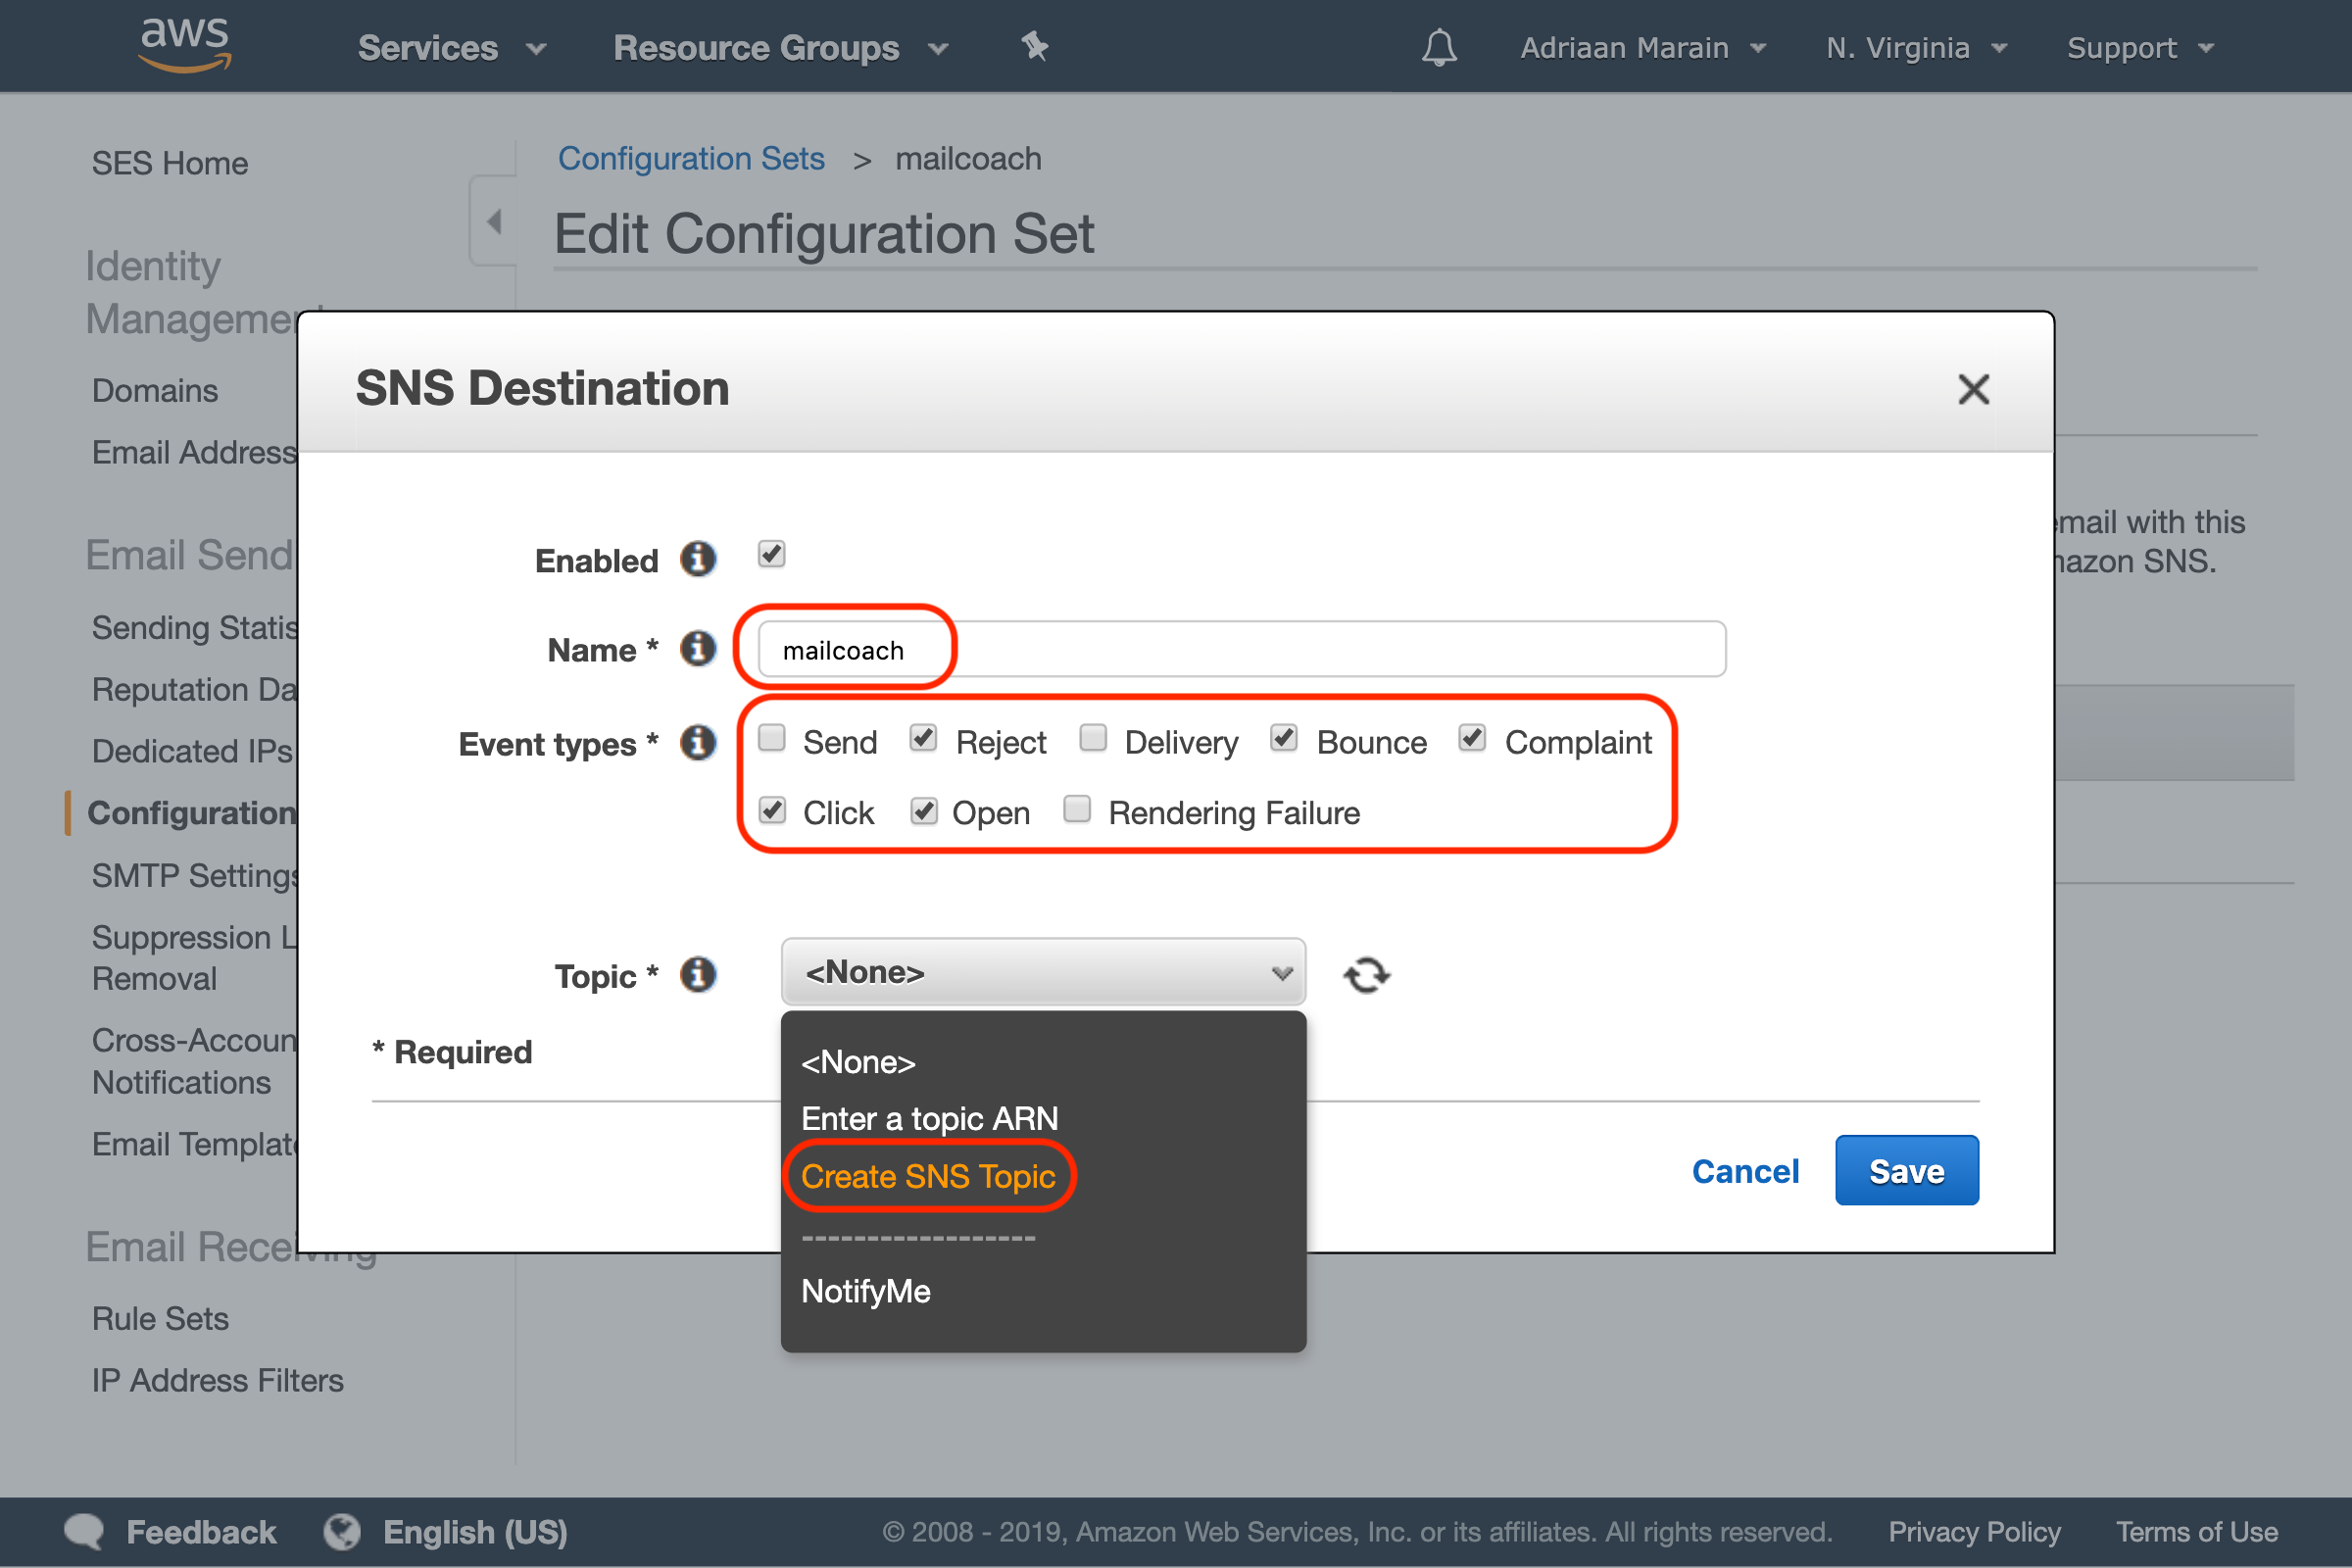
In the window that pops up, choose a name and select the following event types: Reject, Bounce, Complaint, Click and Open. Next, press the Topic dropdown and choose Create SNS Topic:
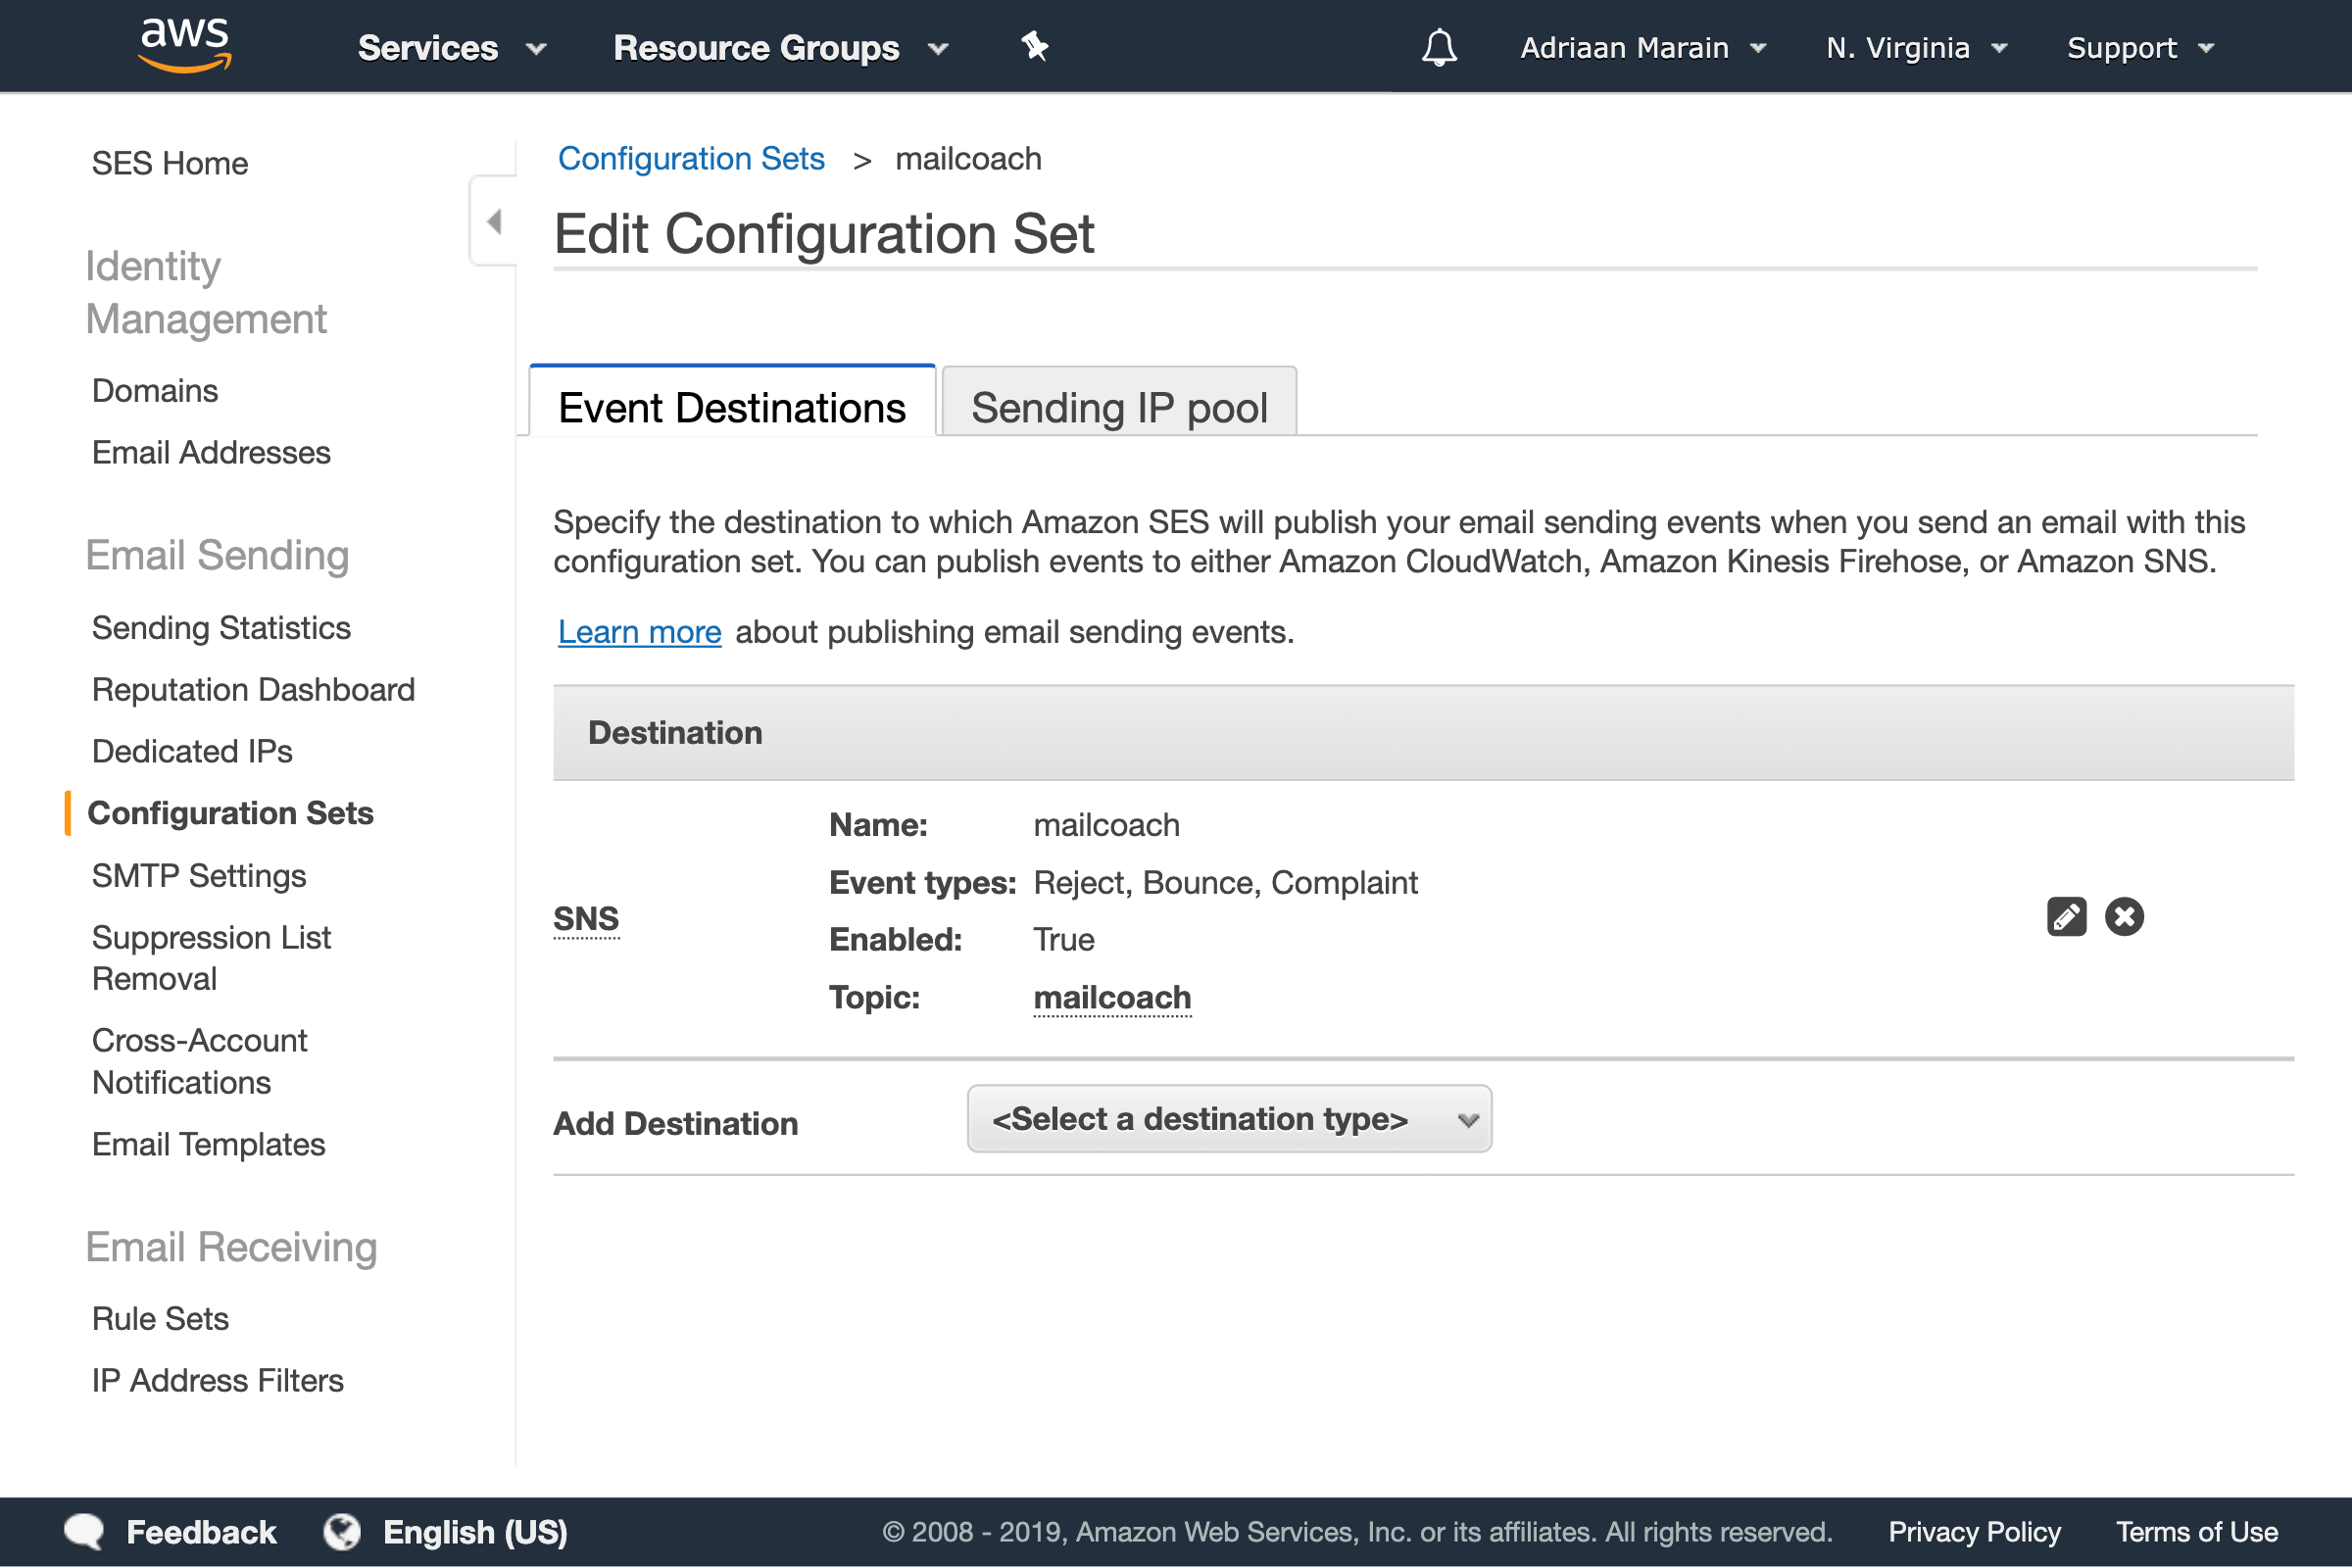
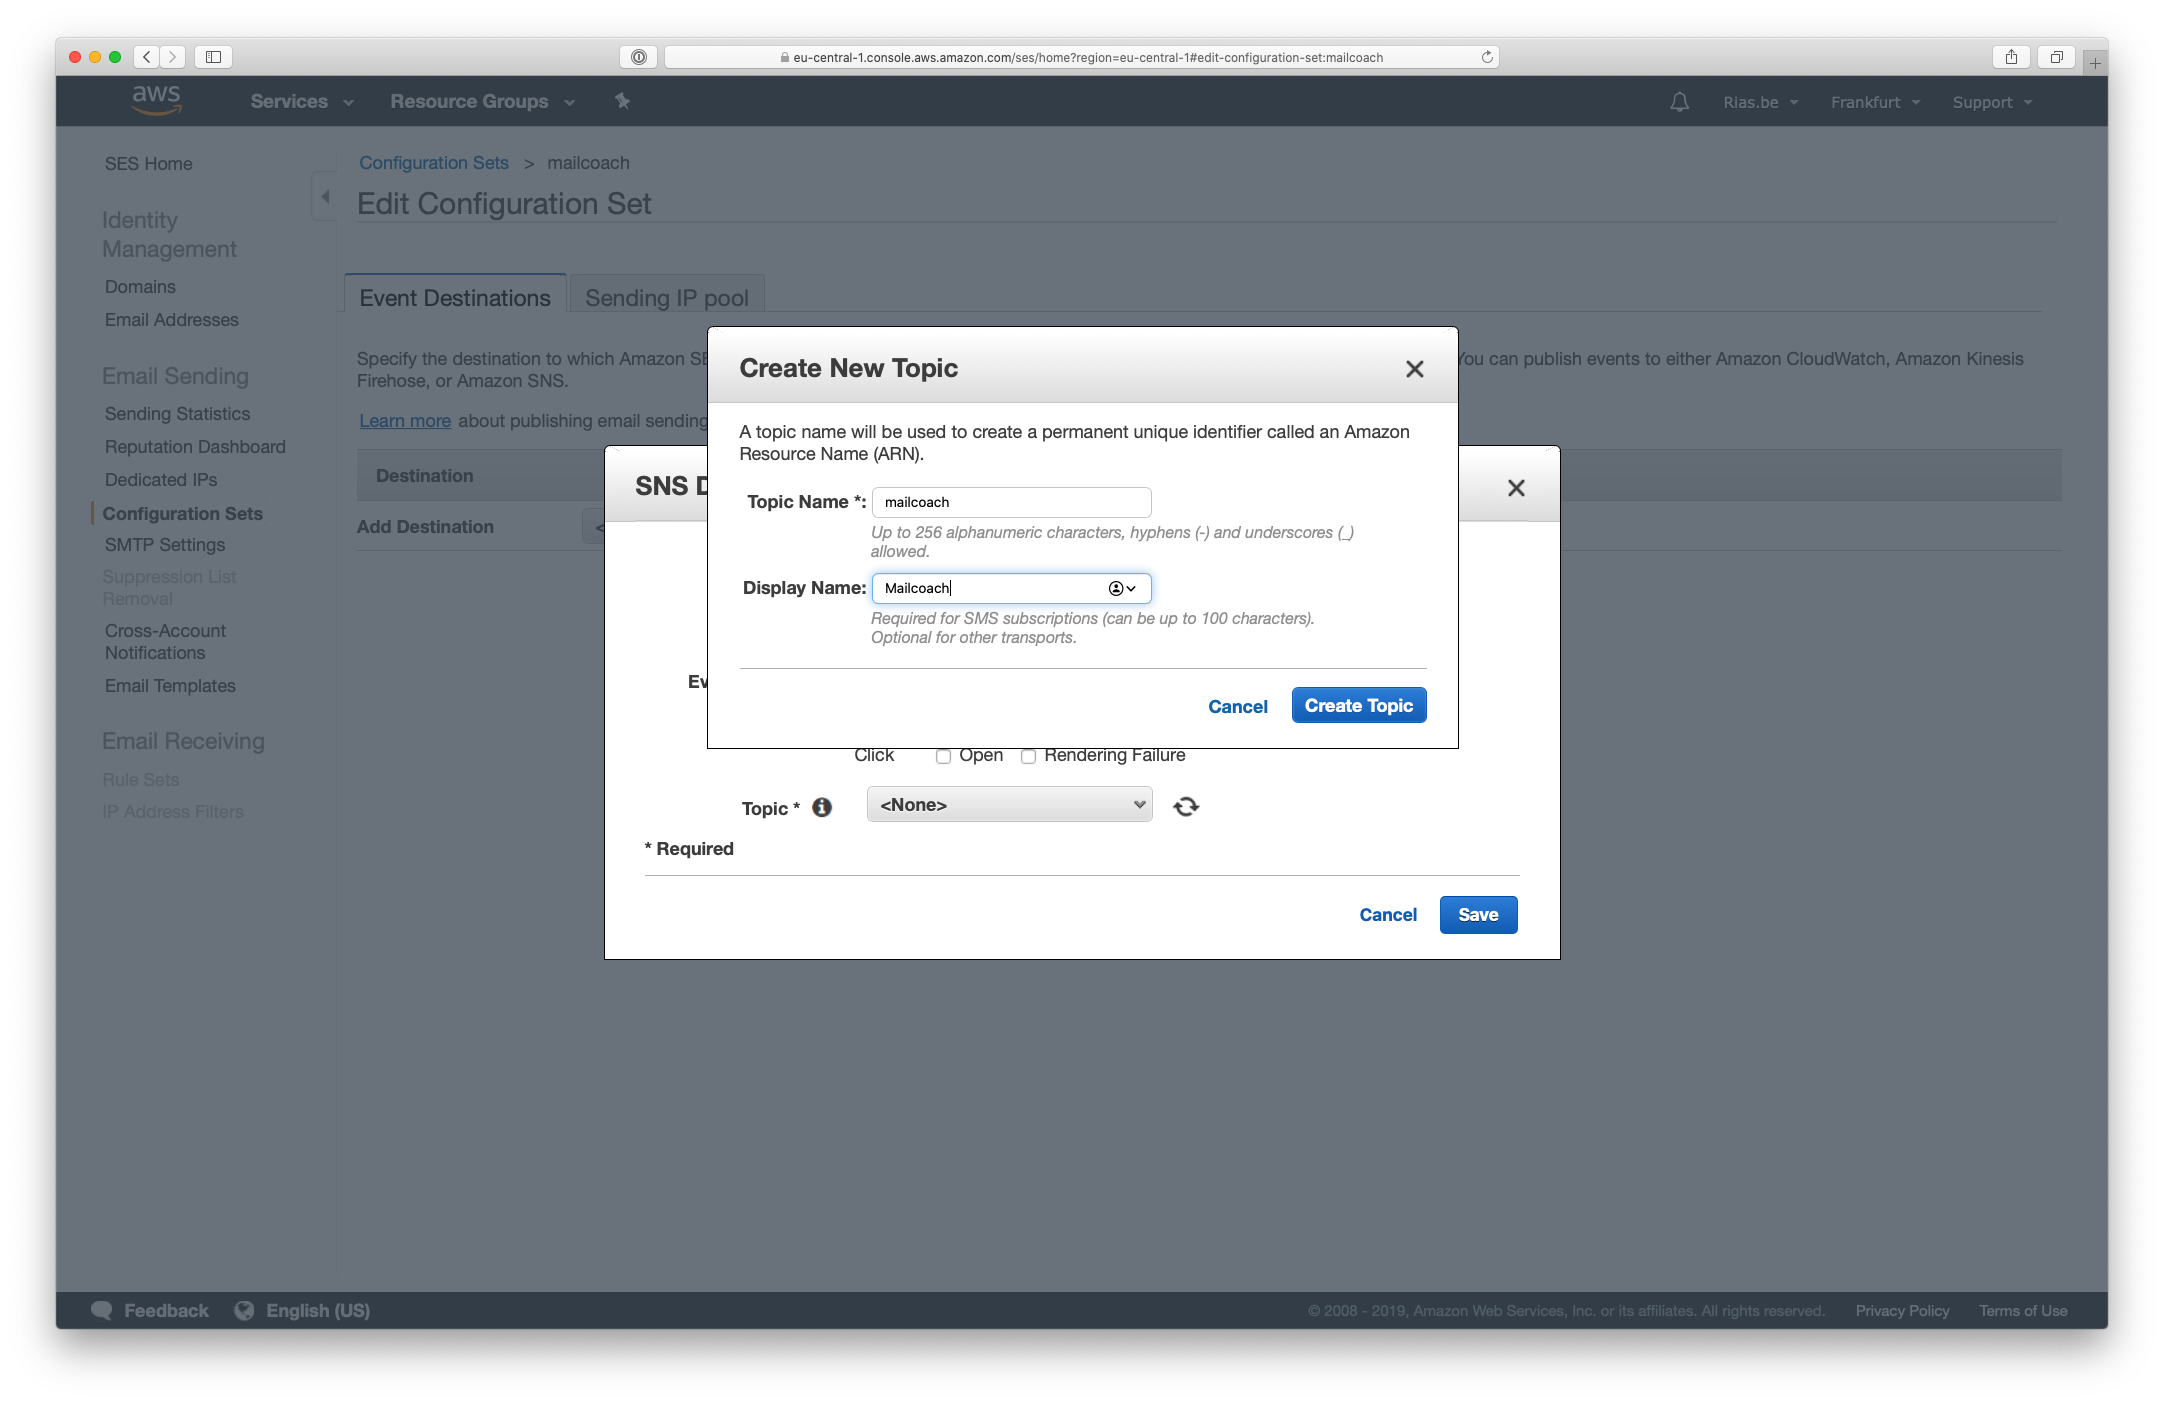
Another window will open, choose a topic and display name, press Create Topic and Save. You should now see your newly created Configuration Set:
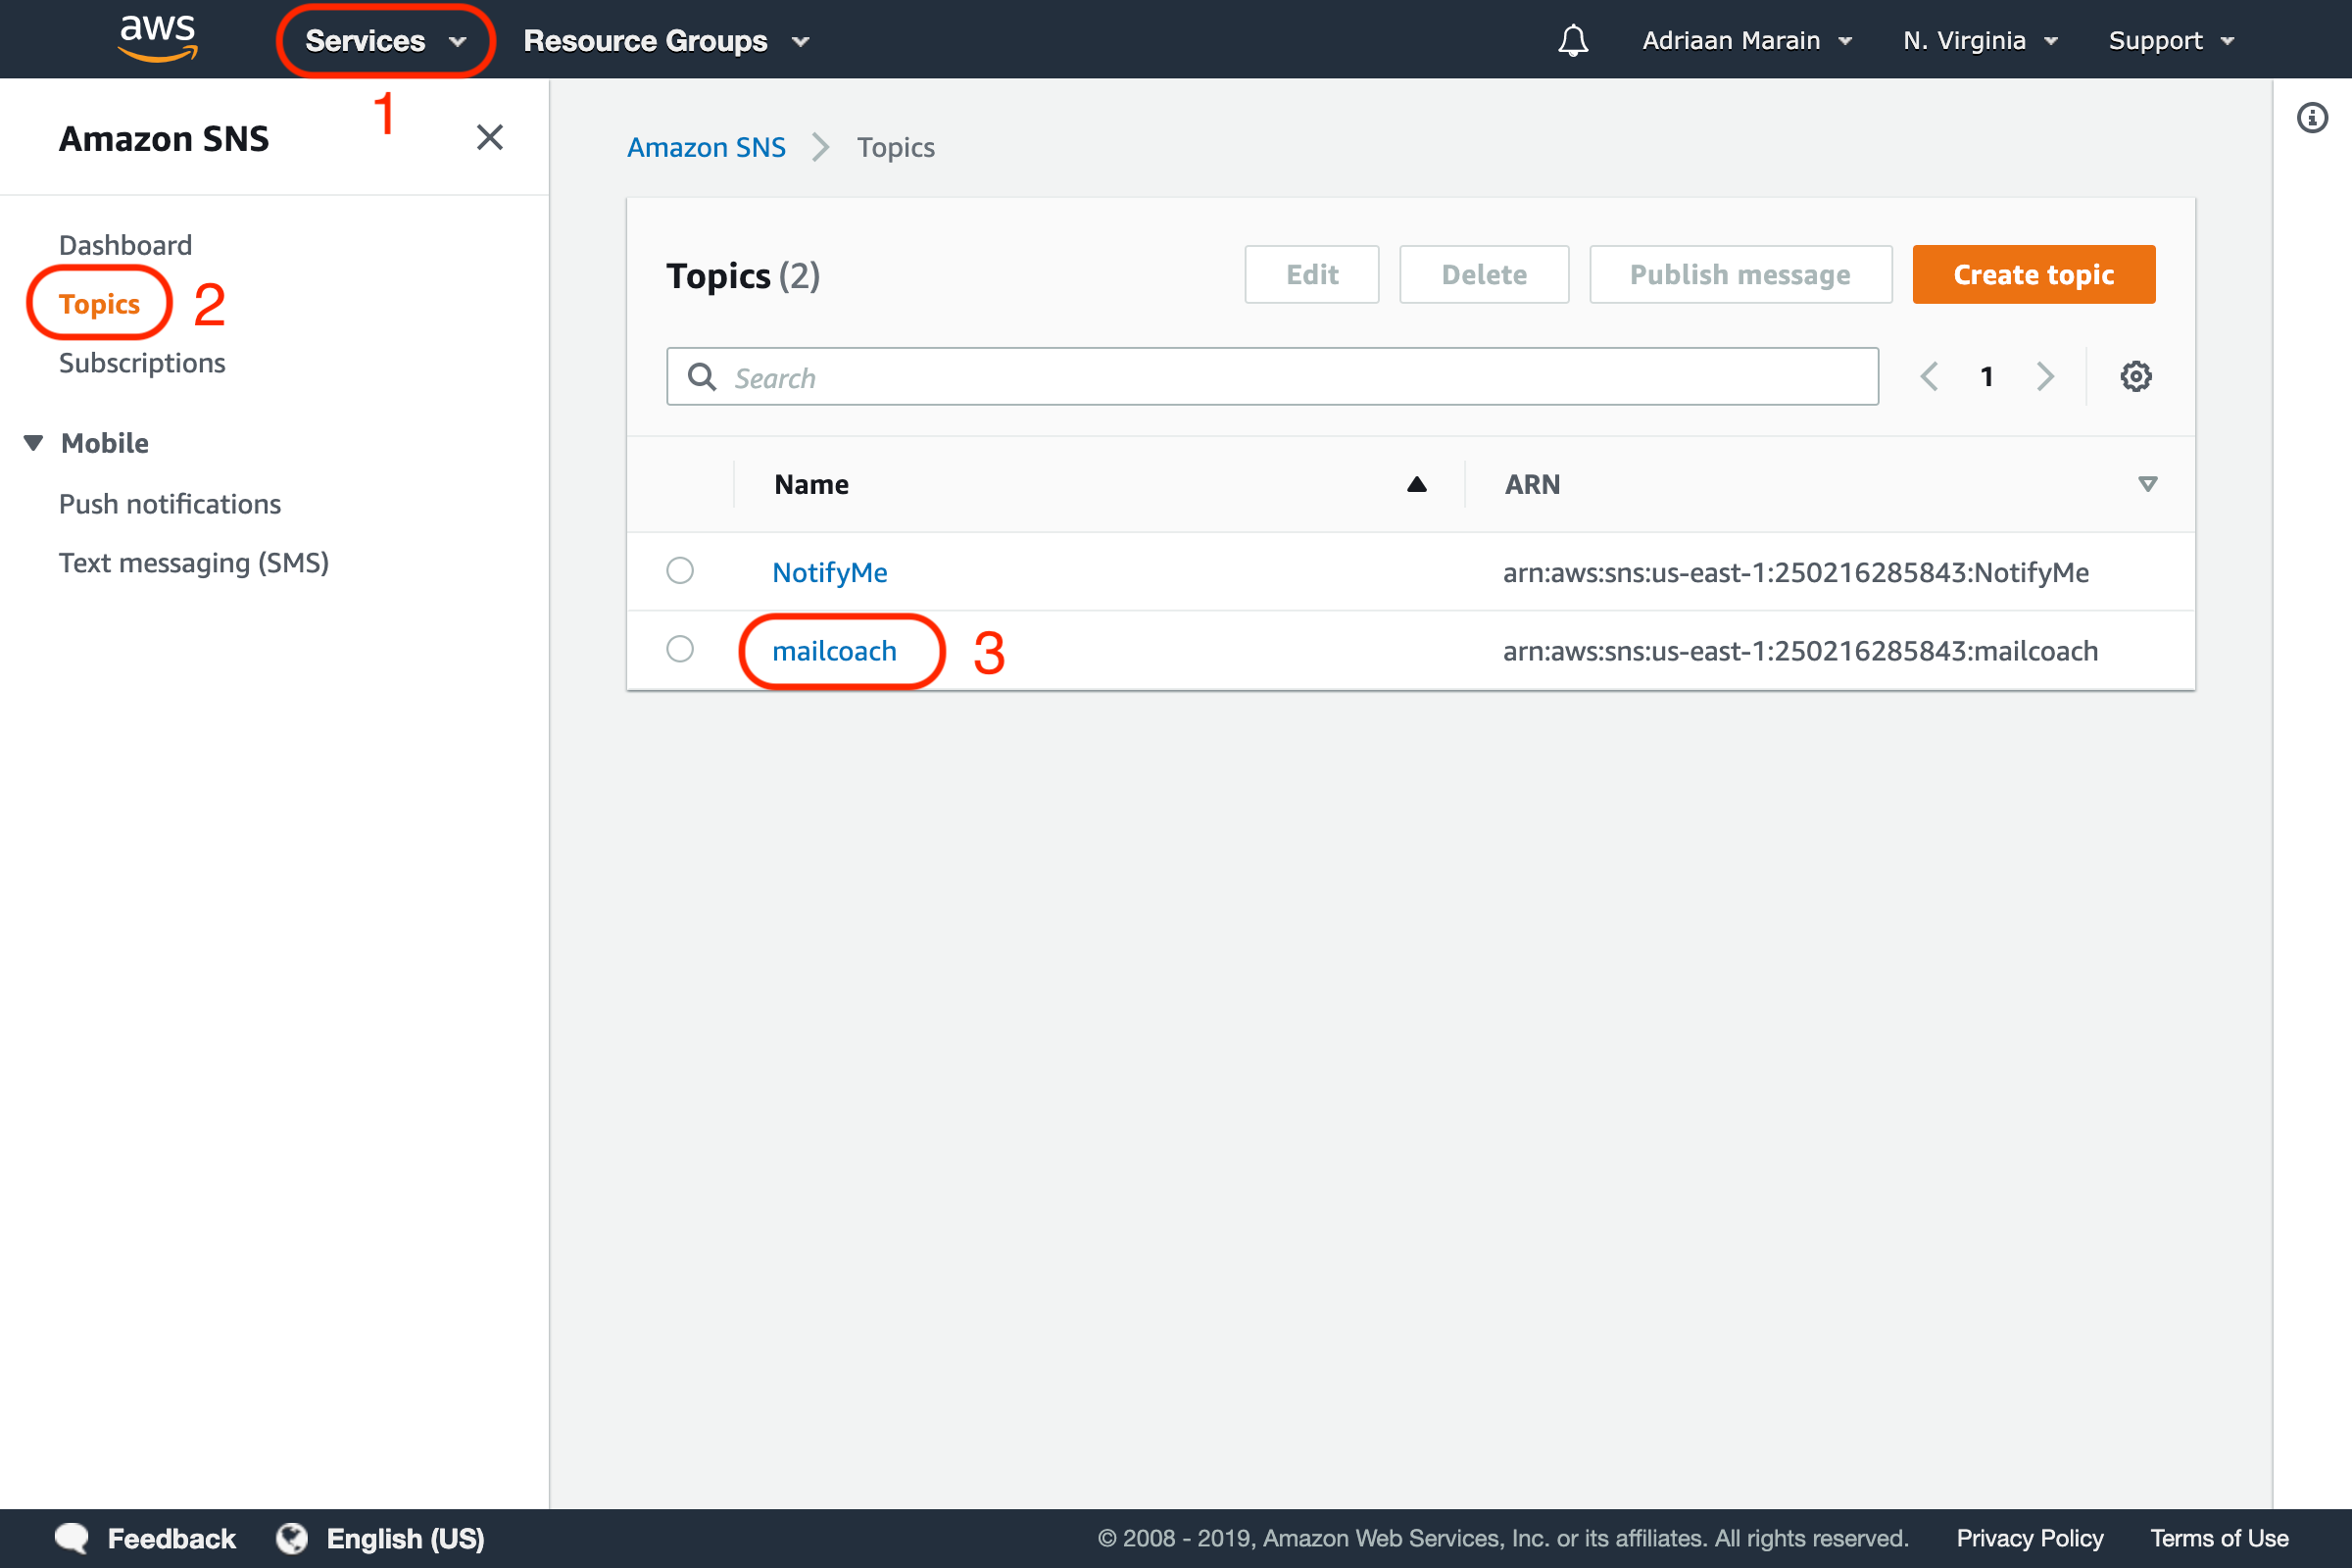
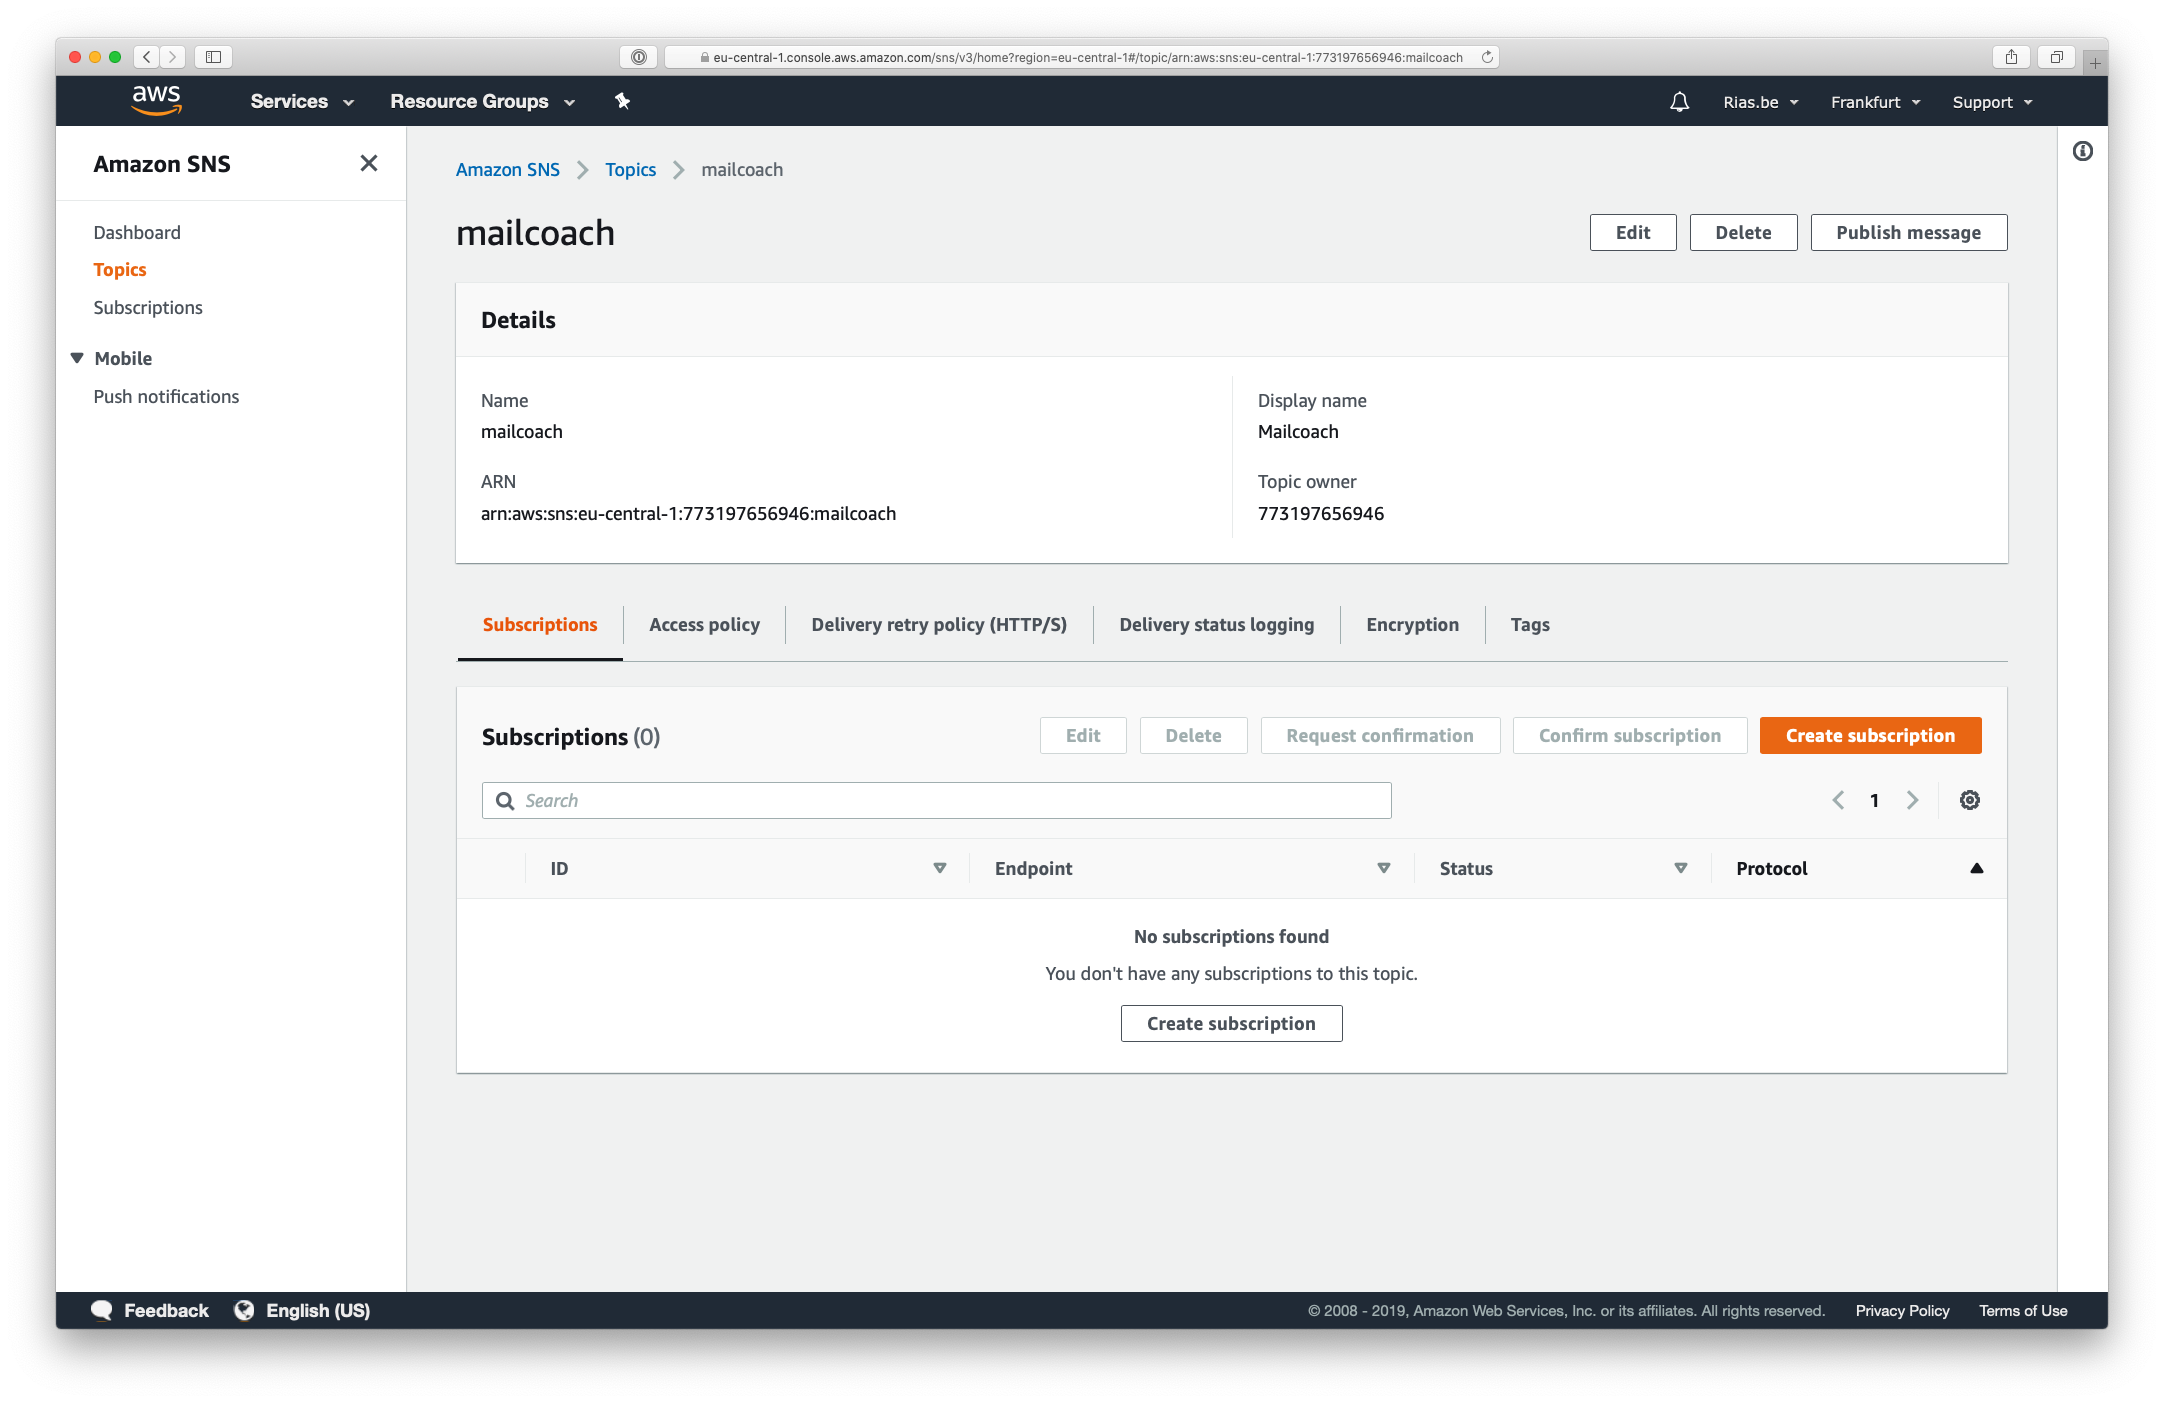
Now, go to Simple Notification Service (SNS) in your AWS dashboard to further configure the topic you just created. Open the Topics menu and select the topic.
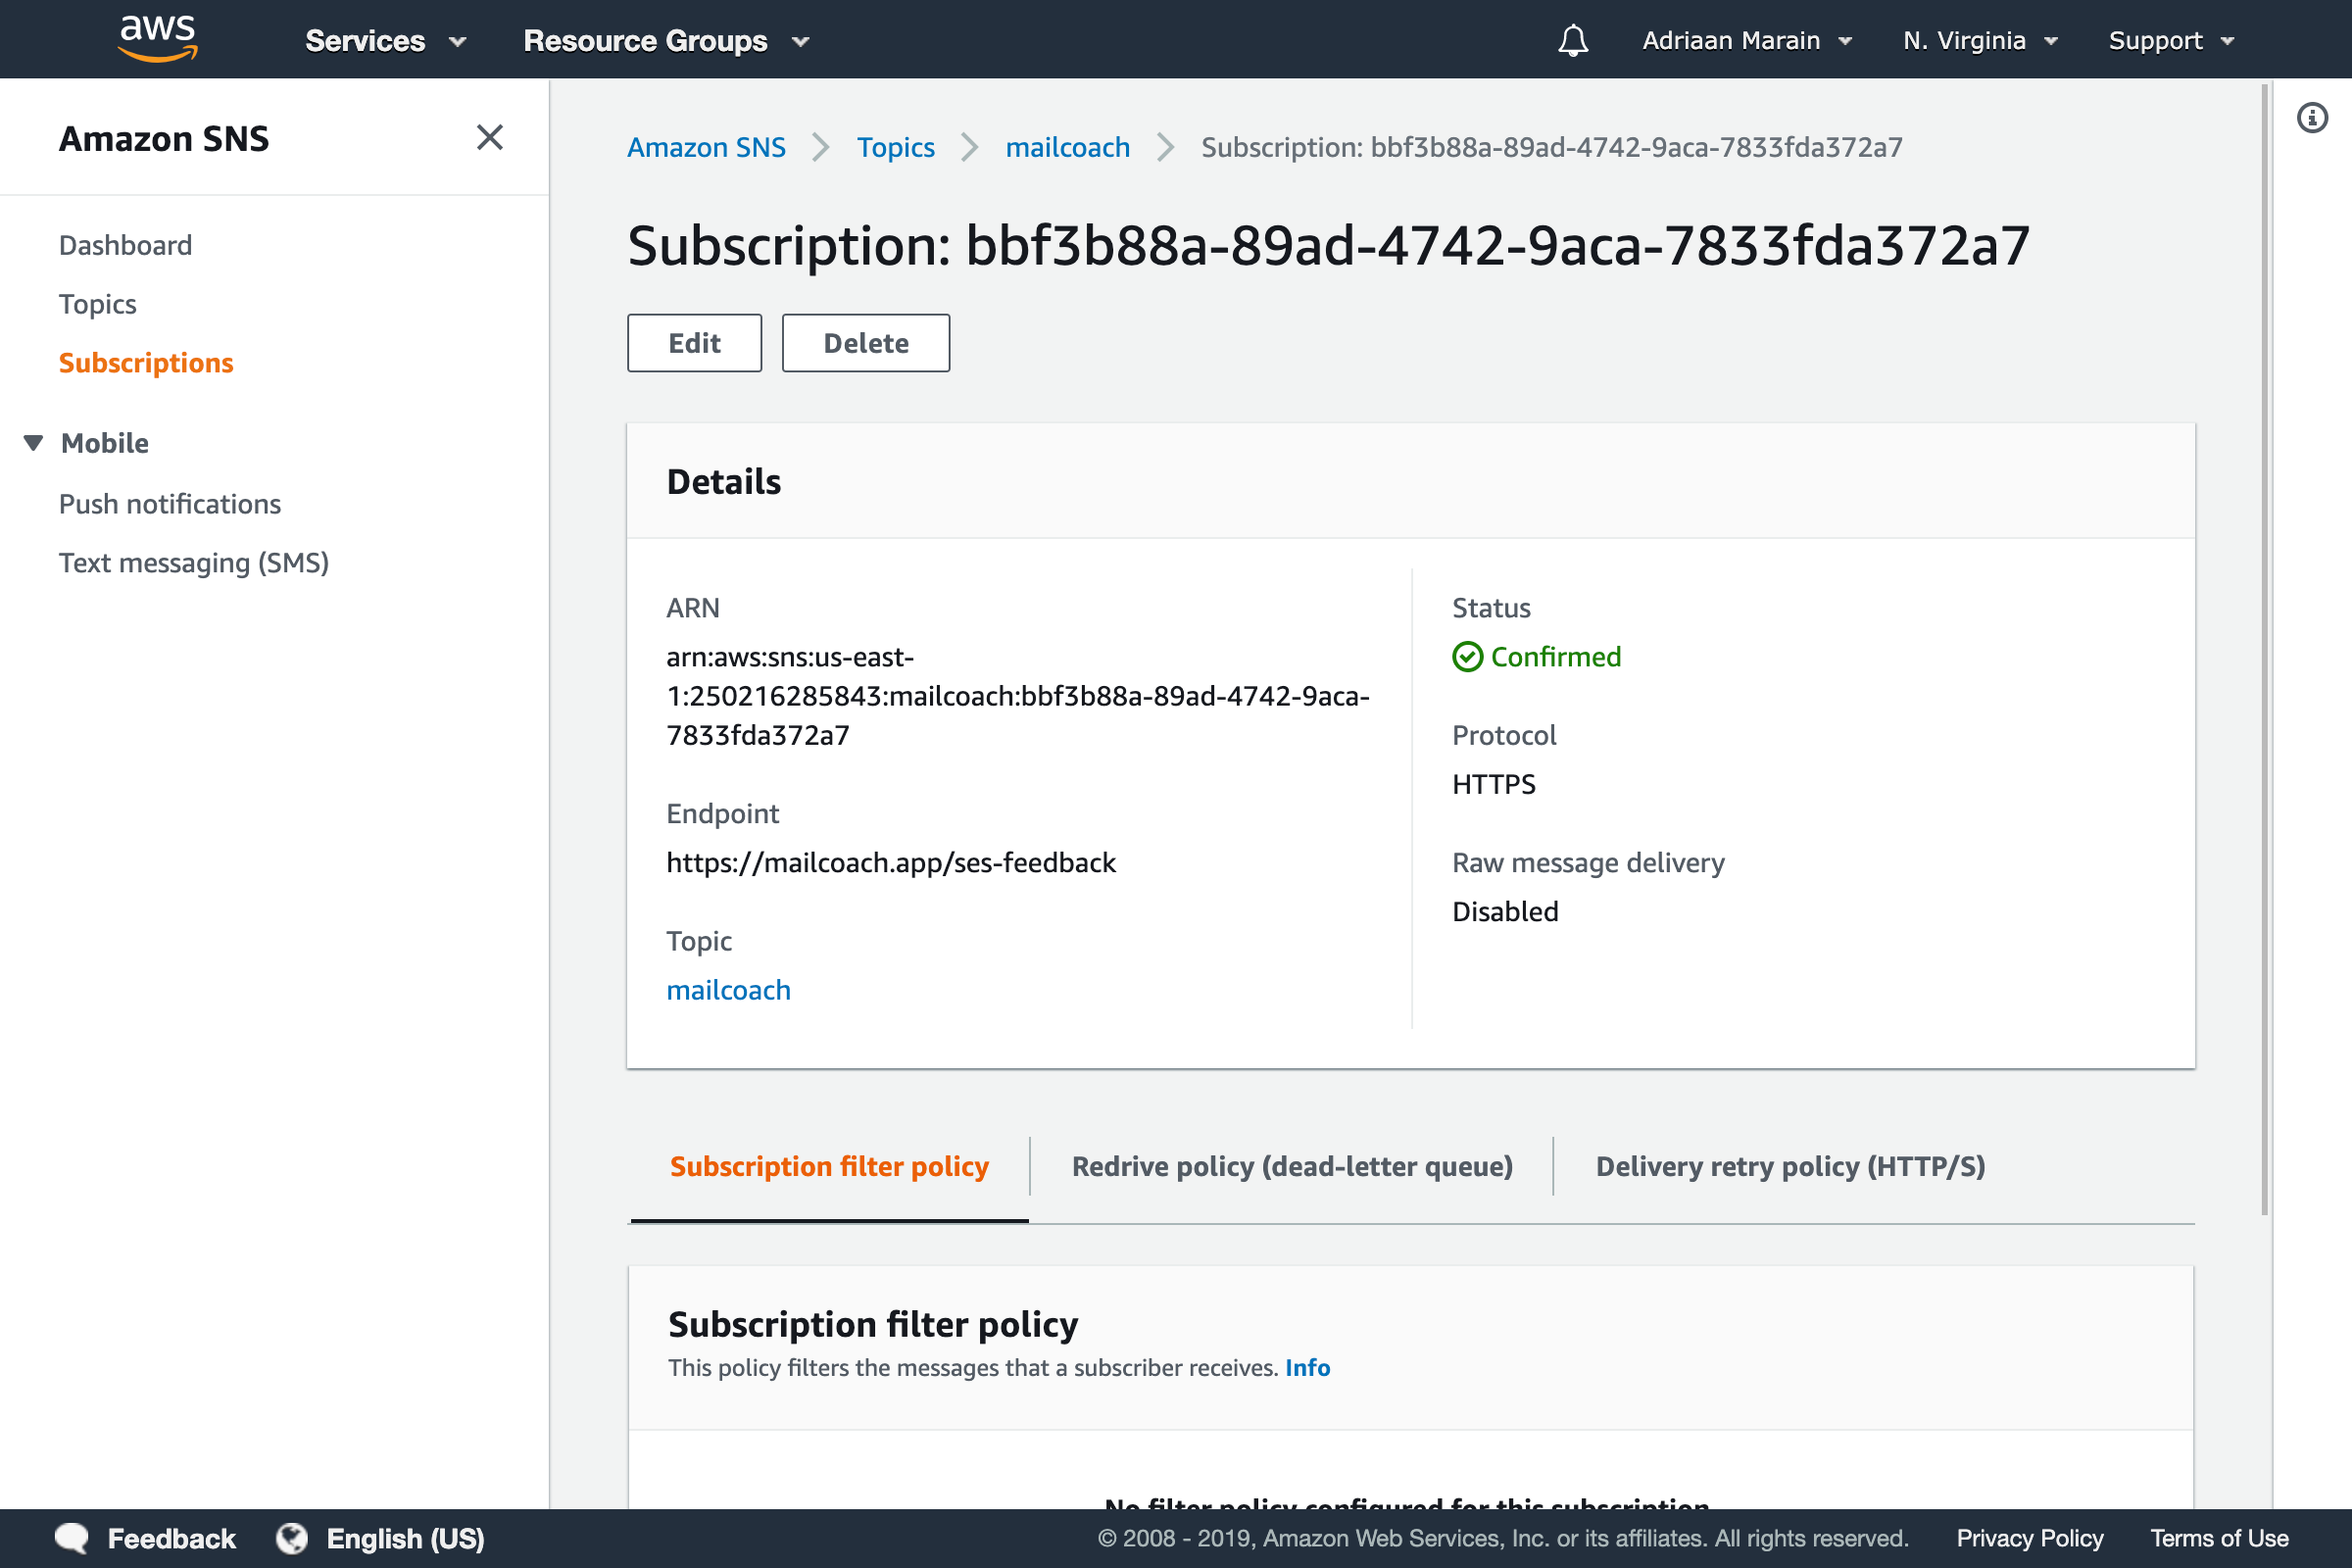
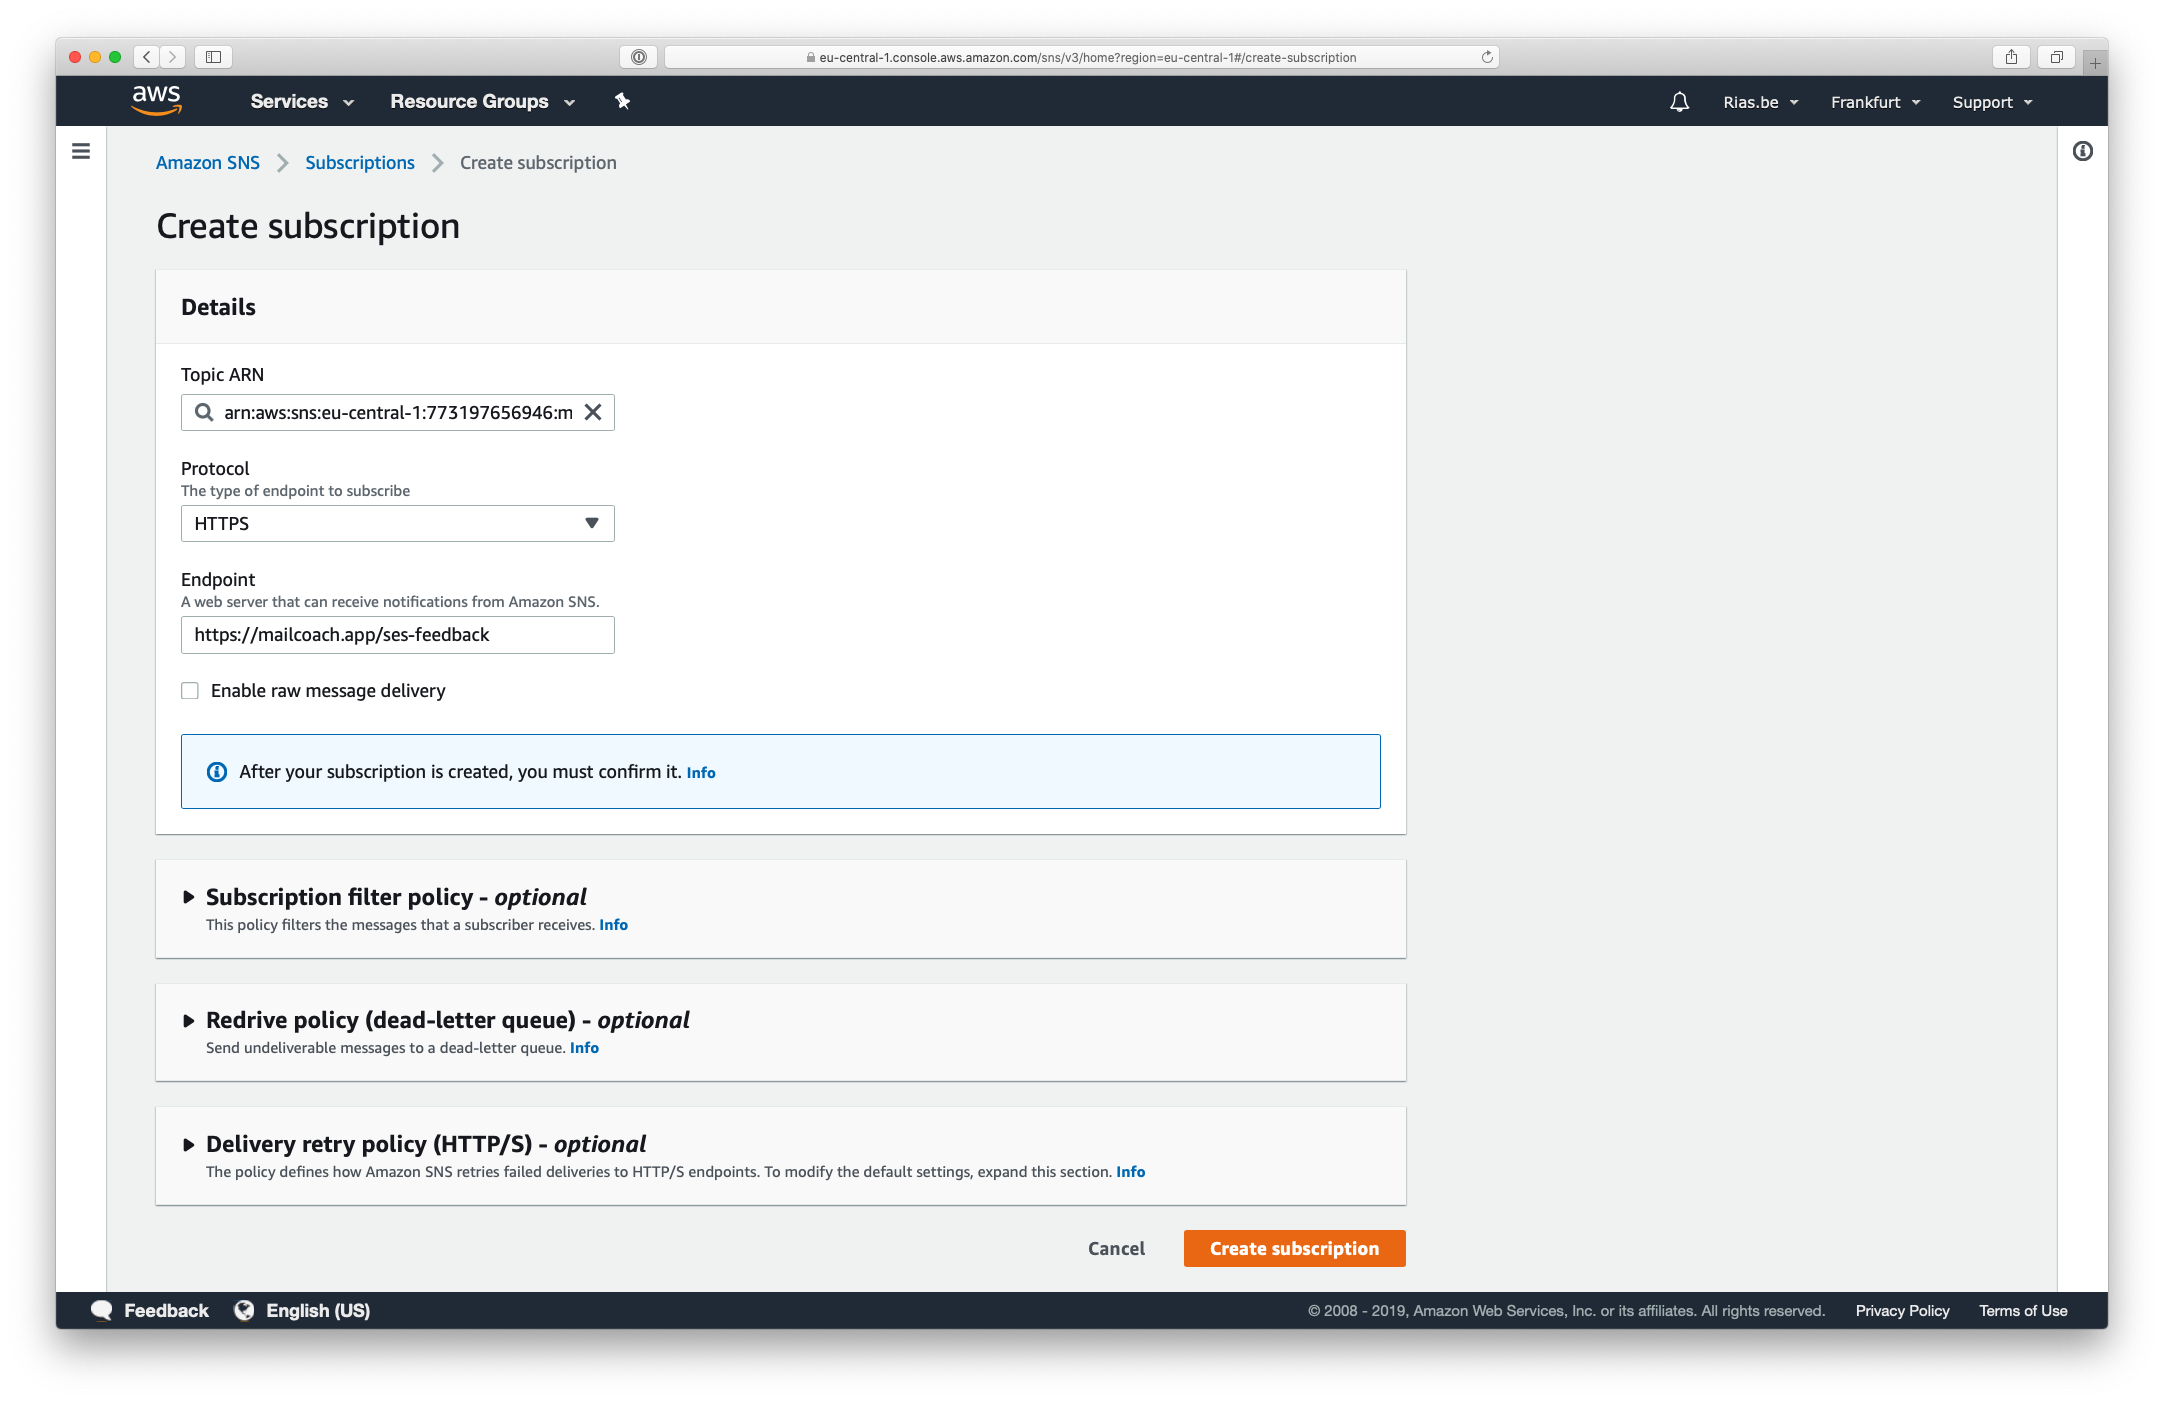
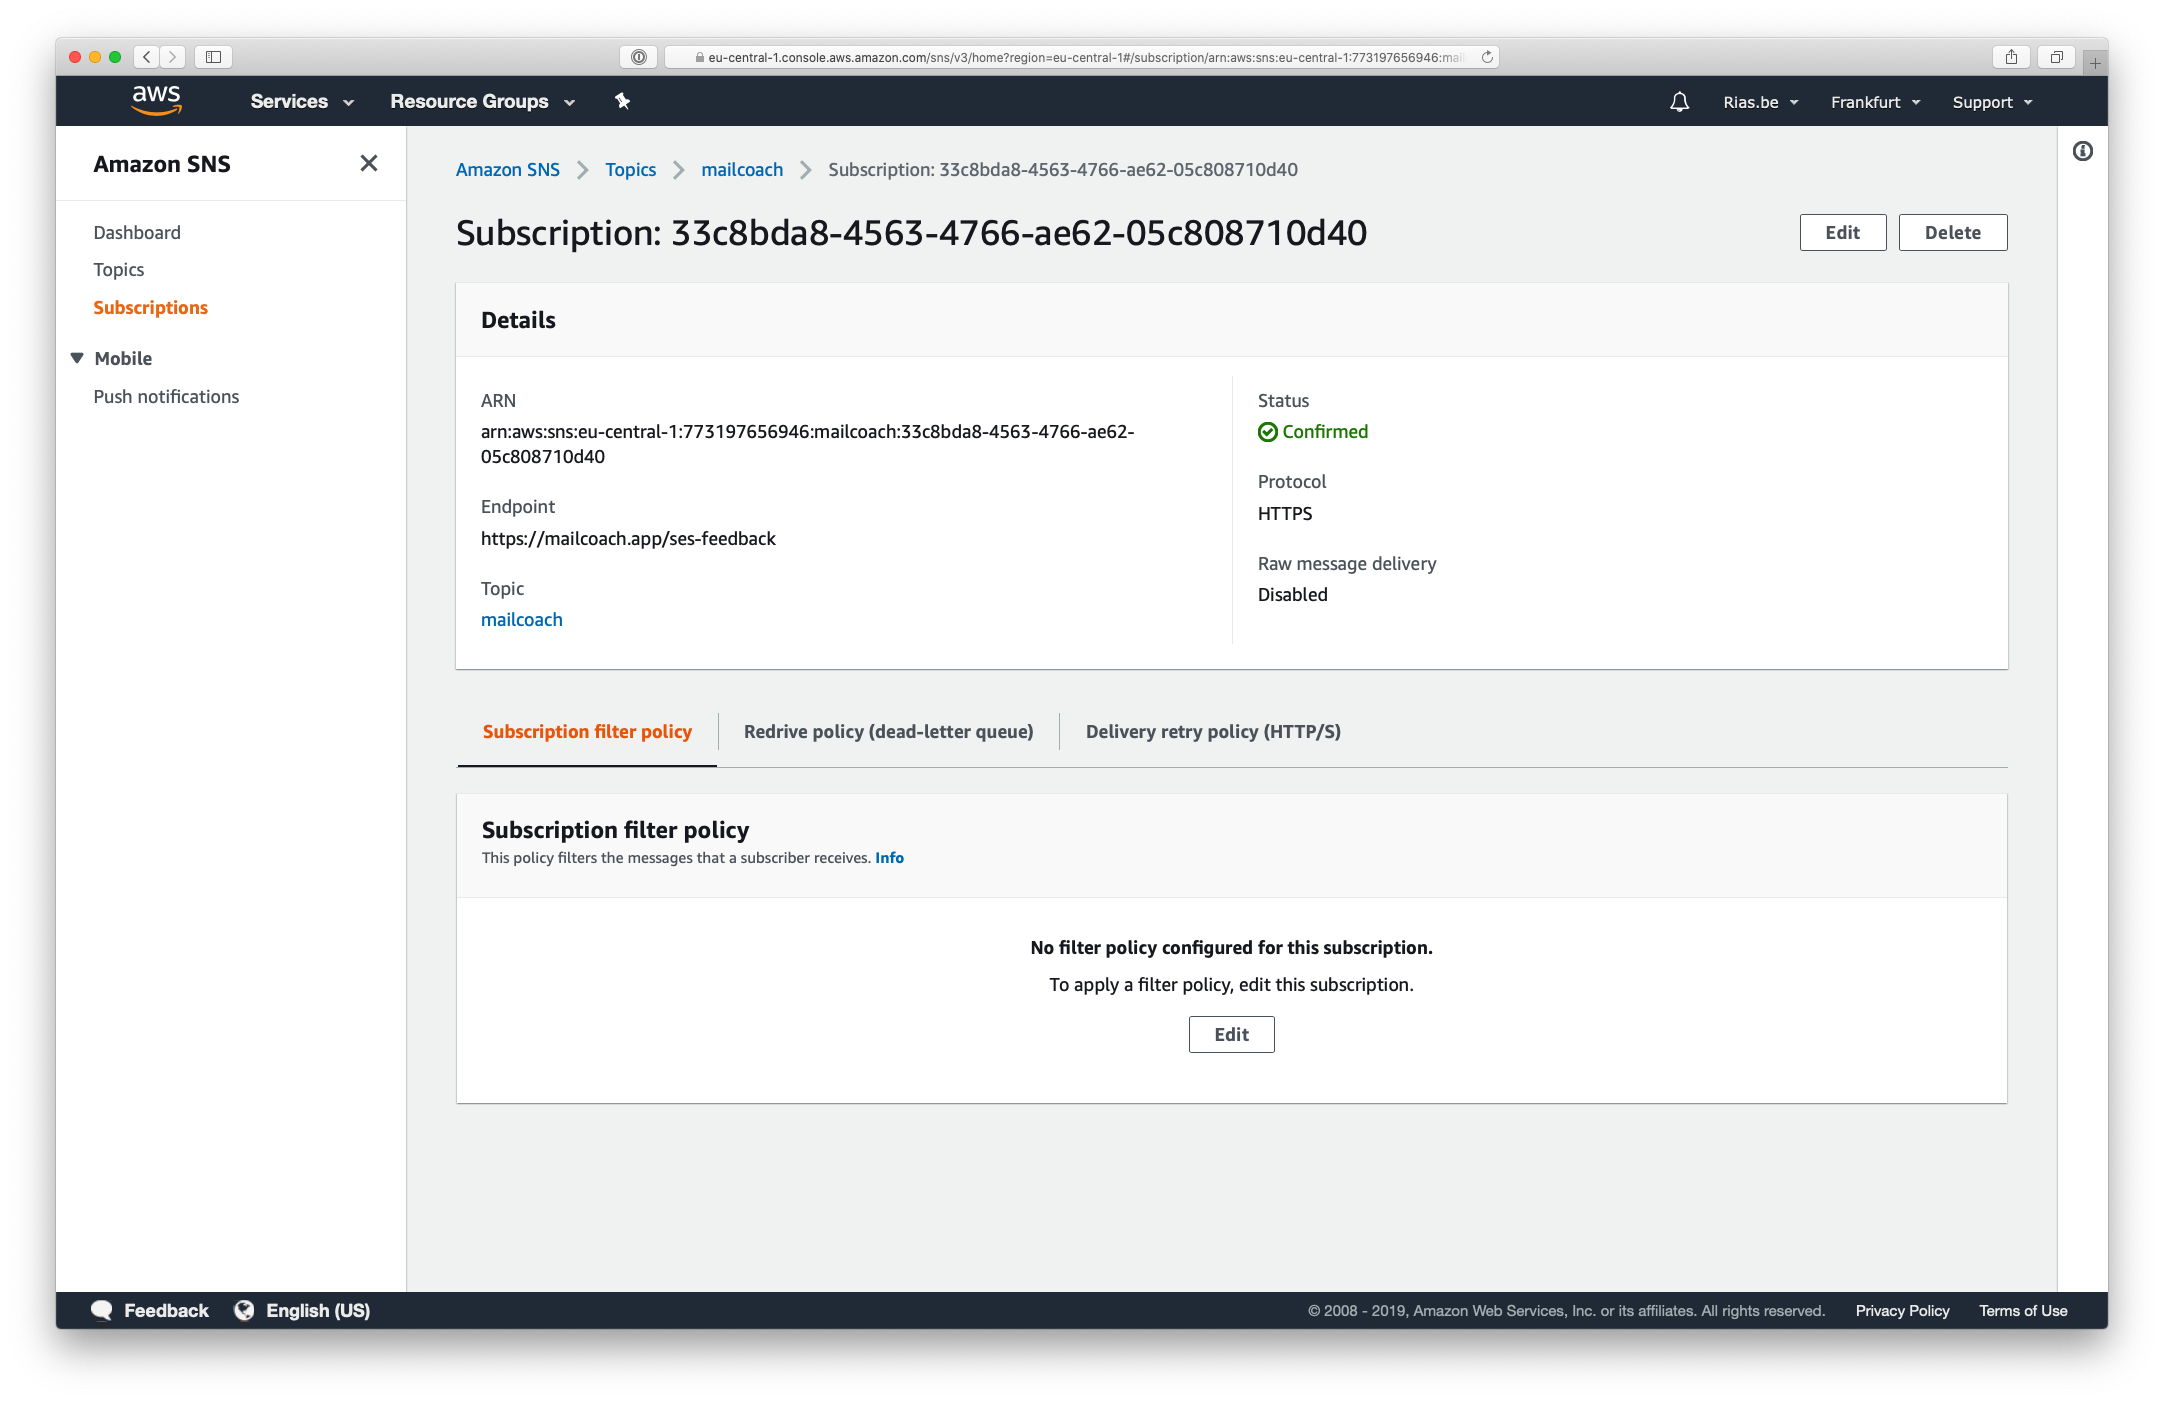
Press the Create subscription button on this page, choose the HTTPS protocol and enter the webhook URL that you can find on your Mailcoach Mail configuration page (https://YOUR-DOMAIN.com/ses-feedback):
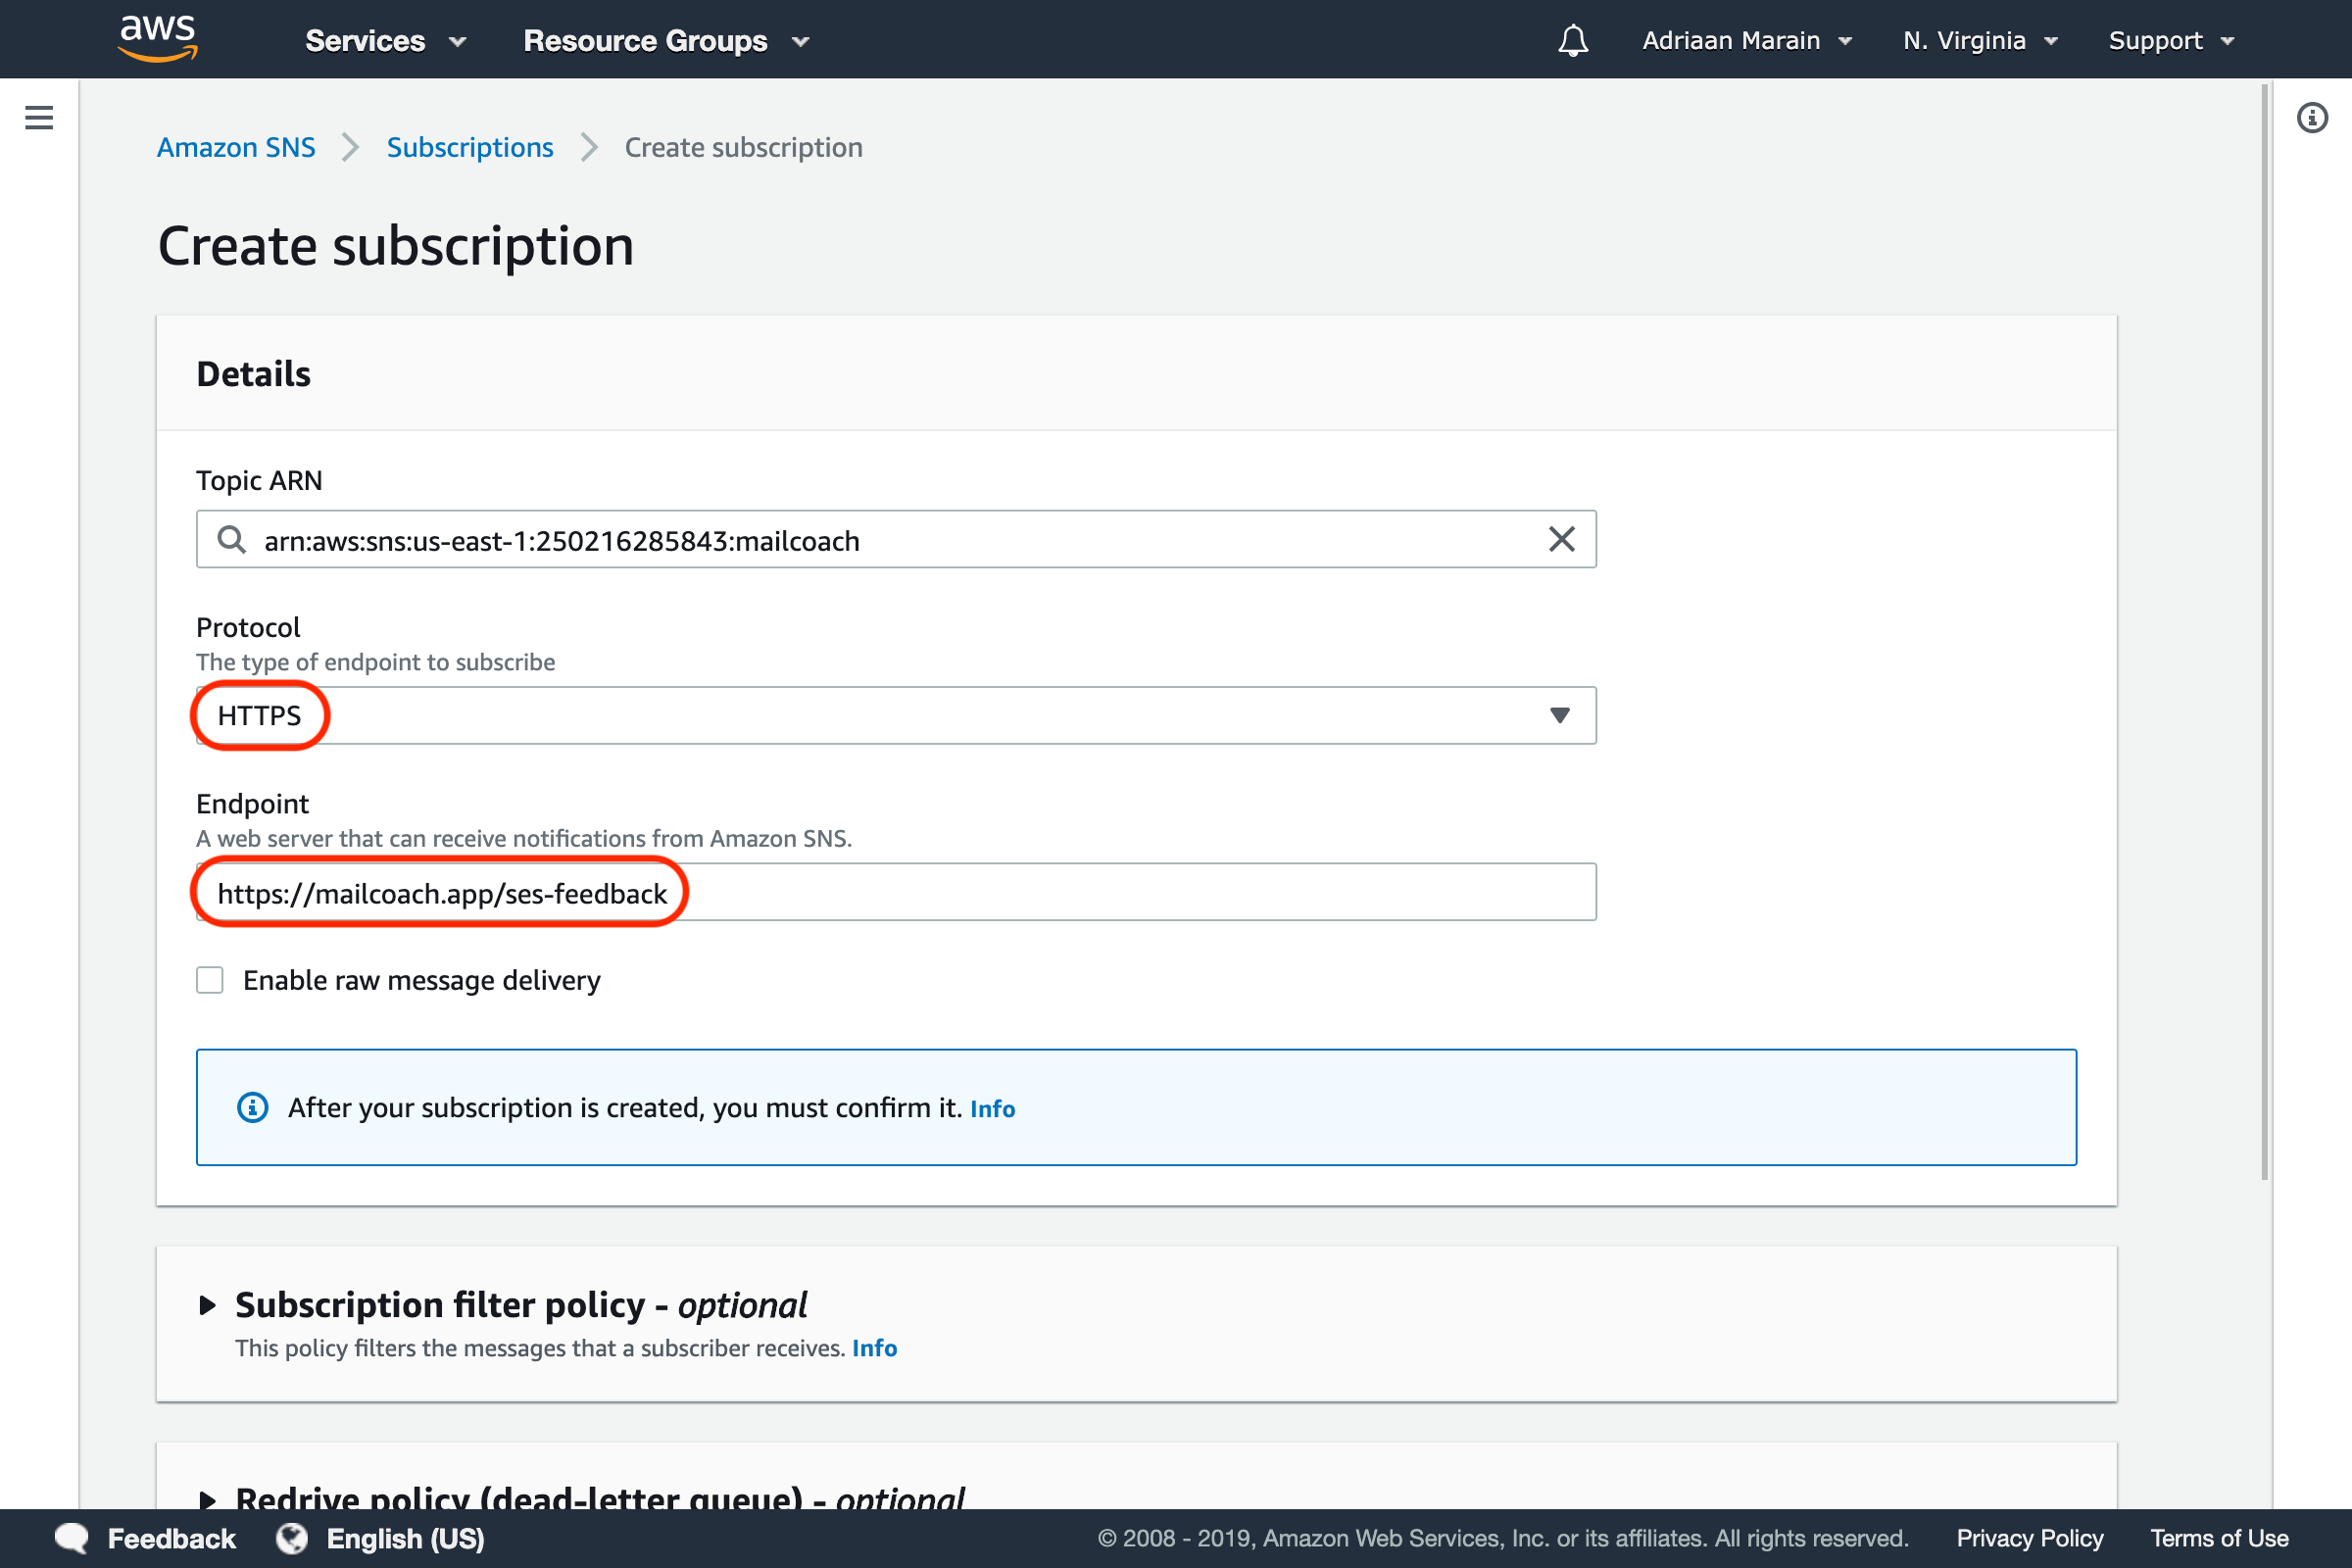
Scroll down and press the Create subscription button. If everything was configured correctly, the subscription should confirm itself and the Status should reflect this after a page refresh.
To complete your Amazon SES configuration, you need to enter your configuration set’s name and AWS region in your Mailcoach Mail configuration:
Your Amazon SES configuration should now be complete, you can go ahead and try sending a test mail. It may go to your spam if you have not set up your domain settings.
Note: If you have created a new Amazon SES account, you will need to request a sending limit change to have your account removed from the sandbox. Until your account is removed from the Amazon SES sandbox you will only be able to send emails to verified email addresses.
Handling Amazon SES feedback in an existing Laravel app
You should only follow these instructions when you’ve installed Mailcoach in an existing app.
laravel-mailcoach-ses-feedback can handle bounce feedback coming from SES. All e-mail addresses that permanently bounce will be unsubscribed from all lists.
You can install the add-on package via composer:
composer require spatie/laravel-mailcoach-ses-feedback:^3.0
Adding the webhooks route
You must use this route macro in your route service provider. Do NOT apply the web group middleware to this route as that would cause an unnecessary session to be started for each webhook call.
You can replace ses-feedback with any url you’d like.
Route::sesFeedback('ses-feedback');
Configuring webhooks at Amazon SES
Simple Email Service Setup
- In your AWS Management Console, create a configuration set if you haven’t already
- Add an SNS destination in the Event Destinations and make sure to check the event types you would like to receive
- Create a new topic for this destination
Simple Notification Service Setup
First, make sure your endpoint is accessible, if you’re installing this locally you’ll need to share your local environment using
valet shareor a service likengrok
- Create a subscription for the topic you just created, use
HTTPSas the Protocol - Enter the endpoint you just created the route for
- Do not check “Enable raw message delivery”, otherwise signature validation won’t work
- In Delivery retry policy (HTTP/S) make sure to set a limit in the Maximum receive rate setting,
5/ second is a good default as that is the default php-fpm pool size. - You can leave all other settings on their defaults
- Your subscription should be automatically confirmed if the endpoint was reachable
Setting the configuration name in your Laravel app
This package automatically adds the correct X-Configuration-Set header for Amazon SES to process feedback. Make sure the name of your configuration set is available under the mailcoach.ses_feedback.configuration_set configuration key.
Here’s an example for a configuration set that is named mailcoach:
// in config/mailcoach.php

'ses_feedback' => [
    'configuration_set' => 'mailcoach',
]
Using the correct mail driver
If you haven’t done so already, you must configure Laravel to use the Amazon SES driver. Follow the instruction in the mail section of the Laravel docs.