What are automations?
One of the standout features of Mailcoach is its capability to quickly and easily set up email automations and workflows.
Automations can be something simple, like sending a warm welcome email whenever someone signs up for your newsletter. A more advanced application would be something like a drip campaign. Popular among marketers where they send leads regular emails and track the performance of each email as they move through the sales funnel.
Check out our automations feature page to learn more about them!
How we built the workflow builder
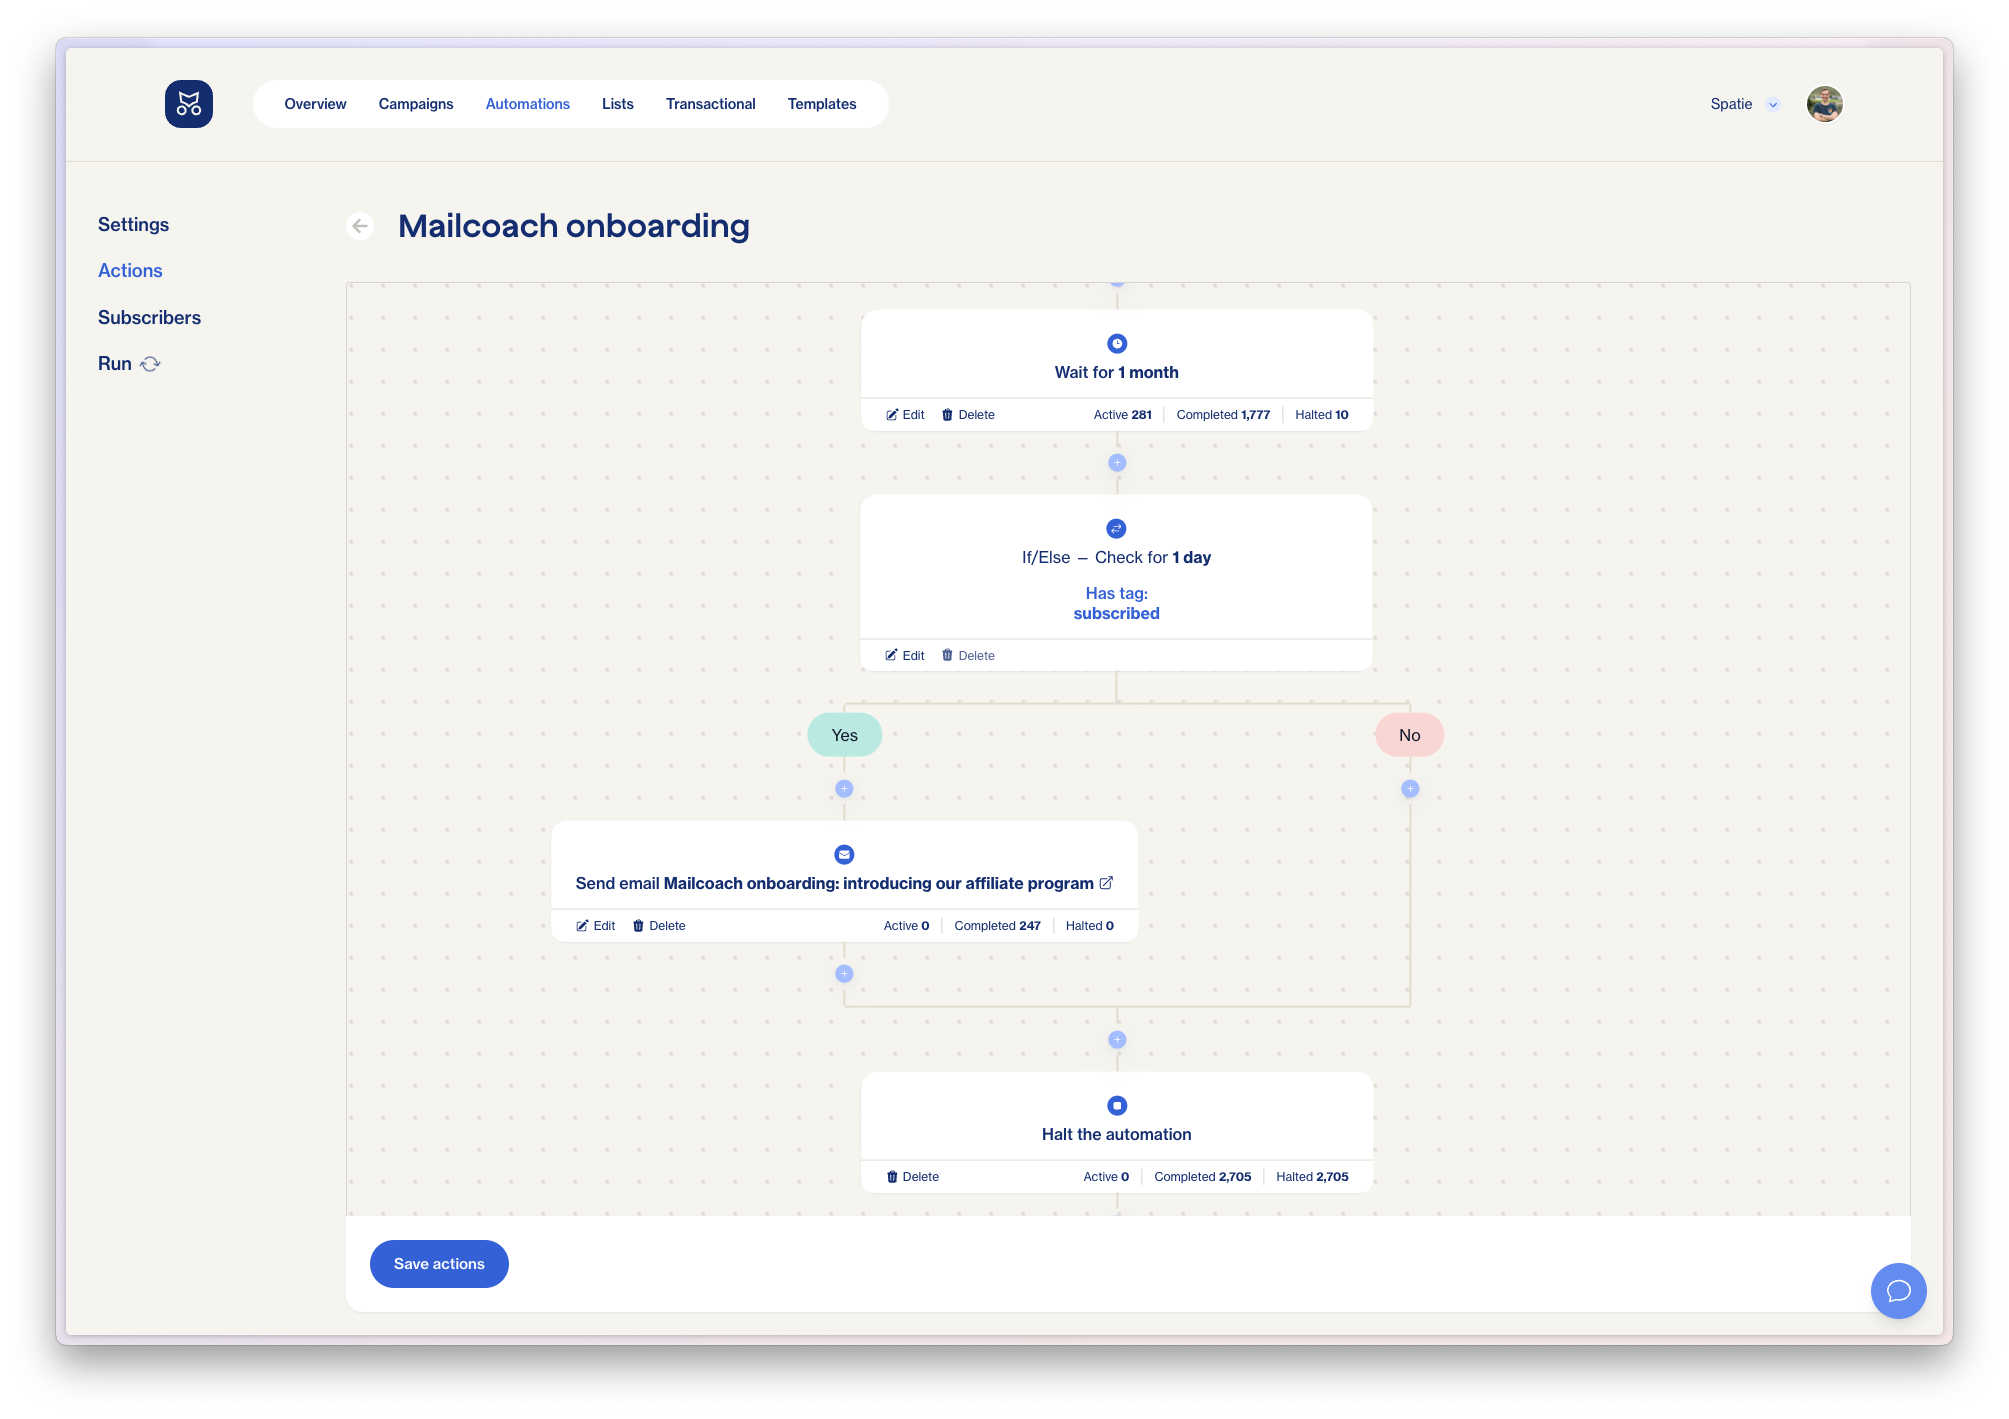
First off, let’s start with a screenshot of what our automation builder currently looks like with an example from our onboarding automation:

An automation is built out of a series of what we call “Actions”. Each action consists of a PHP class that has some logic on what to do based on the current subscriber that the action is running for, and a Livewire component to display the action in its various states (view / edit).
To explain how we made this layout, let’s start off with a basic example, of two actions in a flex container. Actions need a minimum width set for this layout to work consistently.
We’ve created the examples in Codepen, so you can click on the “HTML” button to see the source of each example.
See the Pen Untitled by Rias (@riasvdv) on CodePen.
Next, we’ll add the “+” button between each action. The button itself isn’t that special, but this is where we start drawing the lines between our actions. Each button section consists of three elements:
- Vertical line
- Button
- Vertical line
The button section itself is also a flex container with a flex-direction of column. This allows us to define a consistent gap for the elements.
See the Pen Builder - step 1 by Rias (@riasvdv) on CodePen.
This component to display a series of actions is extracted to an AutomationBuilderComponent in our codebase so we can re-use this, which comes in handy in the next step when we start nesting the builders.
Now, our automation builder wouldn’t be powerful if we just had a sequence of actions, although very useful for drip campaigns, we enjoy having a bit more logic in our automations.
Let’s add a more complicated if/else action as an example that branches the workflow. This uses the automation builder component in each branch to again display a series of actions.
This action starts of similar to the buttons, with a vertical line. After that, we create the two branches of the split. Each branch gets a minimum width of the same as a card width.
Each branch starts with a line that is half of the branch’s width, with a ml-auto in the left branch, and a mr-auto in the right branch. This causes the lines to end up nicely in the center of each branch and creates our visual split with lines that seem to connect.
See the Pen Builder - step 2 by Rias (@riasvdv) on CodePen.
After this, we create a nice Yes / No label surrounded by 2 lines, and the automation builder component is included again to start a new series of actions.
See the Pen Builder - step 3 by Rias (@riasvdv) on CodePen.
To finish things off, we have all these dangly lines that need to be connected at the bottom to create a cohesive workflow with a defined end.
Each branch will end with a vertical line, that uses flex-1 (or in css: flex: 1 1 0%) to grow or shrink to the full remaining height of the branch. In addition to that we add a horizontal line back to the center.
The final vertical line in the center and additional + button are part of the parent and not the branches or the if/else action. This way it’s clear where the action will be added once you click on the button.
See the Pen Builder - step 4 by Rias (@riasvdv) on CodePen.
The final puzzle piece is a library called panzoom which allows us to pan with gestures within the fixed width & height container that we’ve defined.
Using fixed widths for the actions, and a minimum width for each branch, makes sure that the actions grow consistently. Extracting actions and the automation builder to components, makes for quick and predictable nesting.