Securing your online communication is more crucial than ever. Email, a primary means of communication, is very often targeted by malicious actors attempting to engage in deceptive communication to trick you into revealing sensitive information (phishing) or falsifying information or identity (spoofing). I am sure we have all been on the receiving end of one of these emails.
To increase the security of your email communication, it is essential to implement authentication mechanisms like SPF (Sender Policy Framework) and DKIM (DomainKeys Identified Mail). In this blog post, we will set up SPF and DKIM DNS records for your domain.
Understanding SPF
SPF (Sender Policy Framework) is an email authentication protocol that allows email senders to prove they are legitimate by specifying which servers are authorized to send email on behalf of the sender.
Let’s walk through how you would set up SPF for your domain.
You will first need to log into the control panel provided by your domain registrar or hosting provider. This is where you manage your domain’s DNS settings.
Then, find the option that allows you to manage DNS settings. Depending on your provider, this might be named “DNS settings,” “DNS management,” or a similar term.
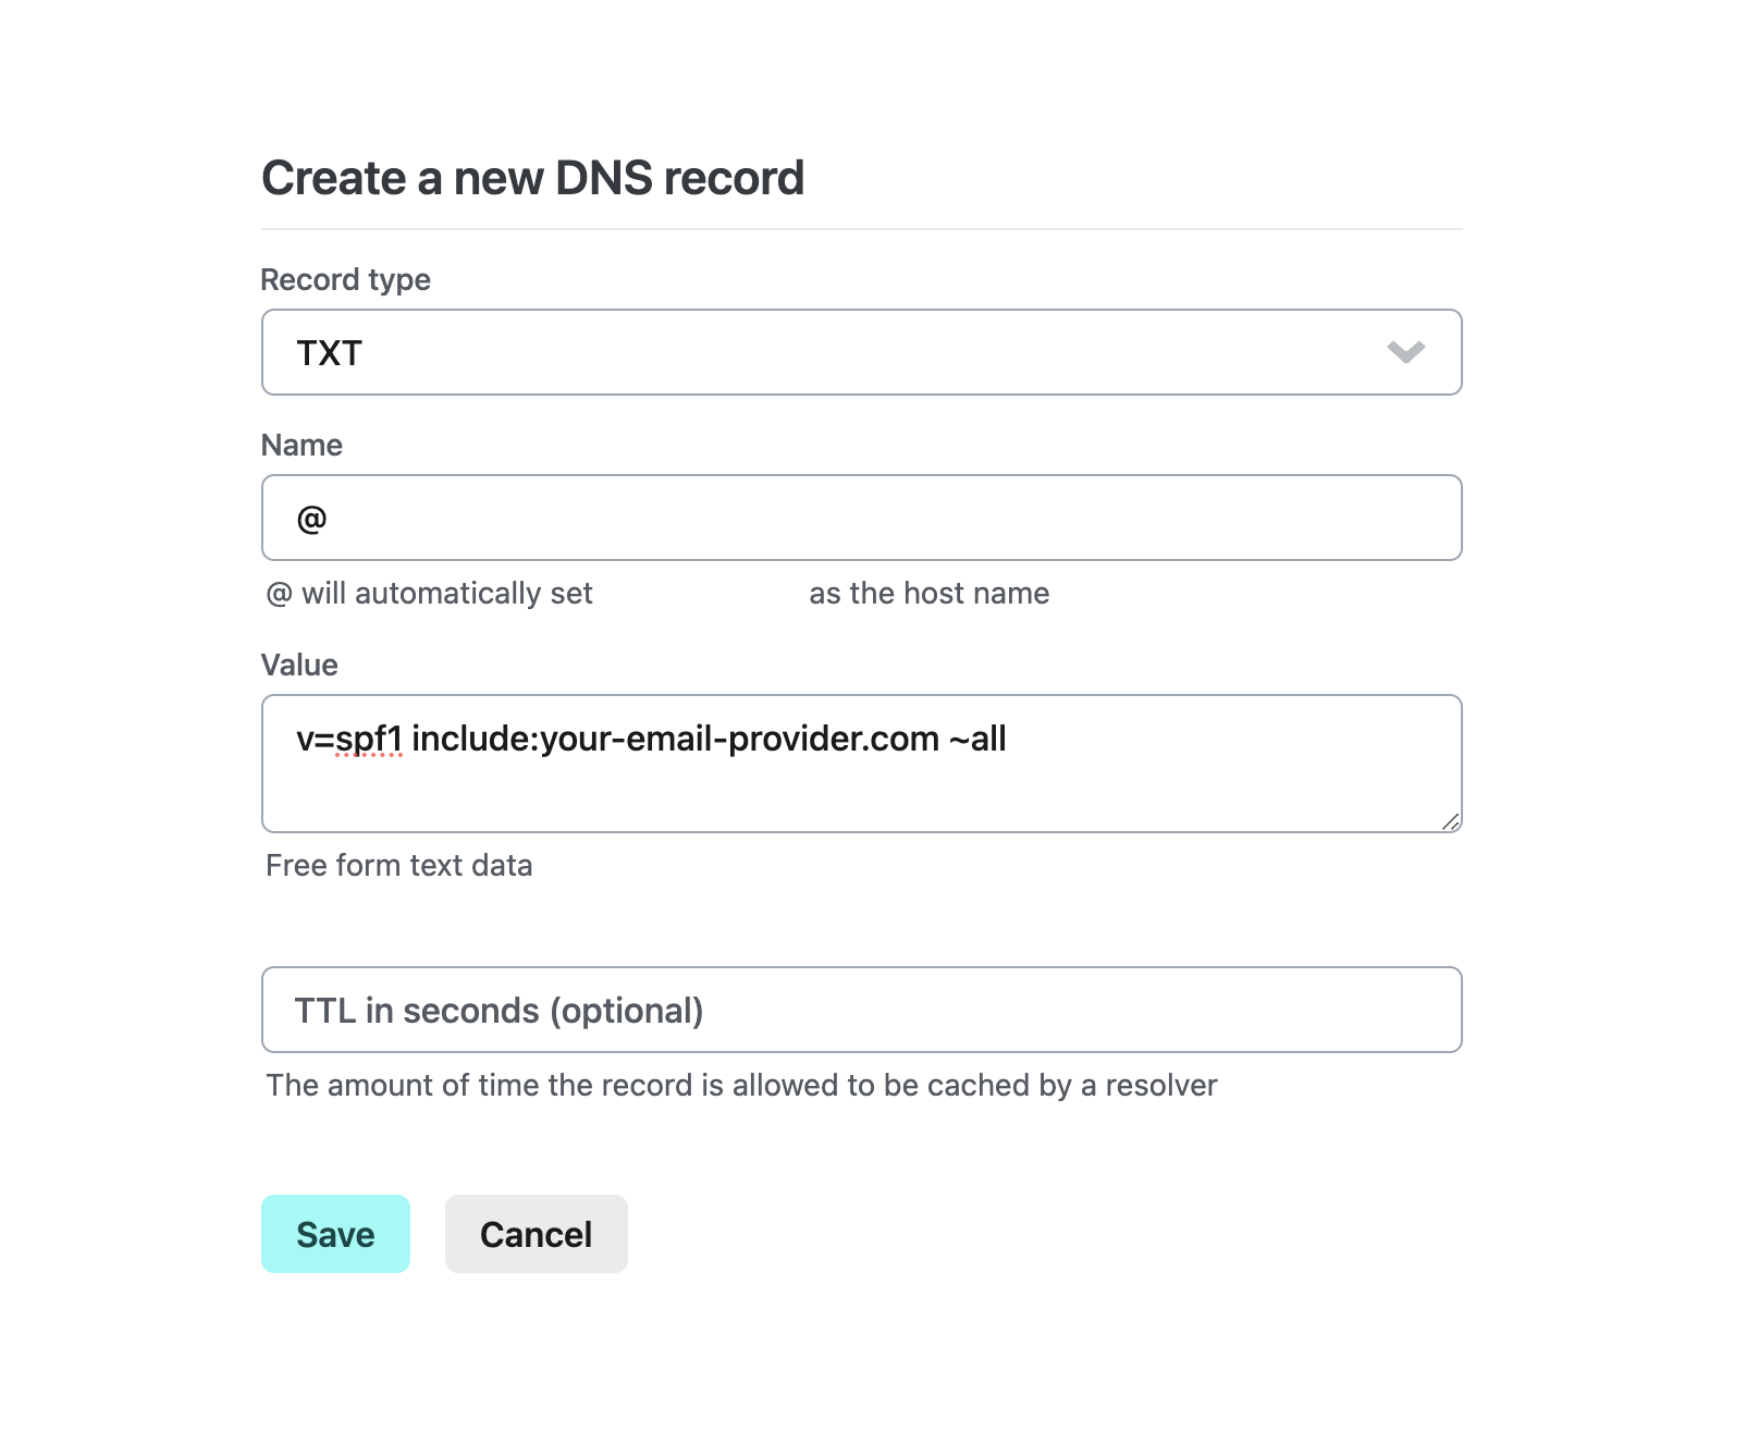
If there’s already an SPF record, edit it. Otherwise, create a new TXT record. You will need to enter your domain in the “Name” or “Host” field (usually represented by @ for the root domain). In the “Value” or “Text” field, input your SPF record. For example:
v=spf1 include:your-email-provider.com ~all
You will need to replace your-email-provider.com with your own email provider’s domain. The form might look something like this:
Finally, save the changes, and the new SPF record will propagate through DNS, enhancing the authentication of your outgoing emails. The propagation might take some time, from a few hours to a maximum of 48 hours.
Implementing DKIM
DKIM, or DomainKeys Identified Mail, is an email authentication method that helps verify the authenticity and integrity of email messages. DKIM helps ensure that an email message was not altered during transit and originated from the claimed sender’s domain. It works by adding a digital signature to the header of an outgoing email.
For DKIM to work, there must be a key pair - a private key and a public key. You will need to generate the key pair by logging in to your email provider’s administration interface and looking for an option to generate DKIM keys, usually found in the email settings or security section.
Once you generate the keys, you will need to retrieve the DKIM public key. This is typically presented as a lengthy string of characters.
You will need to go back to your DNS management console to add a new DKIM record. To do that, create a new TXT record with the following format:
-
The “Name” or “Host” field should be something like
_domainkey.yourdomain.com -
In the “Value” or “Text” field, paste the DKIM public key obtained earlier
Once set, save the changes, and the new DKIM record will be added to your DNS configuration.
Finally, you will need to go back to your email provider’s interface and verify and activate DKIM.
Making sure everything is set up correctly
You will need to test that everything has been set correctly. You can use various online tools to verify the validity of your SPF and DKIM record, but remember to allow time for DNS changes to propagate.
You may think a lot was needed to set up SPF and DKIM. And you are right; email security is not for the faint of heart. But know that following these steps will strengthen your email communication’s security and reduce the risk of email-related attacks. You will thank yourself later.
The good news is that Mailcoach will try to set up as much as possible for you via the email providers’ API when configuring email providers. Our user interface will also show if all DNS records are set up correctly.
If that sounds like something you want to explore, you can try Mailcoach for free! New customers get a 14-day trial, and no credit card is required to sign up. Check out our documentation for more information, or contact us via support@mailcoach.app with any questions.