
Transactional emails are emails triggered by user behavior, such as a password reset email, or by an action such as an order being created or a product being shipped.
These emails play a key role in customer experience which makes it especially important that the emails are sent on time and contain the correct information.
While developing your application, you should test the transactional email flow to make sure the content and timing of the emails are just as expected. You could use a third party service like Mailtrap, Mailhog, or Mailpit to test the flow. Or you could just use Mailcoach to test everything up to the point of the final delivery!
Create a new post used Artisan command
Let’s say you want to send a notification every time a blog post is created. For the purposes of this tutorial, we will create a post using an artisan command, rather than using a form.
<?php

namespace App\Console\Commands;

use App\Models\Post;
use Illuminate\Console\Command;
use Illuminate\Support\Facades\Http;

class CreatePost extends Command
{
    /**
    * The name and signature of the console command.
    *
    * @var string
    */

    protected $signature = 'app:create-post';

    /**
    * The console command description.
    *
    * @var string
    */
    protected $description = 'Send a notification email every time a post is created';

    /**
    * Execute the console command.
    */

    public function handle()
    {
    $post = Post::factory()->create([
        'title' => 'Zuzana Post - #' . rand(1, 100),
    ]);

    $this->info('Created a new post... ' . $post->title);

    return 0;

    }
}
In here, we are using the Post factory to create a post and once the post is created, we return the text Created a new post... Zuzana post #1 in the terminal.
We can run the command in the terminal by running php artisan app:create-post.
Send a “fake” transactional email
Now that this is done, let’s implement the transactional email flow. When the post is created, we will fire a sendTransactionalEmail($post) method and pass in the newly created post.
The method will look like this:
public function sendTransactionalEmail($post)
{
    $apiKey = env('MAILCOACH_API_KEY');

    Http::withToken($apiKey)
        ->acceptJson()
        ->contentType('application/json')
        ->post('https://zuzana-k.mailcoach.app/api/transactional-mails/send', [
            'mail_name' => 'Testing',
            'subject' => $post->title,
            'from' => 'contact@zuzana-k.com',
            'to' => 'test@example.com',
            'fake' => true,
            'template_uuid' => '204be8d5-04d9-43c5-9e1a-a62f9312a89b',
        ]);

}
We make a HTTP POST request to the /api/transactional-mails/send endpoint and pass in the following required data:
mail_nameis the name of your transactional list. You will need to create a list in the Mailcoach dashboard before you test this code.subject- the subject of the emailfrom,to,cc,bcc- you can specify which email addressesfake- this is the important part. By setting this value true, Mailcoach will not send the email, it will just log it in the Mailcoach dashboard. If you don’t set this to true, the notification email will be sent to the final recipient.template_uuid- you can find this UUID in your list’s setting:
The full list of parameters you can pass in to the request is in the Mailcoach API documentation.
Finally, call this method just after the post is created. The final code will look like this:
<?php

namespace App\Console\Commands;

use App\Models\Post;
use Illuminate\Console\Command;
use Illuminate\Support\Facades\Http;

class CreatePost extends Command
{
    /**
    * The name and signature of the console command.
    *
    * @var string
    */

    protected $signature = 'app:create-post';

    /**
    * The console command description.
    *
    * @var string
    */
    protected $description = 'Send a notification email every time a post is created';

    /**
    * Execute the console command.
    */

    public function handle()
    {
        $post = Post::factory()->create([
        	'title' => 'Zuzana Post - #' . rand(1, 100),
        ]);

        $this->sendTransactionalEmail($post);

        $this->info('Created a new post... ' . $post->title);

        return 0;

    }

    public function sendTransactionalEmail($post)
    {
        $apiKey = env('MAILCOACH_API_KEY');

        Http::withToken($apiKey)
            ->acceptJson()
            ->contentType('application/json')
            ->post('https://zuzana-k.mailcoach.app/api/transactional-mails/send', [
                'mail_name' => 'Testing',
                'subject' => $post->title,
                'from' => 'contact@zuzana-k.com',
                'to' => 'test@example.com',
                'fake' => true,
                'template_uuid' => '204be8d5-04d9-43c5-9e1a-a62f9312a89b',
        ]);

    }
}
Let’s test it by running php artisan app:create-post in the terminal and check the Mailcoach dashboard. The email is in the log - ready to be reviewed.
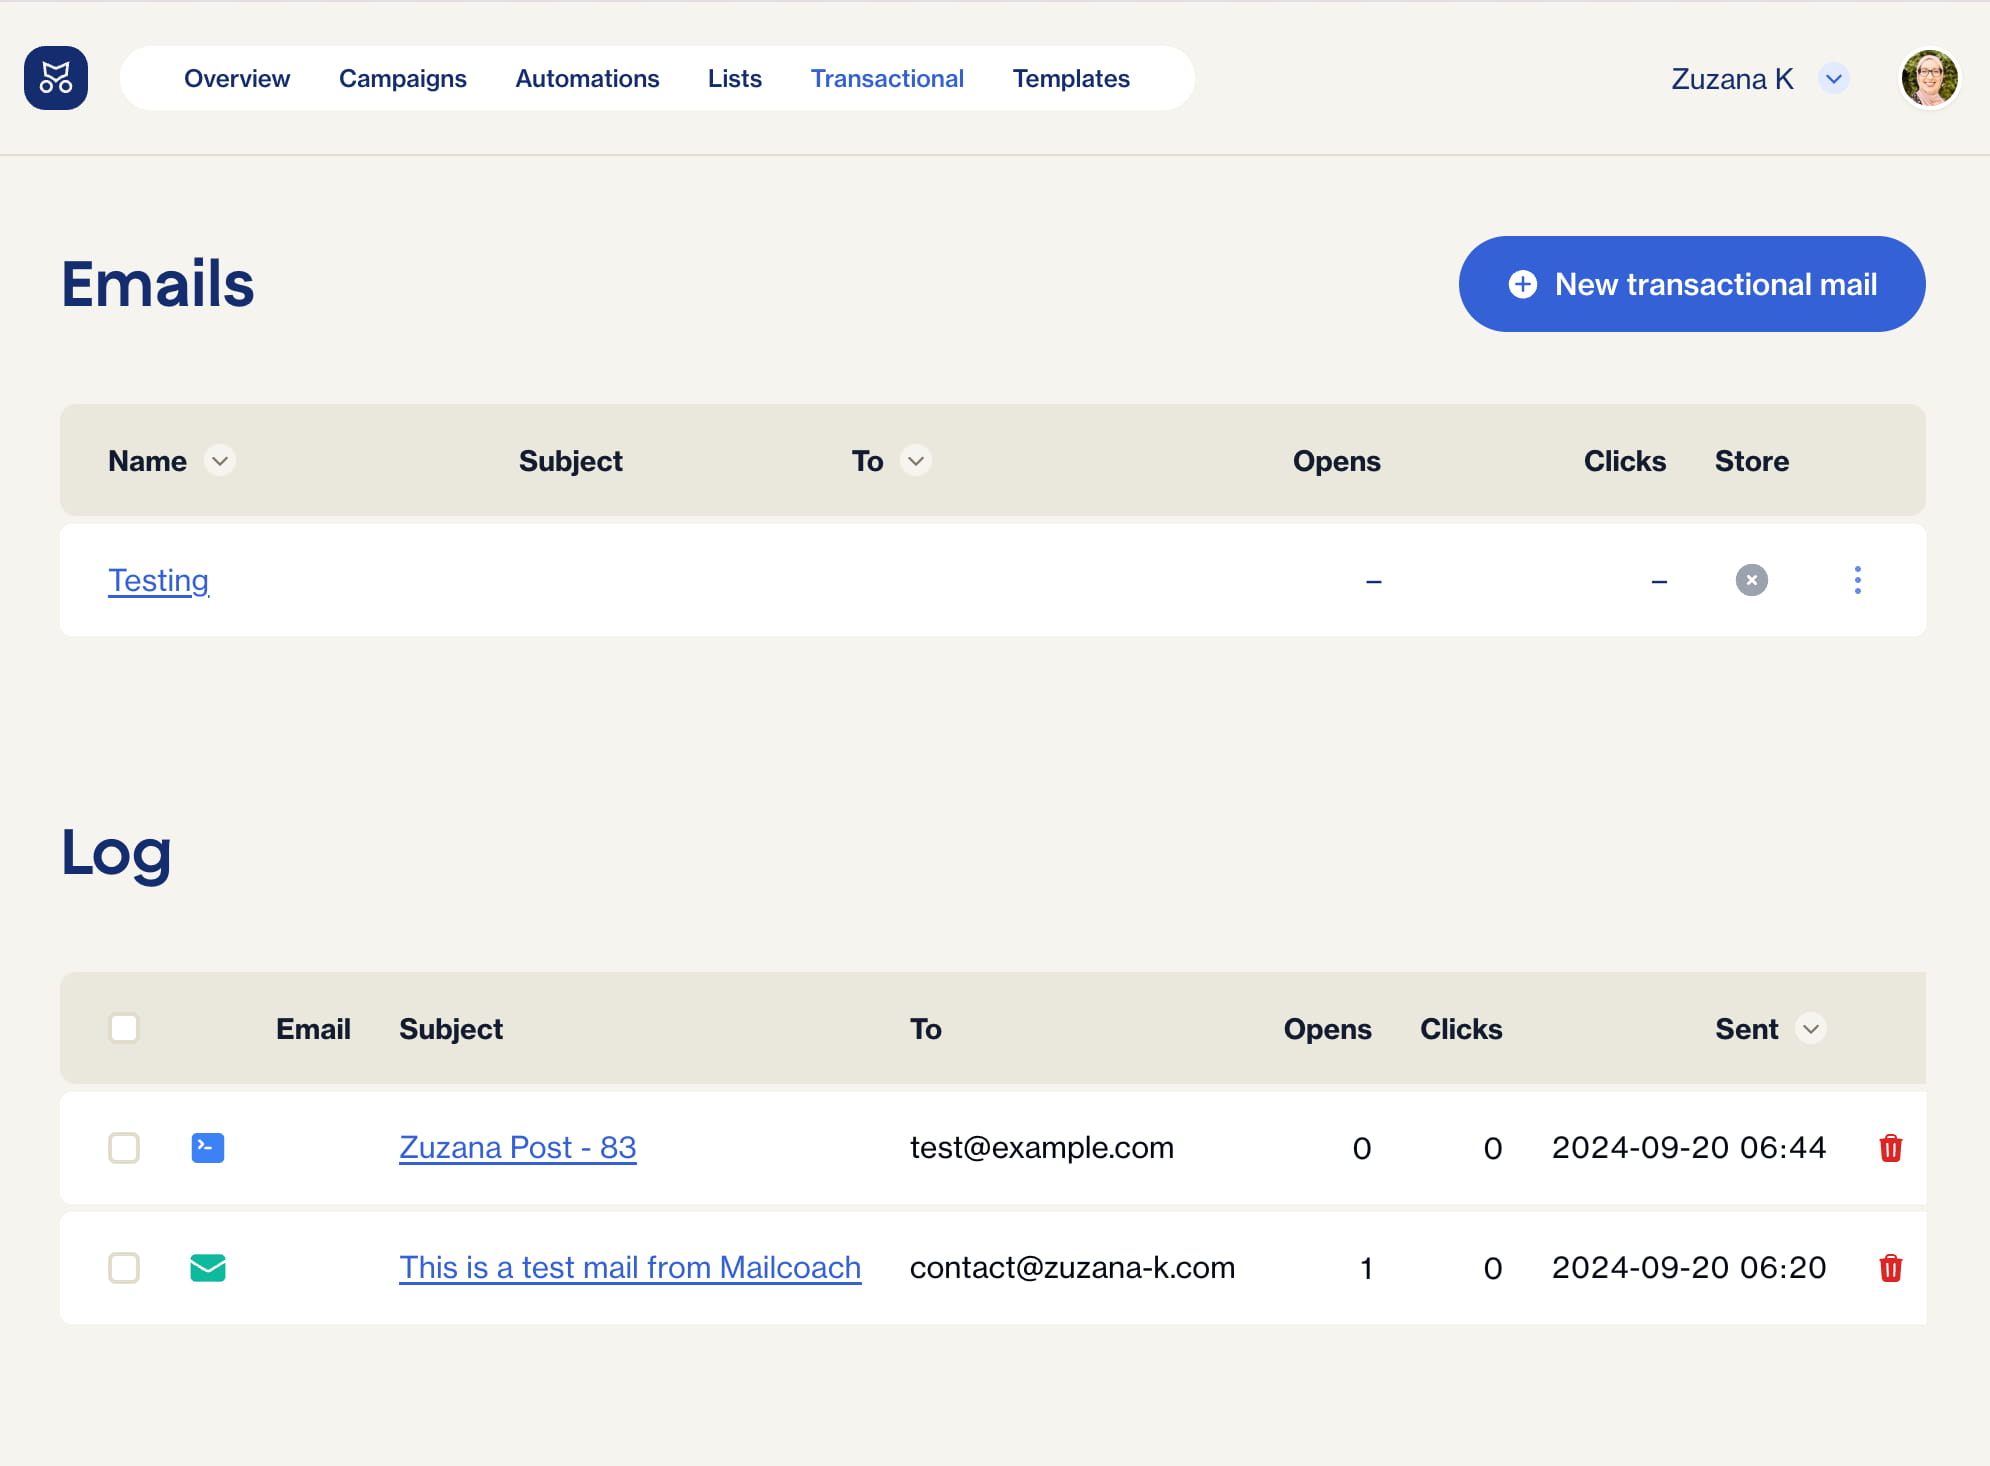
This way you can test the timing and the look of your transactional emails during development without having to install and set up a third party email testing package.
If you want to learn more about sending transactional emails in Mailcoach, check out our documentation. And if you are not using Mailcoach yet, you can try it out using our free trial.