In Mailcoach and the upcoming v6 of the self-hosted version of Mailcoach, we’ve made it much simpler to connect an email-sending service to Mailcoach.
In this blog post, we’d like to explain why and how we did this.
A little bit of history
Most email marketing sending services, like MailChimp, are pretty expensive. One of the reasons is because they handle all the technical aspects of mail sending for you.
When starting with the self-hosted version of Mailcoach a couple of years ago, we choose a different route. To send mail, you should create an account at an email provider of your choice (like Amazon SES, Mailgun, Postmark, Resend, …). Mailcoach will use that account to send out emails.
This way, we don’t have to manage a mail server. Sending mail through any of those services is very affordable: Amazon SES can send tens of thousands of emails for only a couple of dollars.
When creating the self-hosted version of Mailcoach, we know our audience would be technical and would probably have no problem configuring their email service account for use with Mailcoach. We provided the necessary steps for each provider in our documentation, and most of our users could figure it out.
We have a hunch that the audience for Mailcoach, the hosted version of Mailcoach, is less technical. That’s why we made it much easier to prepare and connect an email-sending service account to Mailcoach.
Automatically preparing SES, Postmark, Resend … for Mailcoach
You can now simply follow a wizard to set up your favorite email service with Mailcoach.
In Mailcoach, a connection between an email sending service and Mailcoach is called a “mailer”. In the settings, you can create a mailer for the service of your choice.
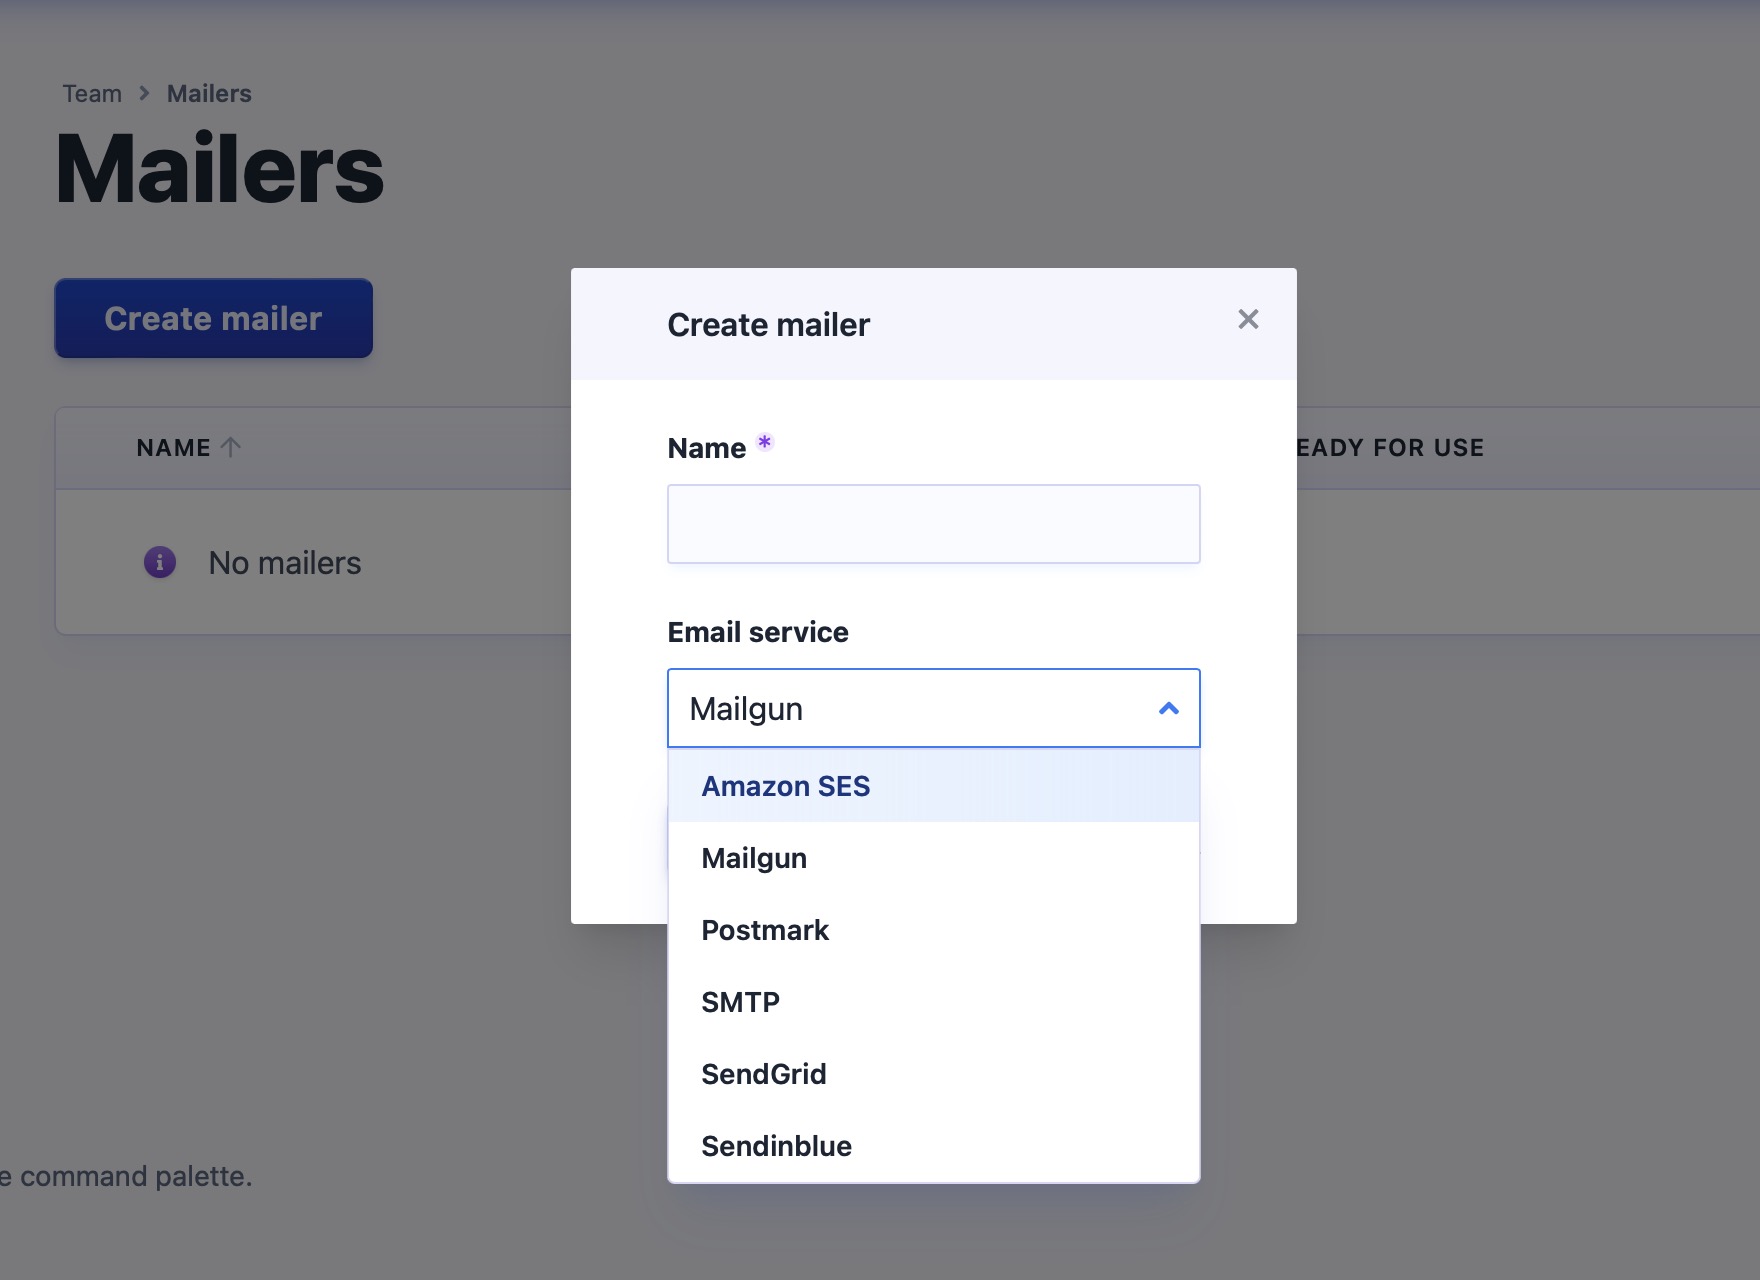
Let’s create a mailer Amazon SES. After saving the mailer, you’ll see a wizard that will guide you through the entire process of connecting your Amazon SES account to Mailcoach.
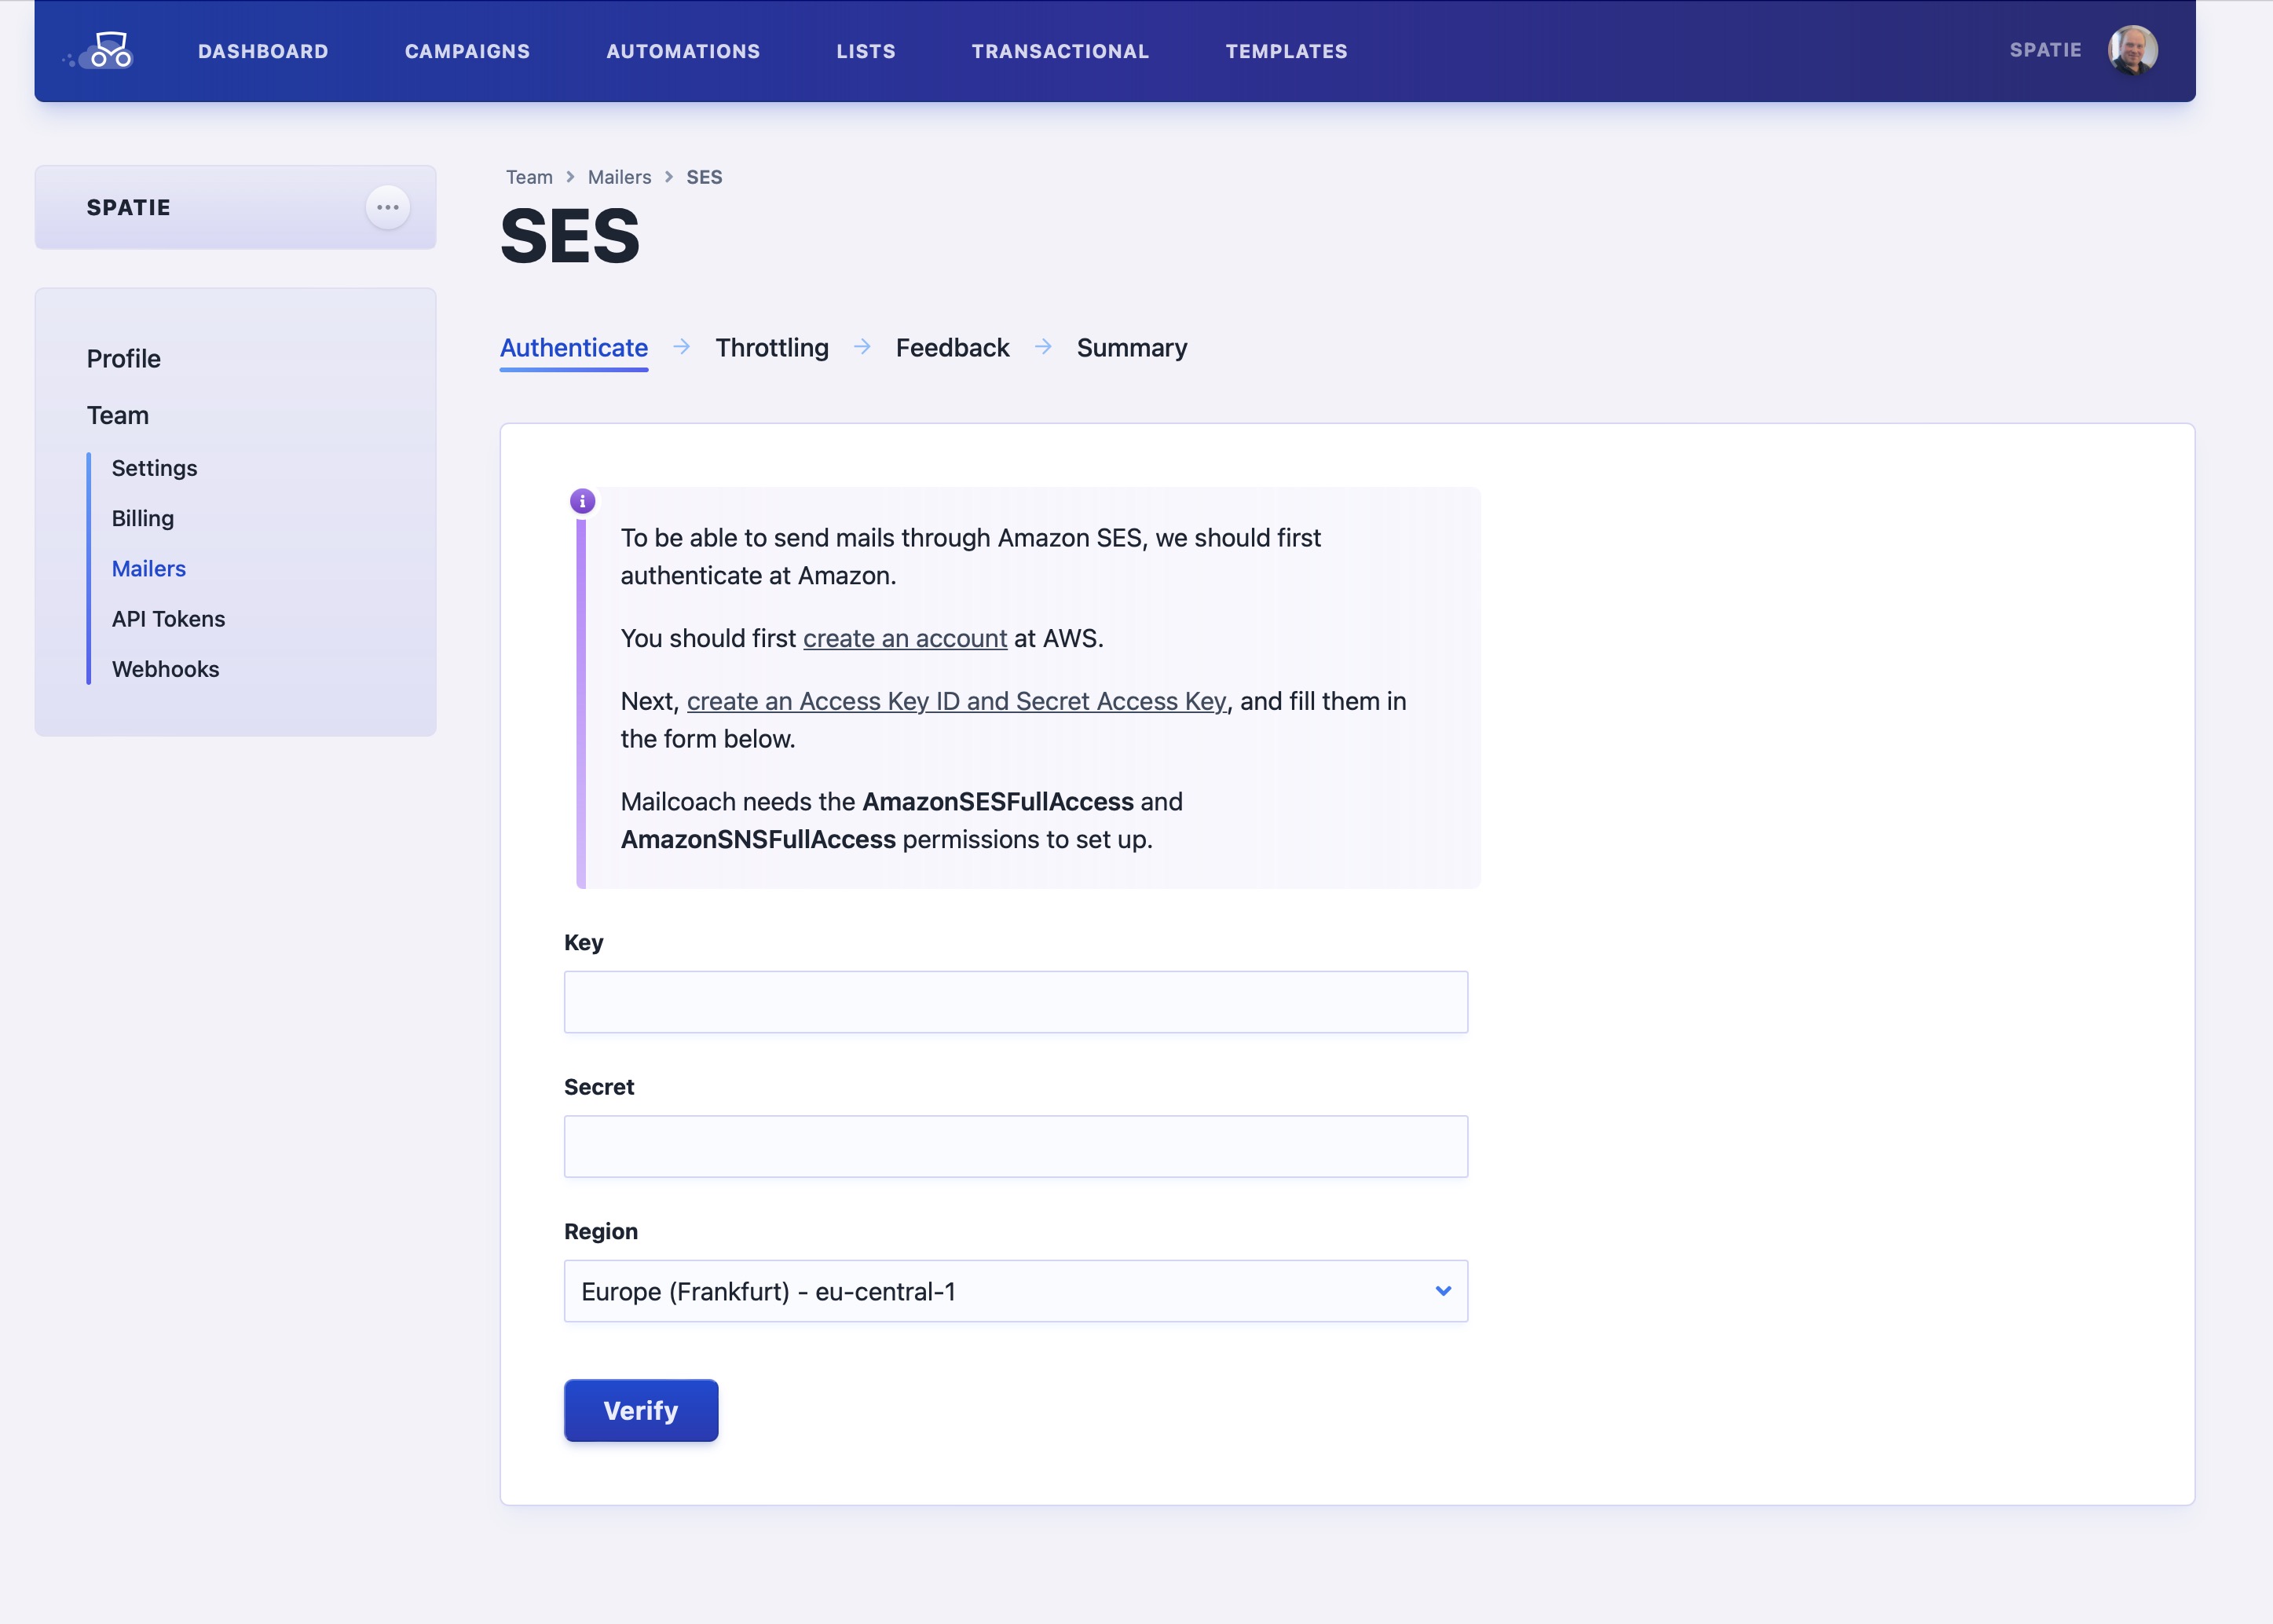
At the top, you’ll see detailed instructions on how you can quickly add the necessary permission on SES so we can do the rest. We display such instructions for each of the email-sending services we support.
You’ll notice that in the previous screenshot, you can click “Verify” to submit the form. We’ll not only store the key and secret encrypted in our database, but we’ll also verify that you’ve done everything correctly at Amazon. If everything is ok, we can automatically set everything up for you.
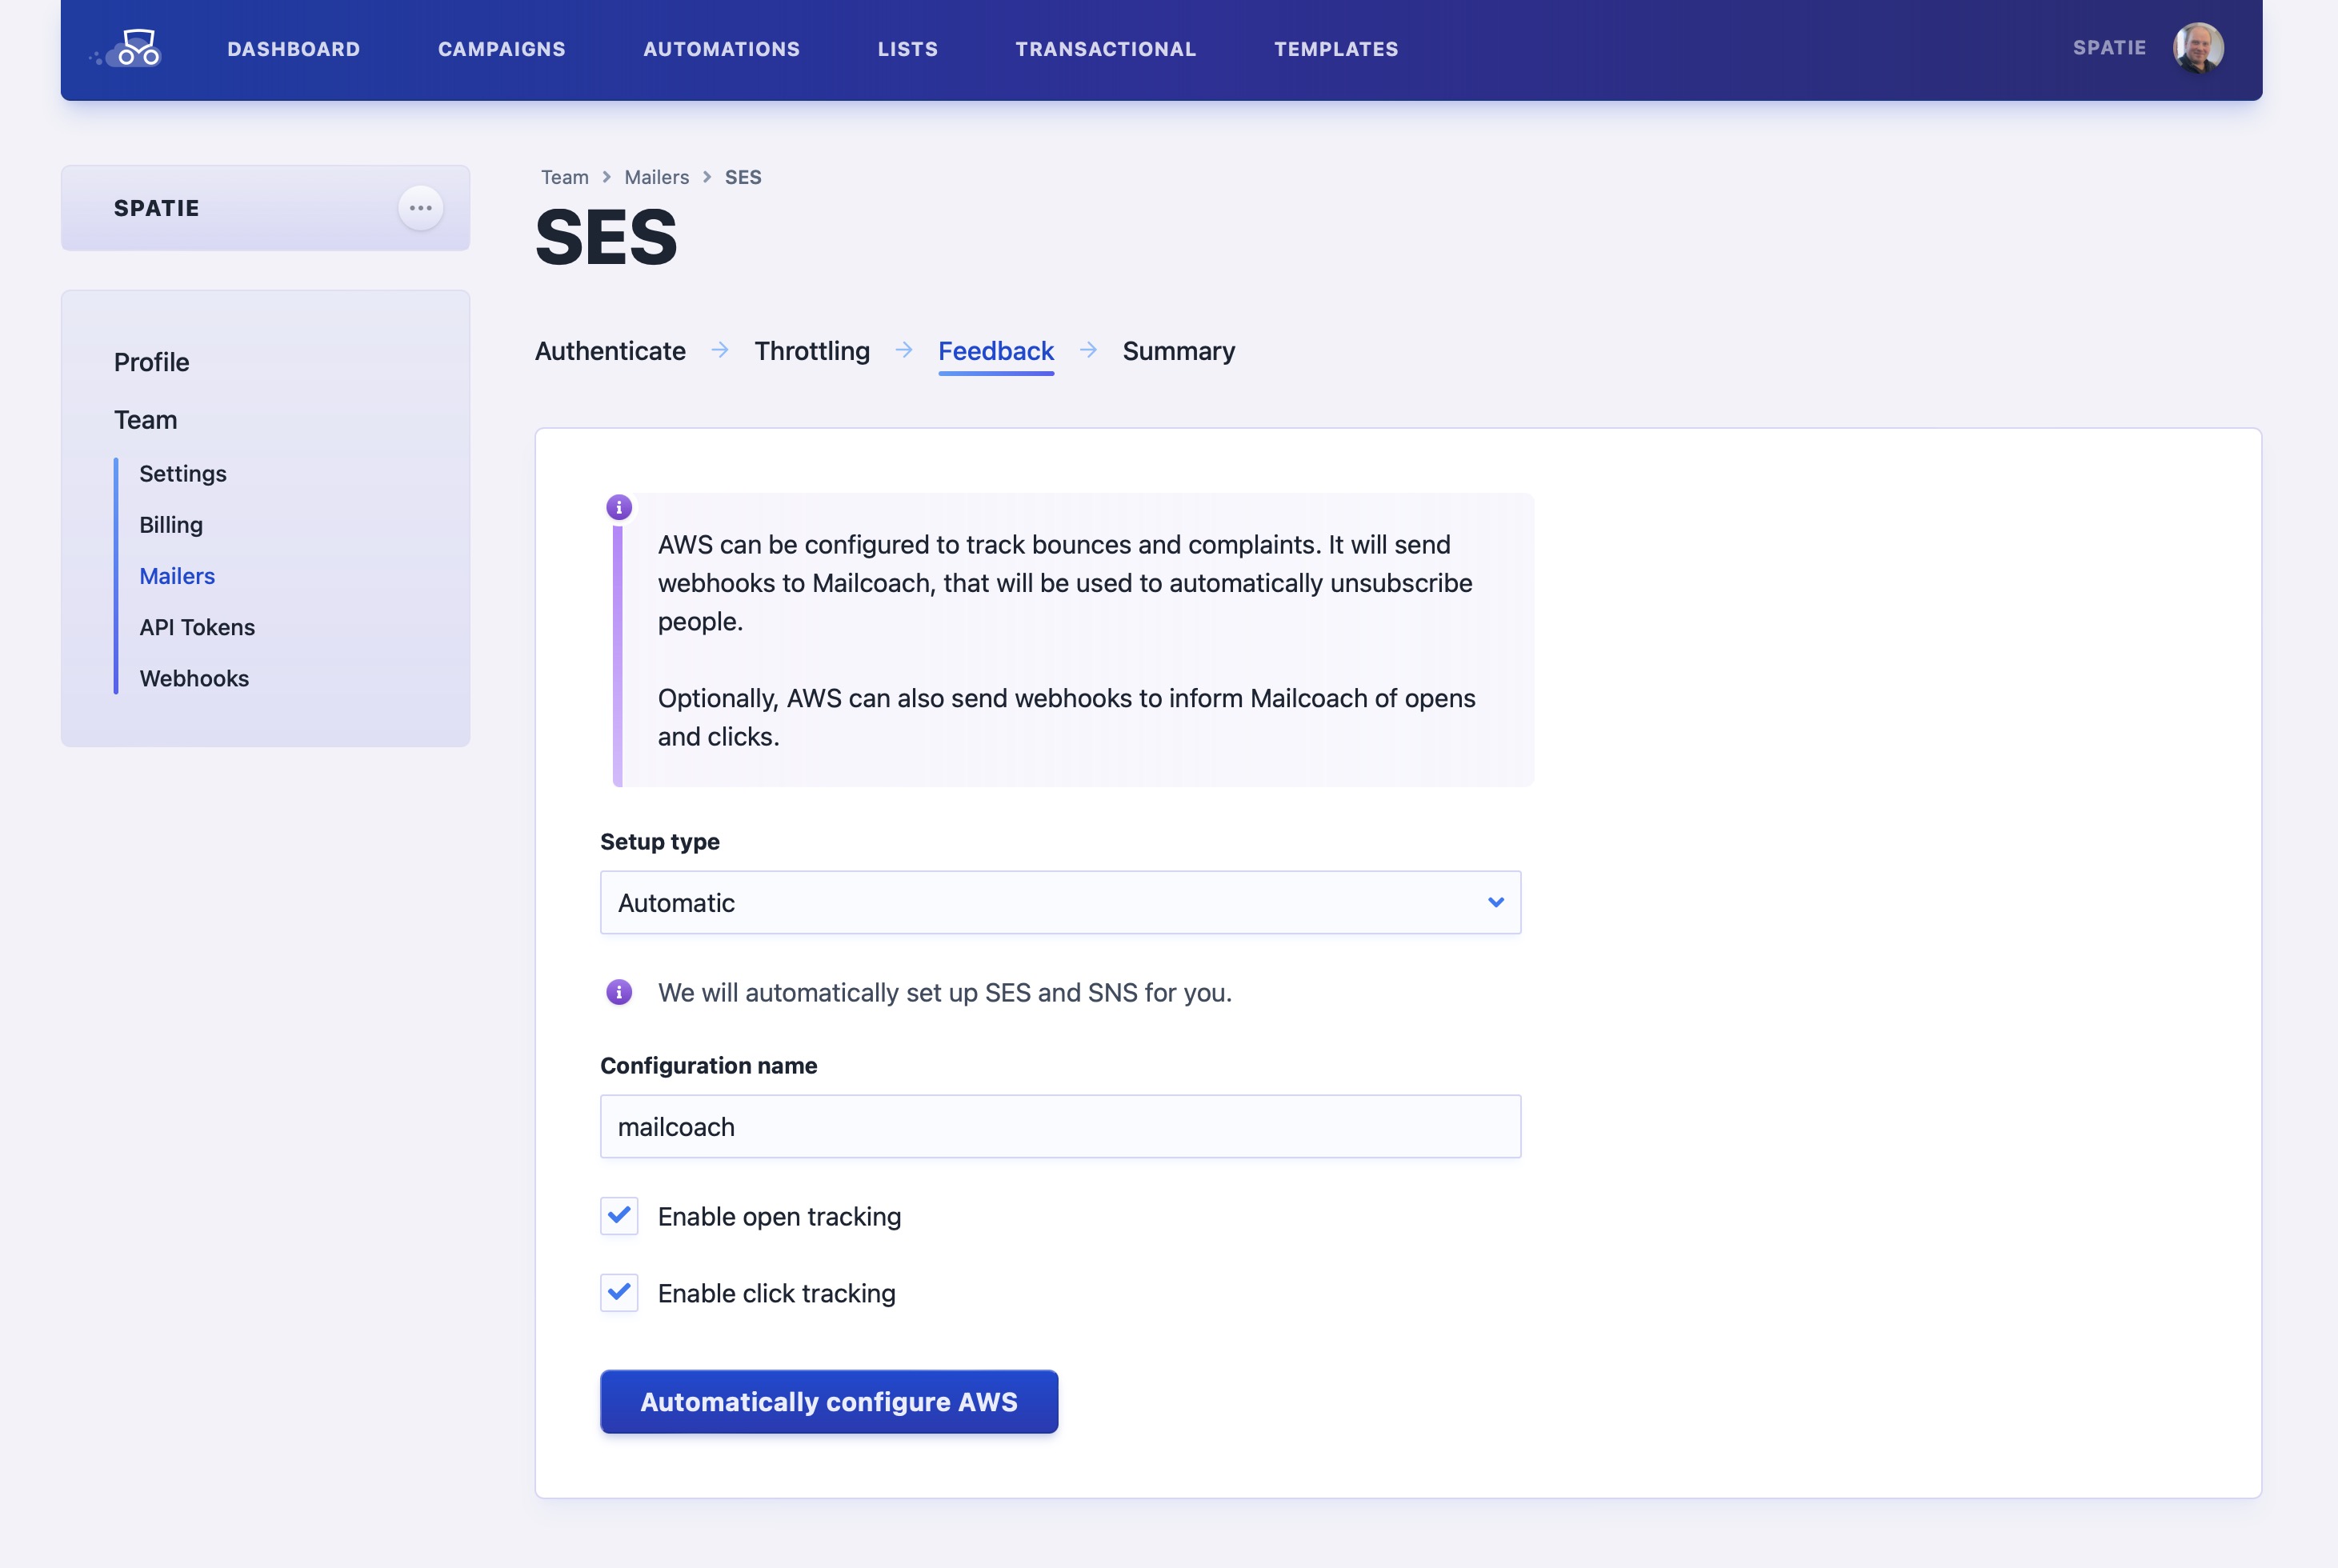
In previous versions of Mailcoach, you had to manually configure the rest of SES and SNS (the notification services). A simple screen has now replaced that, you just have to let us know if you want us to configure SES for open and click tracking.
After the setup is complete, you’ll get a nice summary and can send a test mail to ensure everything is in order.

Our wizard makes connecting your email service account to Mailcoach a breeze!
Extracting the magic to packages
True to our open source spirit, we have extracted most of this functionality of our wizard to publicly available packages.
The logic of the wizard itself, such as the splitting of the form and managing which steps there are and which one is active, is available in our spatie/laravel-livewire-wizard package.
Using this package, you can create a WizardComponent with the necessary step components.
use Spatie\LivewireWizard\Components\WizardComponent;

class CheckoutWizardComponent extends WizardComponent
{
    public function steps() : array
    {
        return [
            AuthenticateComponent::class,
            ThrottlingComponent::class,
            FeedbackComponent::class,
            SummaryComponent::class,
        ];
    }
}
A step is a class that extends StepComponent (which extends Livewire\Component). You can do anything here that you can do with a regular Livewire component.
namespace App\Components;

class SummaryComponent extends StepComponent
{
    // add any Livewire-powered method you want

    public function render()
    {
        return view('app.wizards.ses.summary');
    }
}
You can learn more about this package by reading the extensive documentation we have written.
We also open source the code that we use to configure the various email providers supported in Mailcoach. We haven’t written full docs for them, but if you know your way around PHP / Laravel, you’ll understand what is happening.
You’ll find the code for setting up email providers in these repositories on GitHub:
In closing
Our automatic setup wizards lower the barrier for non-technical persons to get started with Mailcoach. These wizards will also be available in the upcoming v6 of self-hosted Mailcoach.
Mailcoach is the best service for sending out email campaigns. We also offer email automation that allows you to easily build a drip campaign. You can manage your content and templates via powerful HTML and Markdown editors. Start your free trial now.