Mailcoach has the ability to send a webhook to your application whenever somebody (un)subscribes, a tag gets added etc… This way you can keep the state of your app in sync to what’s happening in Mailcoach.
In this blog post, we’d like to share some improvements we recently added to our webhooks.
Choosing webhook types
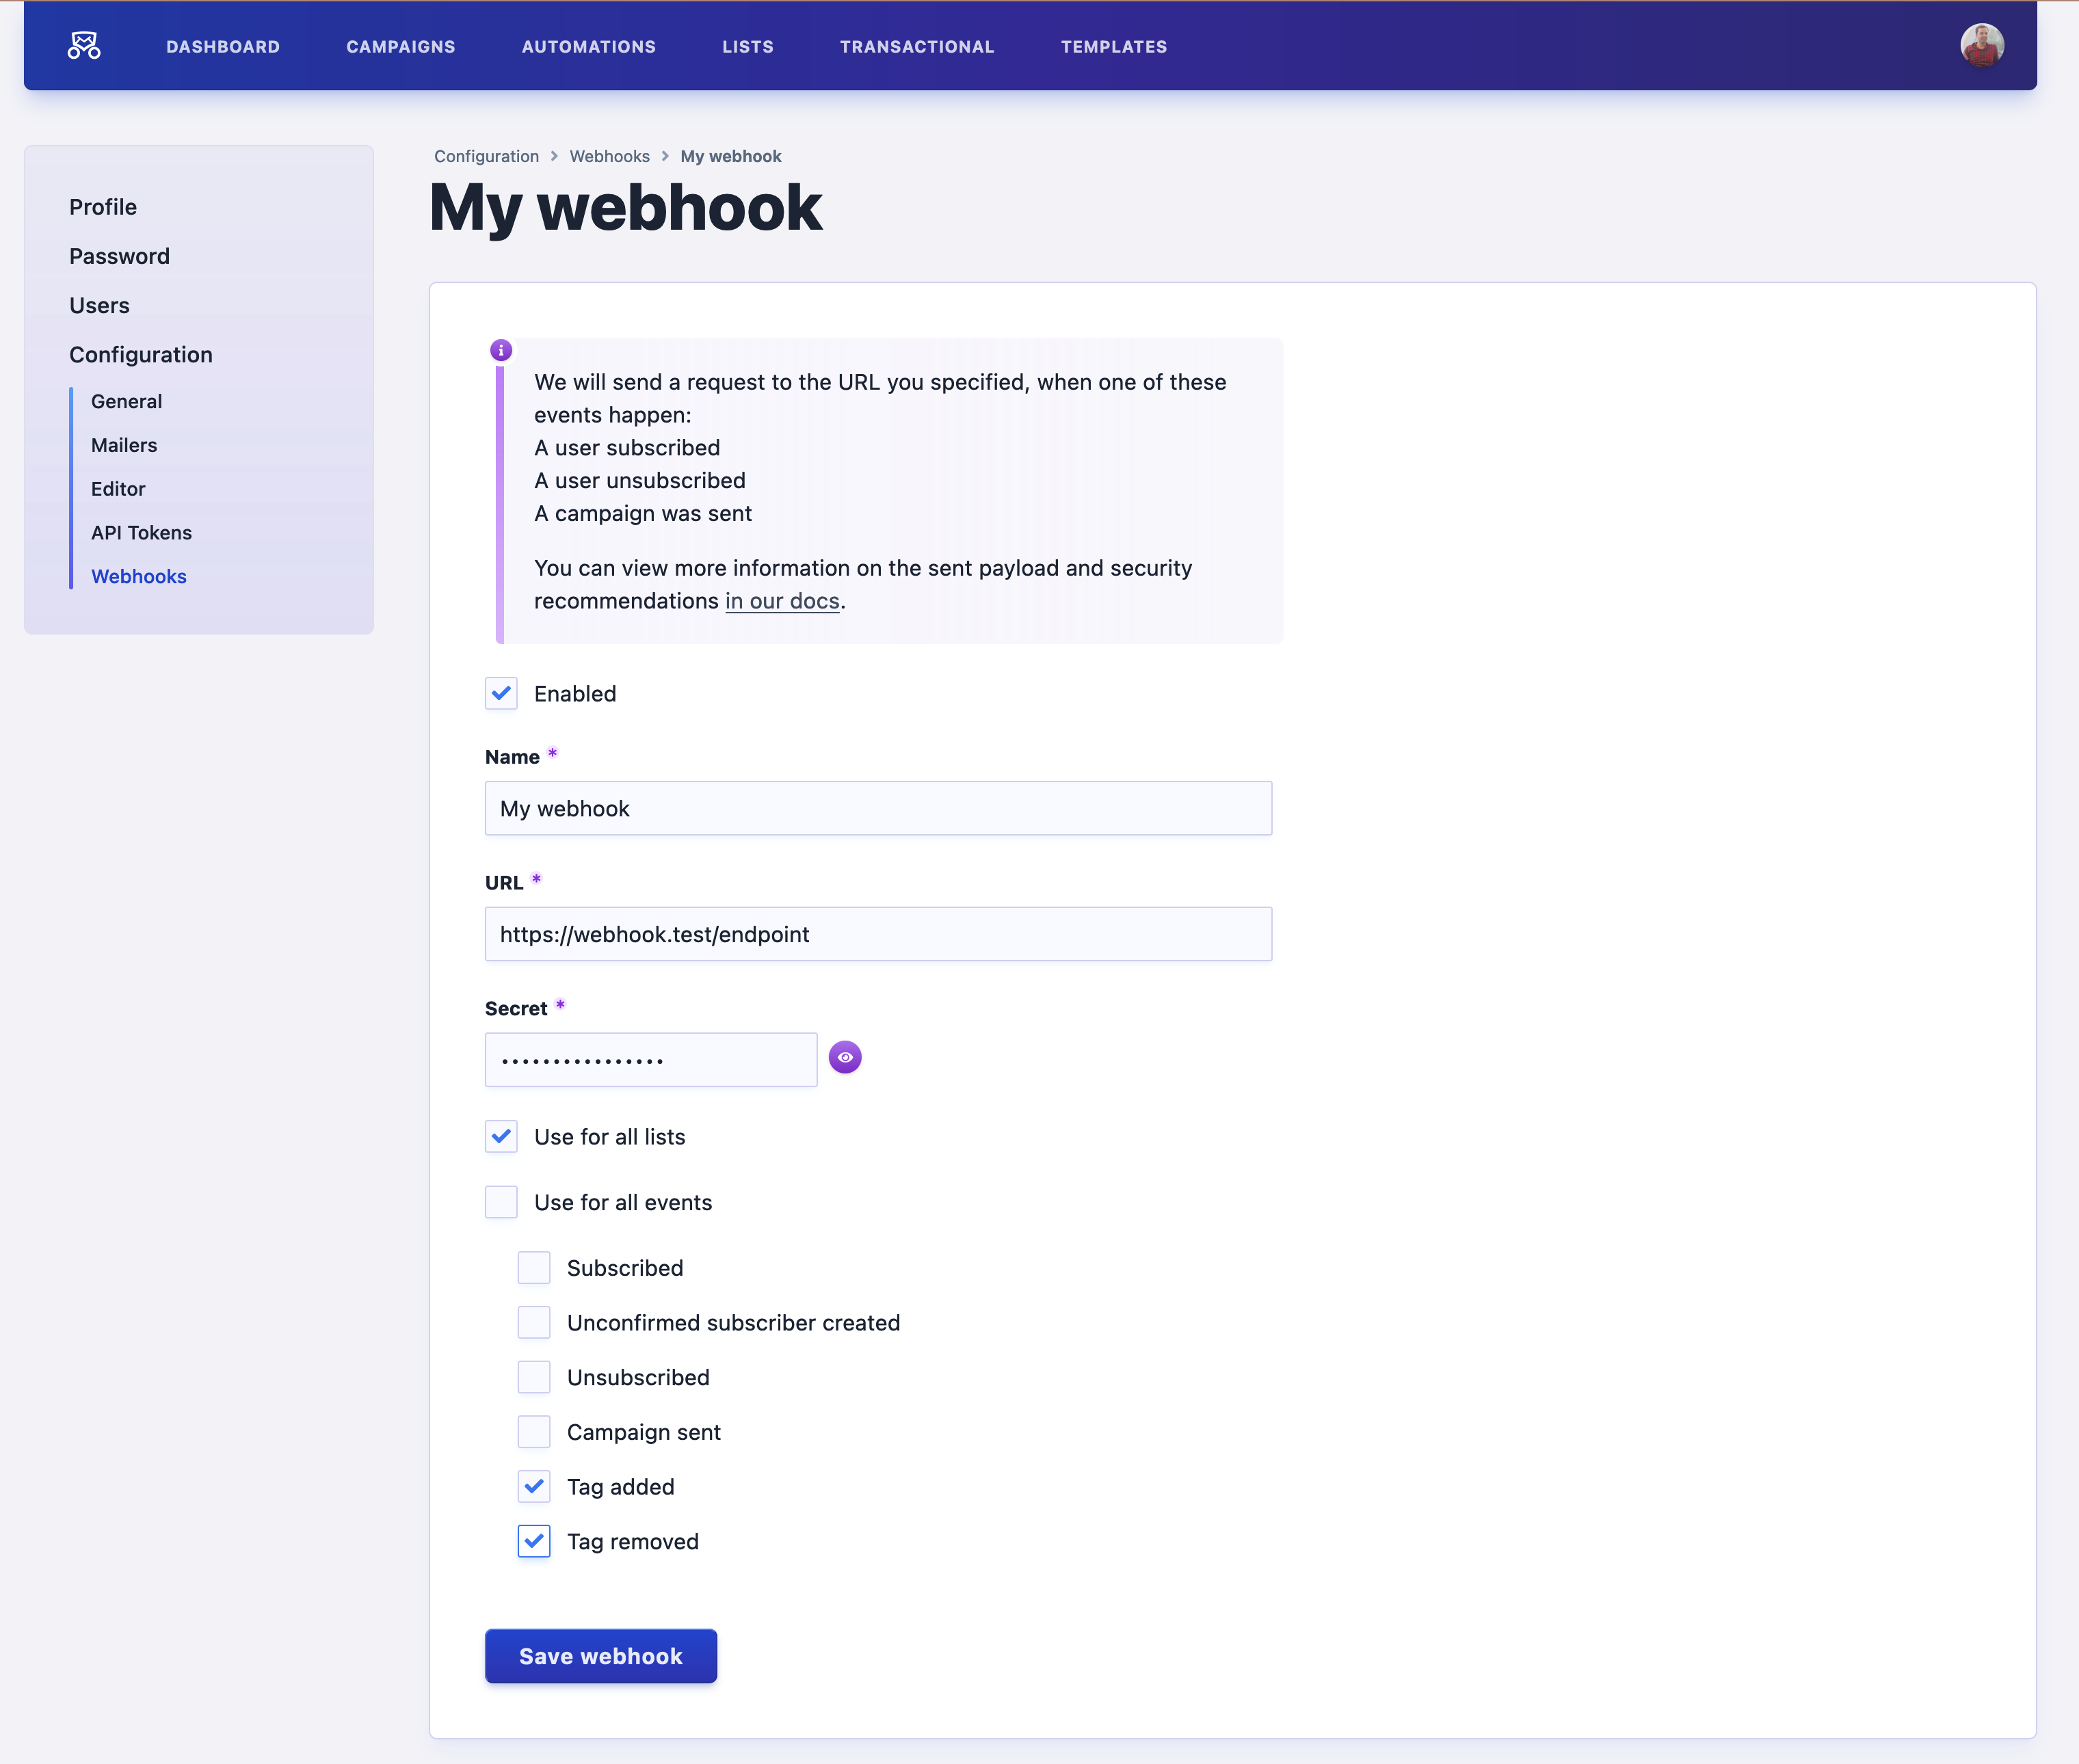
You now have more control over when webhooks should be triggered. Sometimes your webhook does not need to receive all types of events that Mailcoach supports. From now on, you can specify which events you want to be sent to your webhook. If, for some reason, you want to disable a webhook temporarily, you can now also do this by simply unchecking the checkbox on the webhook details screen.

Webhook logs
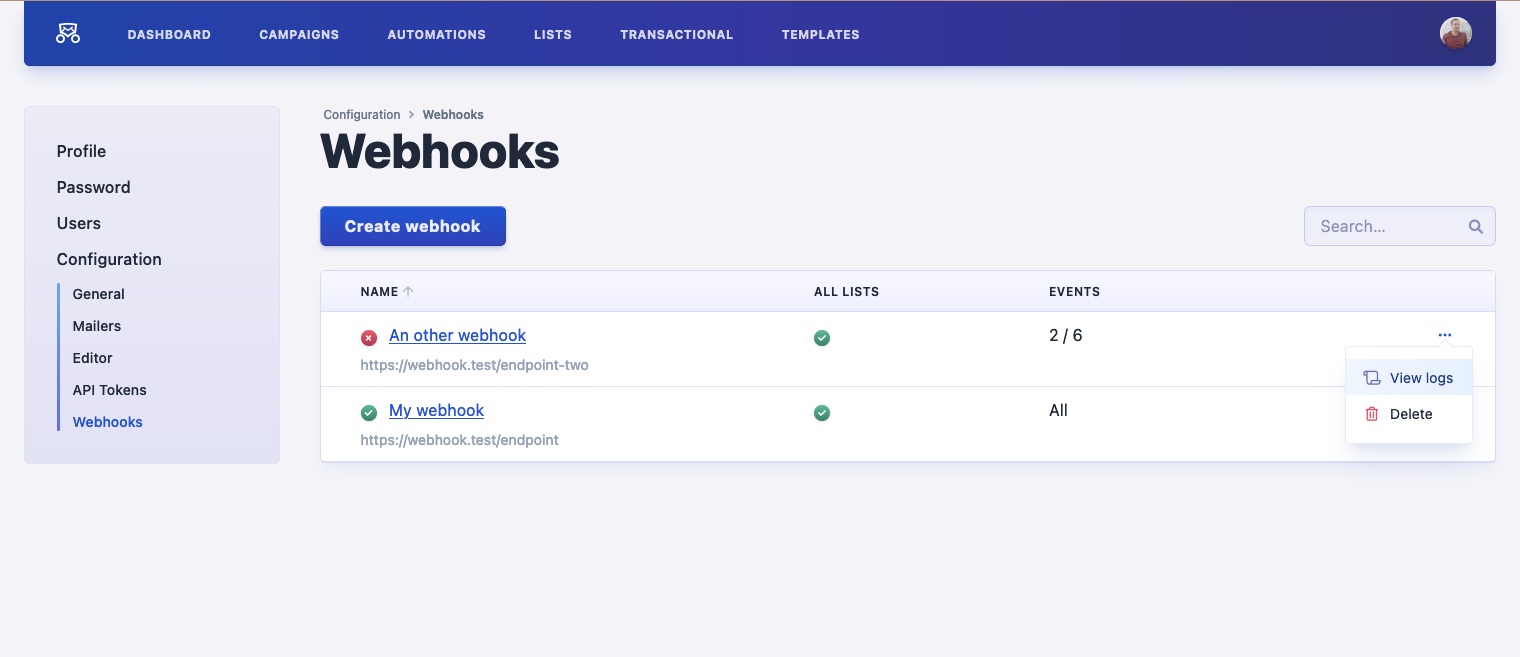
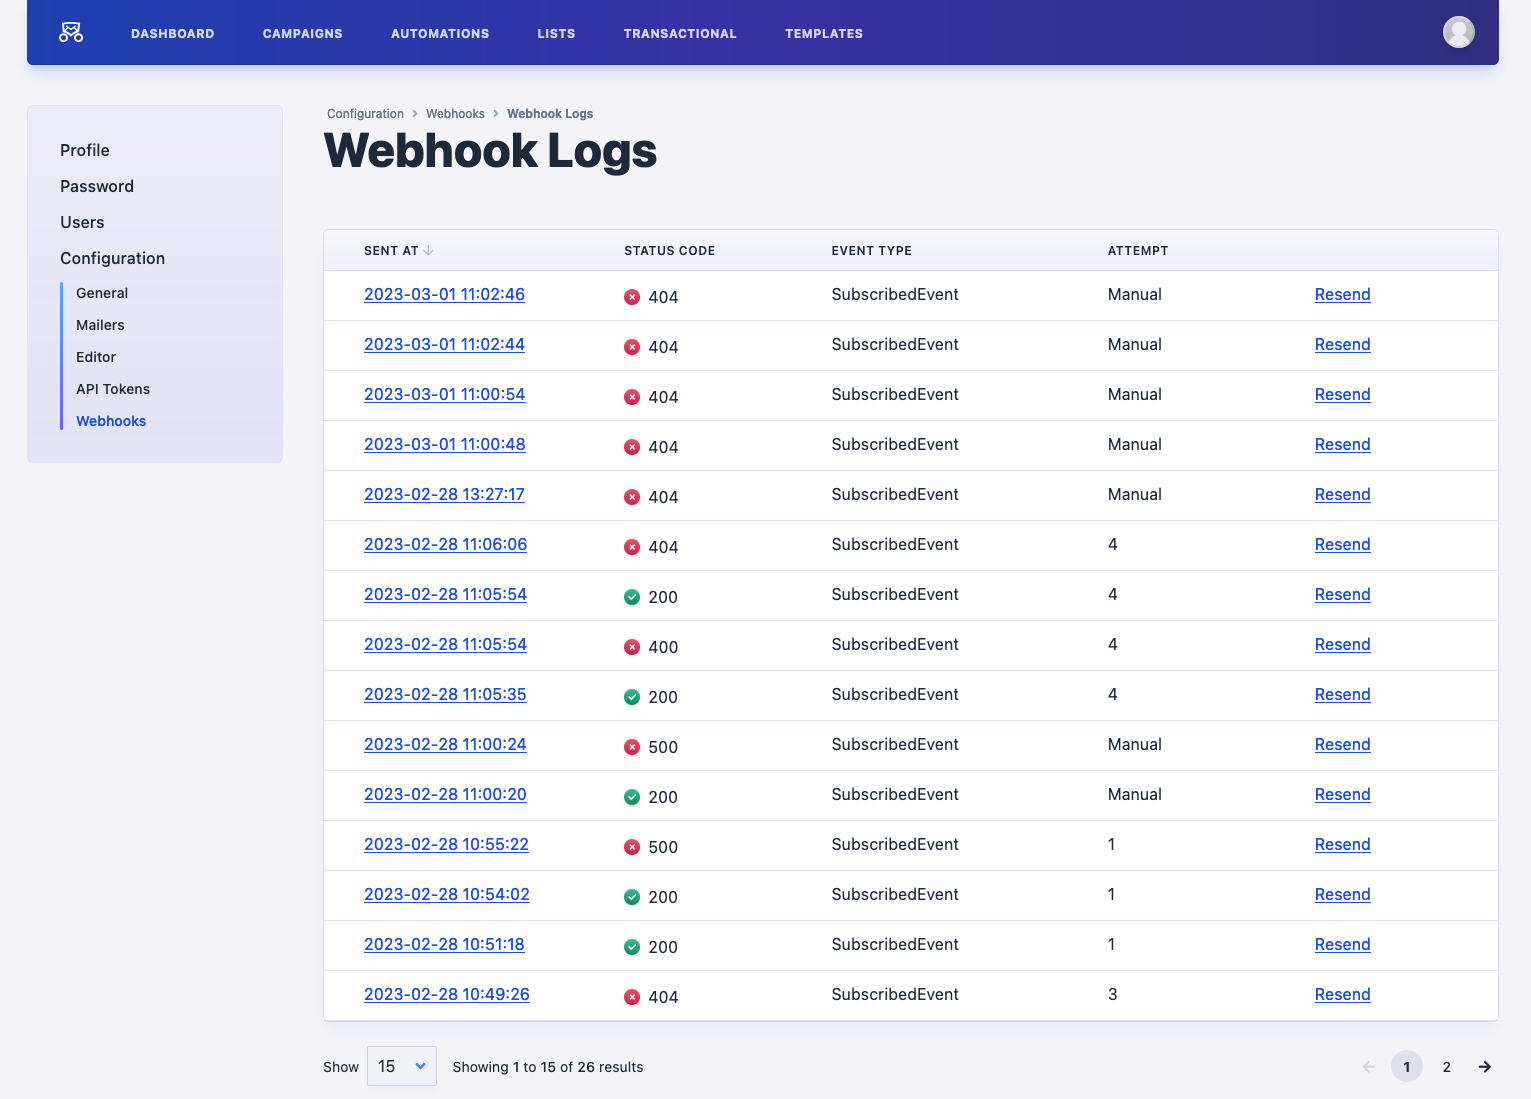
We also added a new logs feature for webhooks. From the webhook overview, you can now go to an overview with a log of all requests that have been (attempted to) sent to your webhook.


When you click on the date, you will be taken to a detail screen that contains extra information like the payload and response of the request.
We also added a handy “Resend” action to the table to make debugging your webhook easier.
In closing
These new features are now available on Mailcoach and the self-hosted version of Mailcoach.
If you are using the self-hosted version, make sure to read the documentation on how to enable these new features.
Mailcoach is the best service for sending out email campaigns. We also offer email automation that allows you to quickly build a drip campaign. You can manage your content and templates via powerful HTML and Markdown editors. Start your free trial now.