Campaigns
An email campaign is a set of emails that can be sent to an email list (or a segment of a list).
On this page:
- Creating a campaign
- Using templates
- Using extra attributes and conditionals
- Split testing or A/B testing a campaign
- Continue sending a cancelled campaign
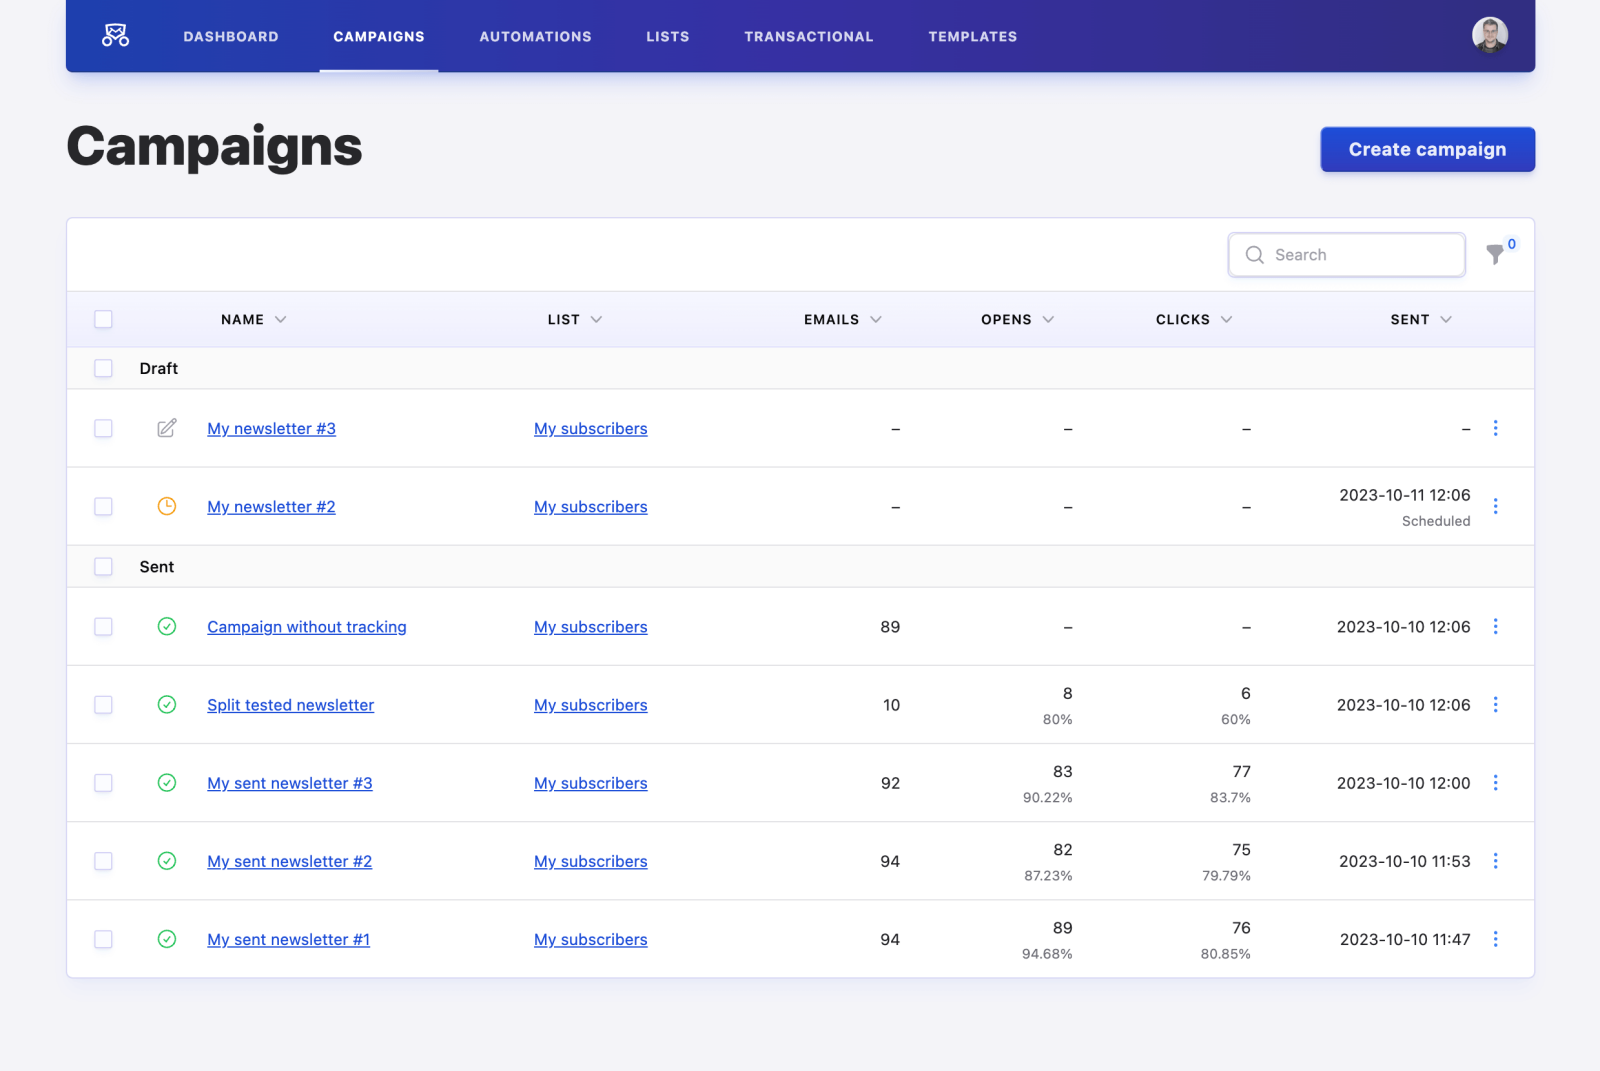
The Campaigns index page summarizes some information about your campaigns. You can see the status of the campaign (editing, scheduled, sending or sent), the number of people it was sent to, the number of times it was opened and how many links were clicked, and when it was or will be sent.
The percentage below the opens and clicks is as part of the total amount of subscribers that received your email.
Creating a campaign
When creating a campaign, you can either create a new one from scratch or duplicate an existing one to copy most of its settings:
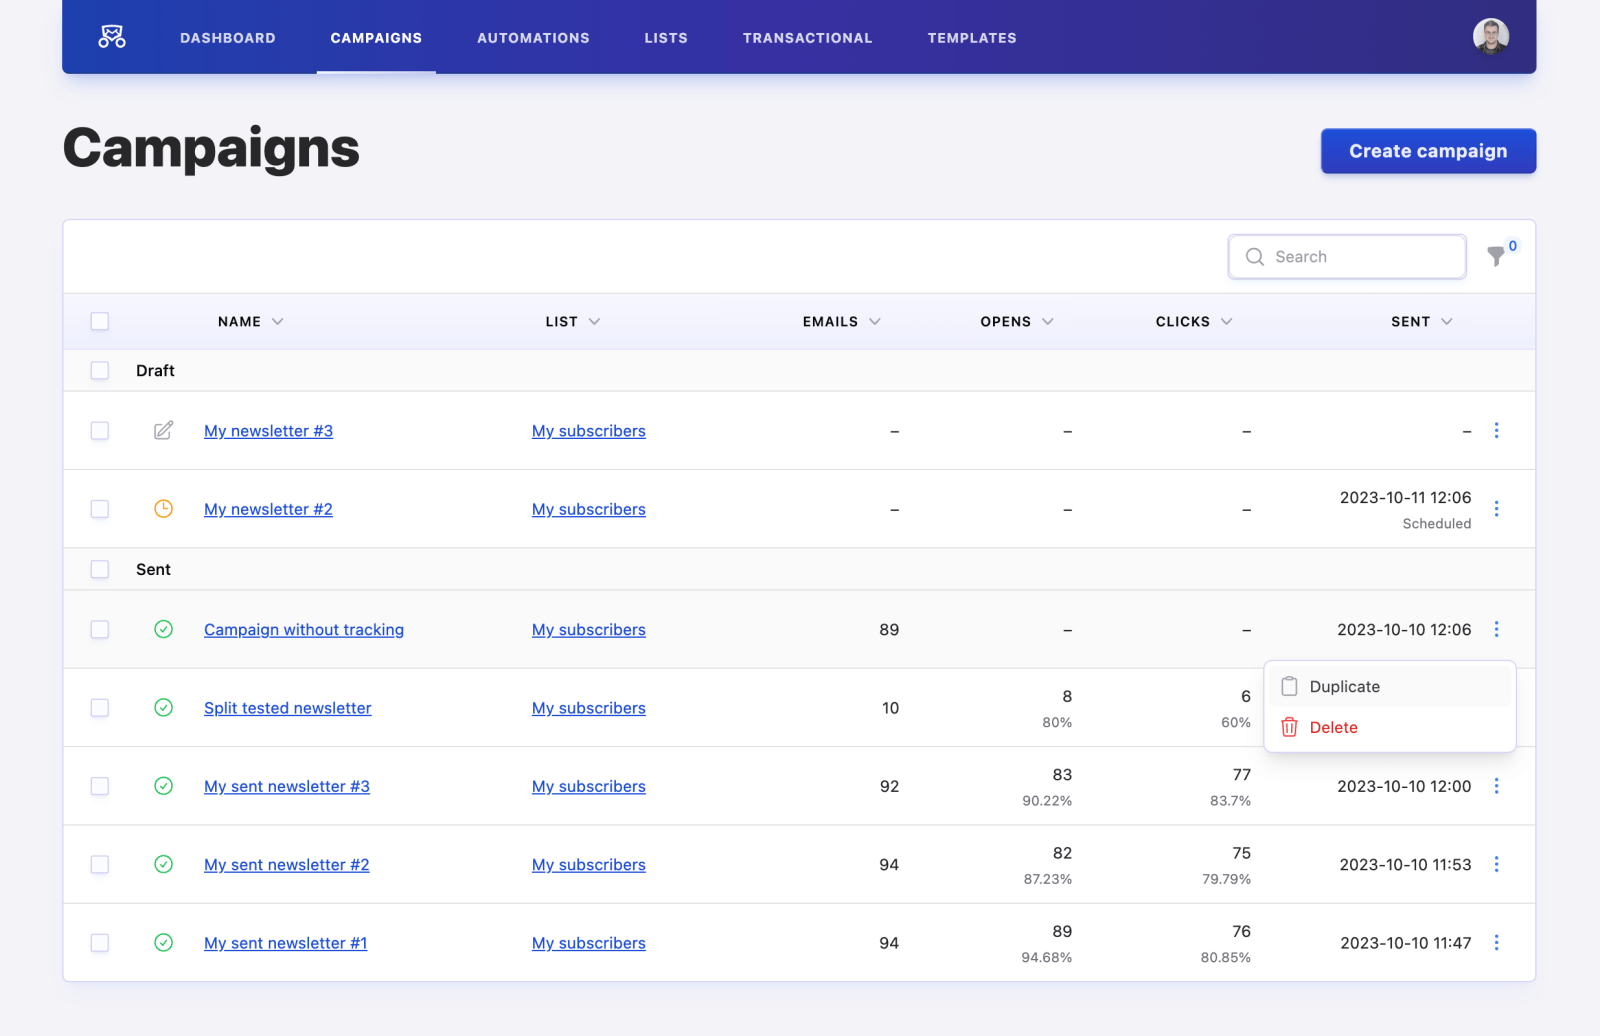
When creating a new campaign, you can choose which of your templates, if any, you want to use as a base for your email’s content. You can also choose to duplicate an existing campaign. Use these actions to save time when creating a new campaign.
Settings
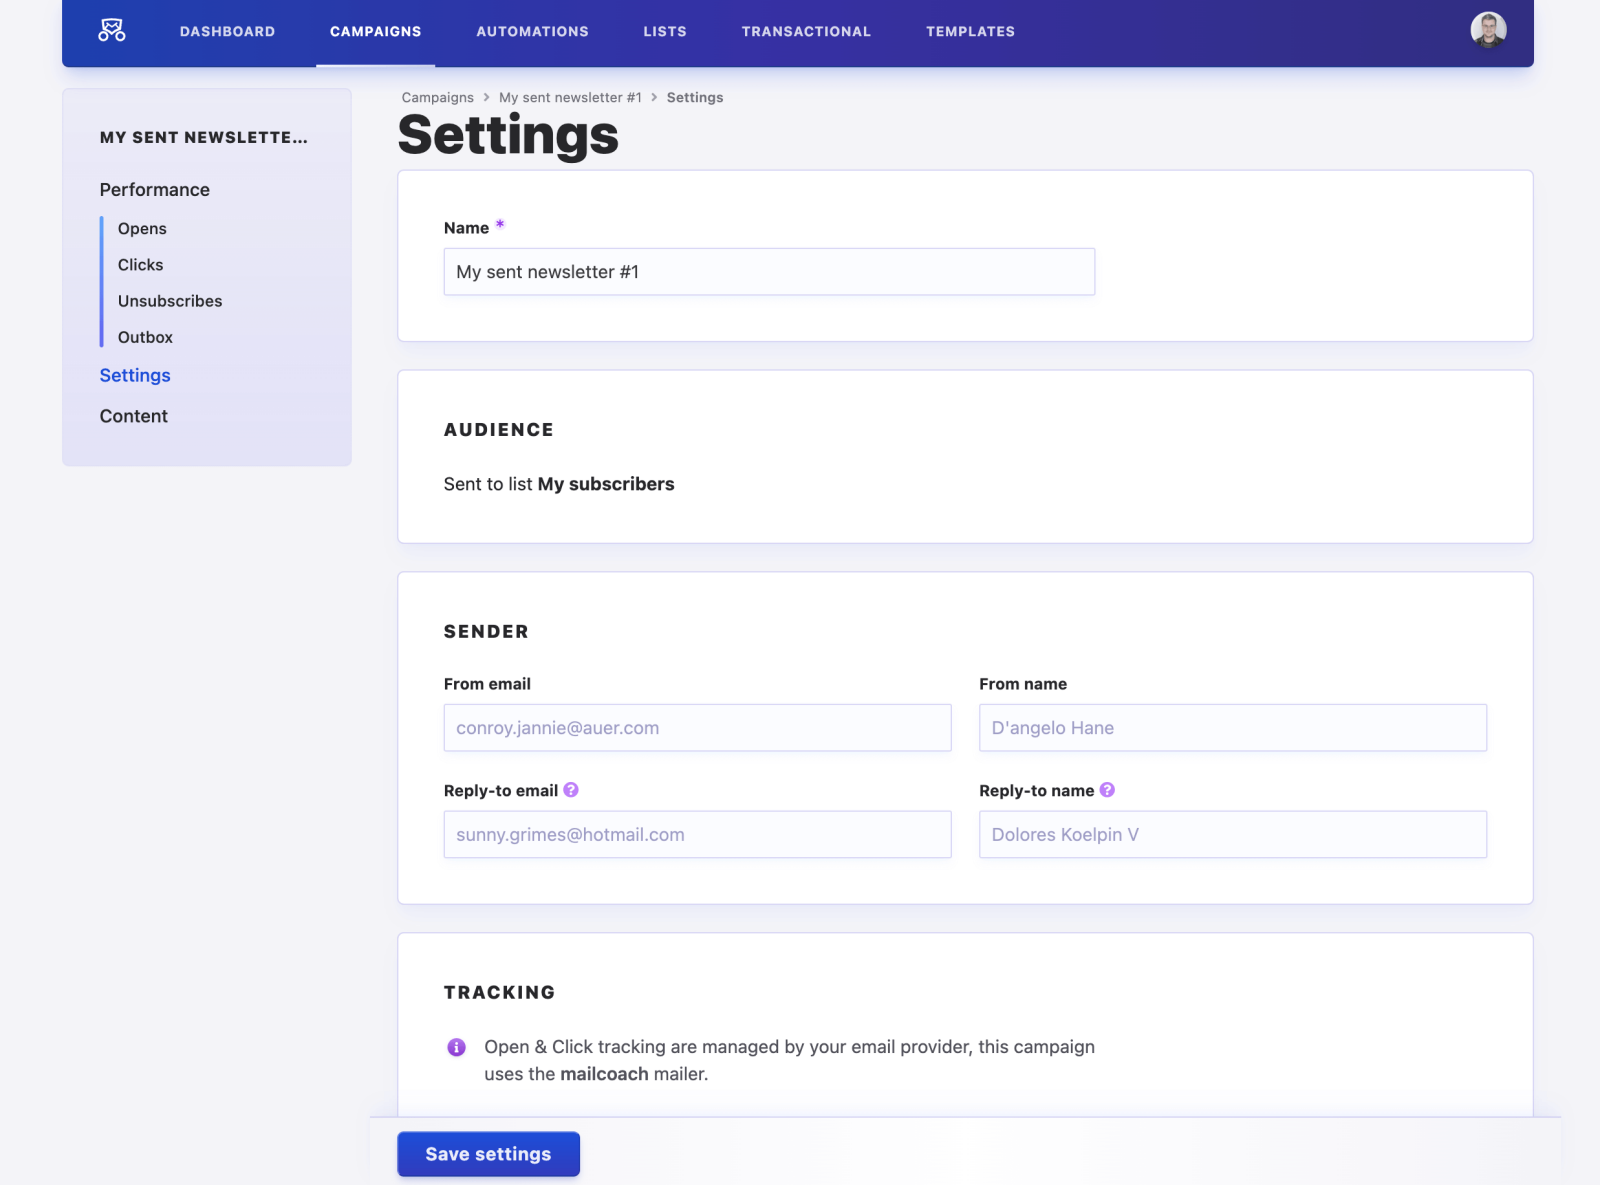
Most of the settings for creating a new campaign are pretty self-explanatory:
The name of a campaign is only used within your Mailcoach UI. Subscribers will not see this anywhere.
The value for the Subject field is used as the subject for sent emails.
The List menu allows you to pick one of your lists, which you can further narrow down by picking one of its Segments right below it. You can read more about tags and segments here.
Finally, the tracking options allow you to track how many subscribers have opened your email and whether they clicked any of the links you included. You can see what the result of this tracking looks like in the Campaign statistics section of the documentation.
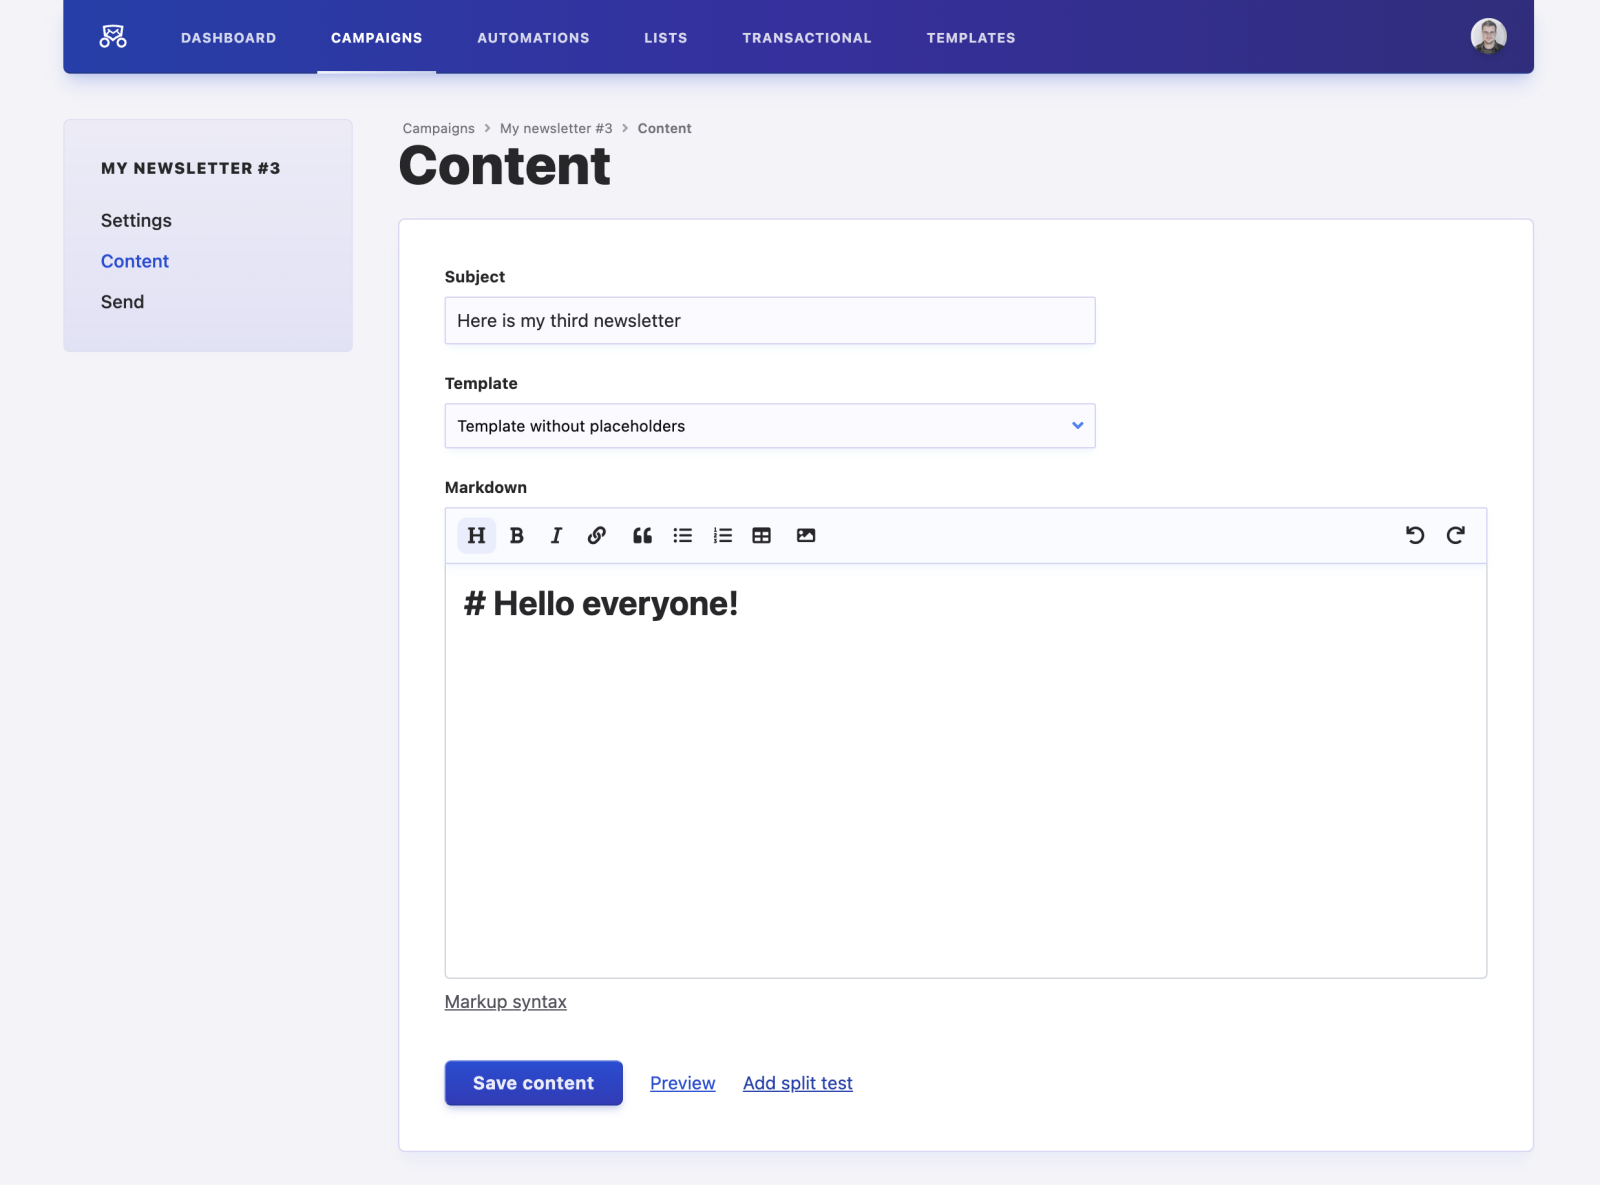
Content
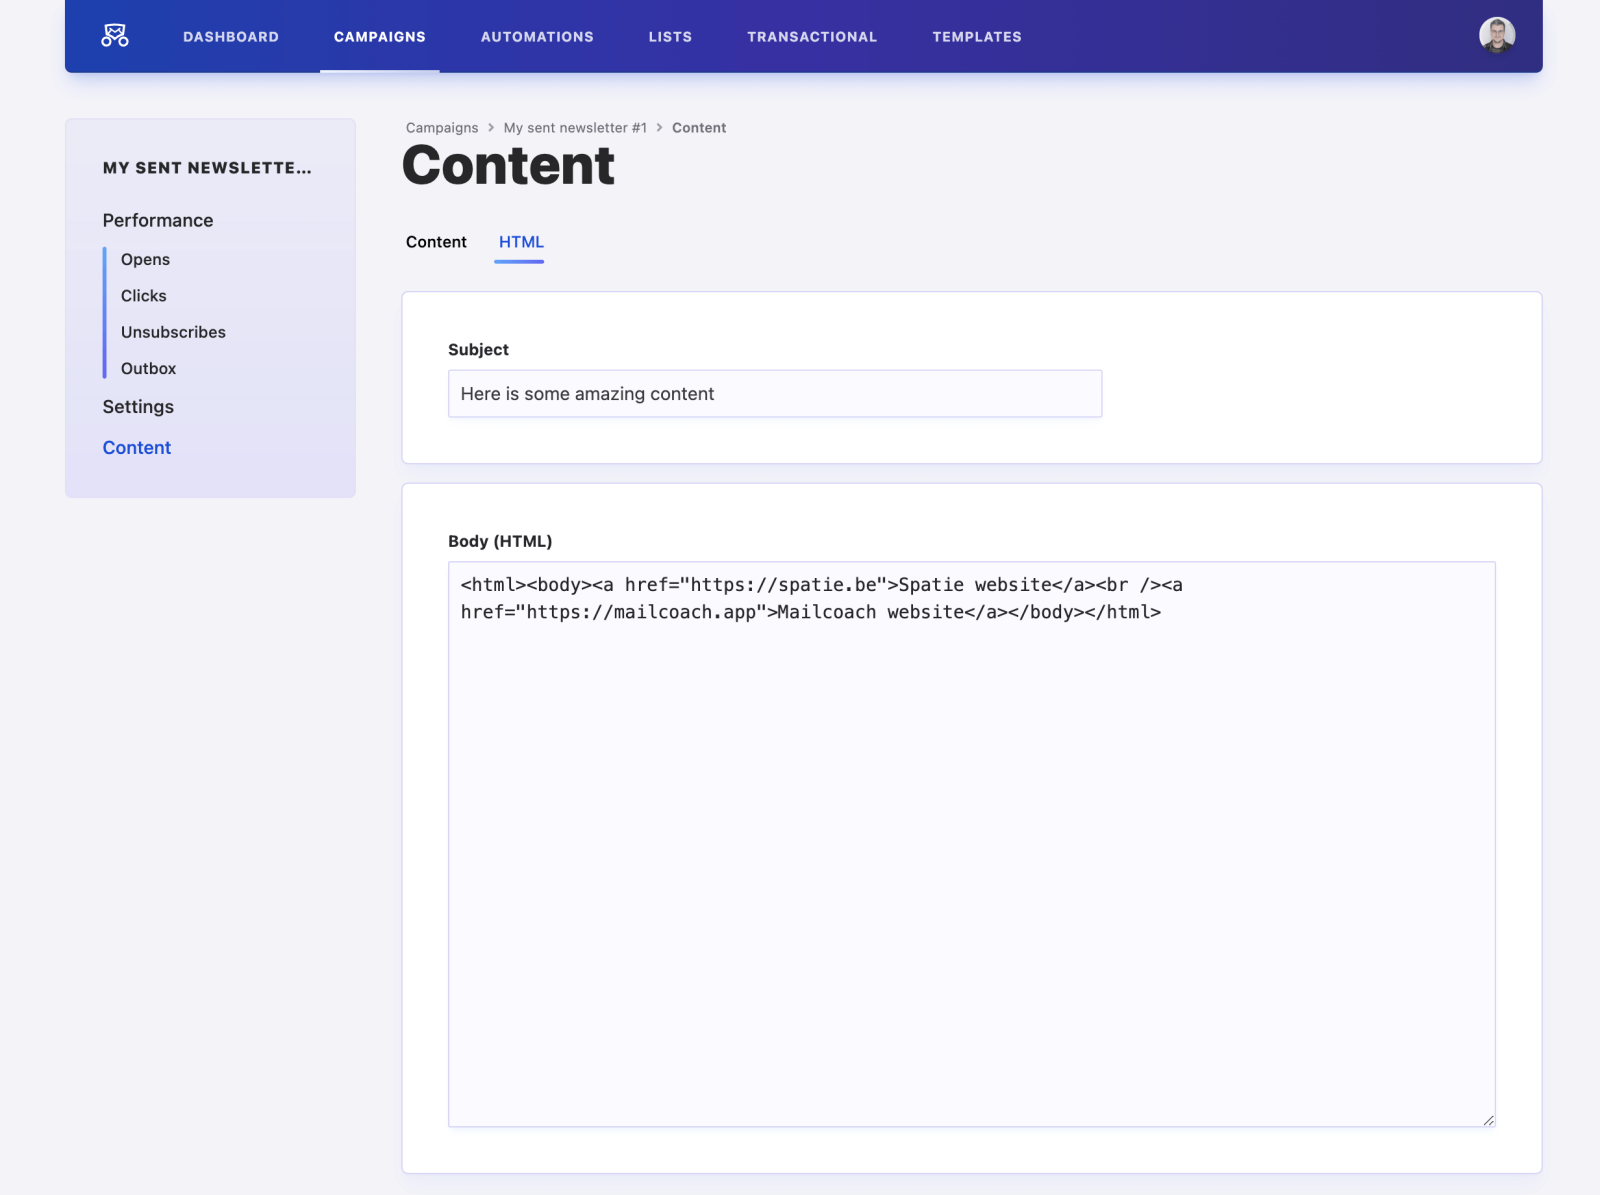
This is the content of the email that will be sent to your subscribers. If you selected a template while creating your campaign, the field will be prefilled with that template. If you duplicated another campaign, this field will be the same as that campaign’s content.
You can -and should- use placeholders in your emails. We strongly suggest including at least {{ unsubscribeUrl }} in every email you send, for example at the bottom of the email. Not including this link may lead to your users complaining or emails being marked as spam.
While editing your email, you can see what it will look like for subscribers by clicking the Preview button.
Since we are sending out mails in UTF-8, it’s good practice including following charset definition in the <head> of your HTML as well. This way, special characters will also correctly show up in your preview.
<meta http-equiv="Content-Type" content="text/html; charset=UTF-8" />
Delivery
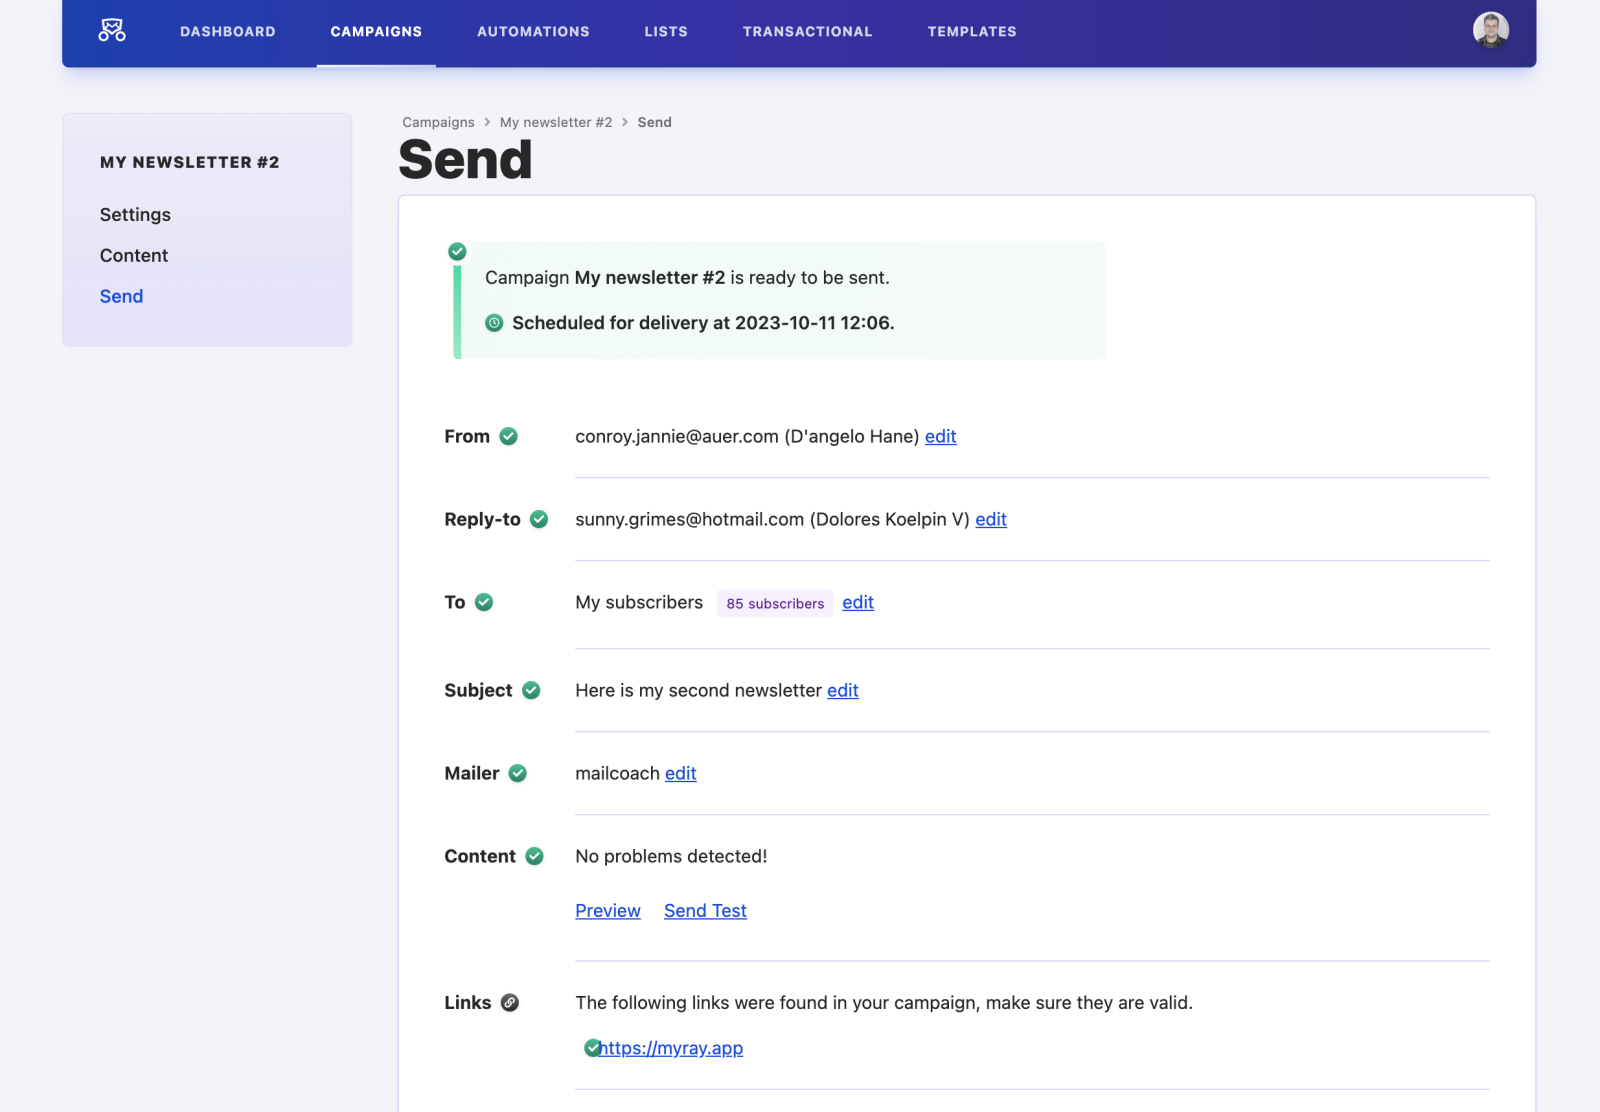
This page provides a final checklist that you should go over before sending a campaign. It shows a summary of the campaign’s settings, like how many people will be sent an email, the subject and any issues we found with your email’s content.
You can also send a test email to yourself for a final review before sending it out to your subscribers’ mailboxes.
Finally, you can set the timing for this campaign: whether to send it right now or to schedule delivery for a moment in the future. You can use this to set up multiple campaigns to be sent without you having to micromanage the delivery. As long as the campaign hasn’t started sending emails, you can reschedule or cancel it.
When sending a campaign, all the emails that need to be sent out will be placed in a queue, and you will be redirected to a page where you can track the progress and see your campaign’s statistics trickling in:
For more information on what these statistics mean, continue reading in the campaign’s statistics section of the documentation.
Campaign statistics
This page contains all the statistics for a campaign that was sent. These statistics will be updated regularly, so you can closely track the success of your campaigns.
Summary
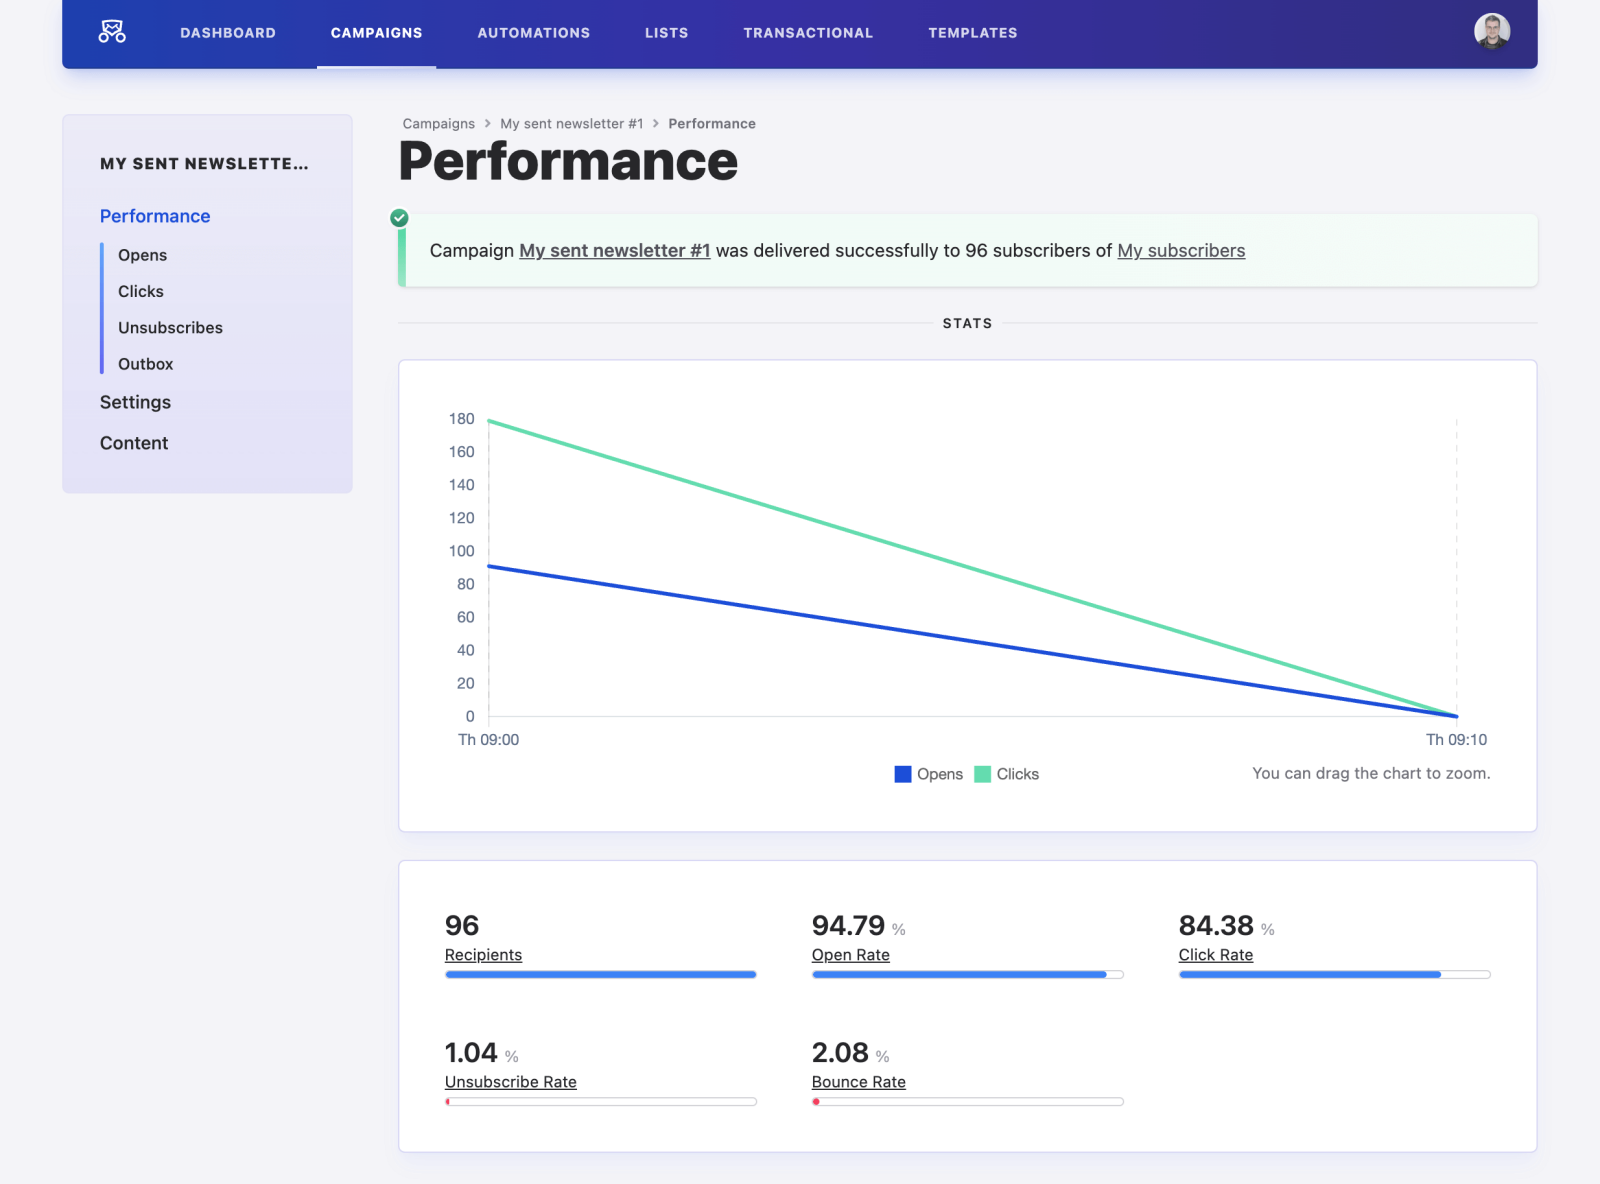
This page shows a summary of the statistics for your campaign. At a glance, you can see how many people opened your email and clicked any links you included, and also how many people unsubscribed from your mailing list as a result of this campaign and how often the emails bounced.
A bounce means that an email could not be delivered to a certain email address, this could happen for several reasons. You can better find out why in the Outbox tab.
Opens and clicks

On the Opens screen, you can see which subscribers have already opened your email, and when.
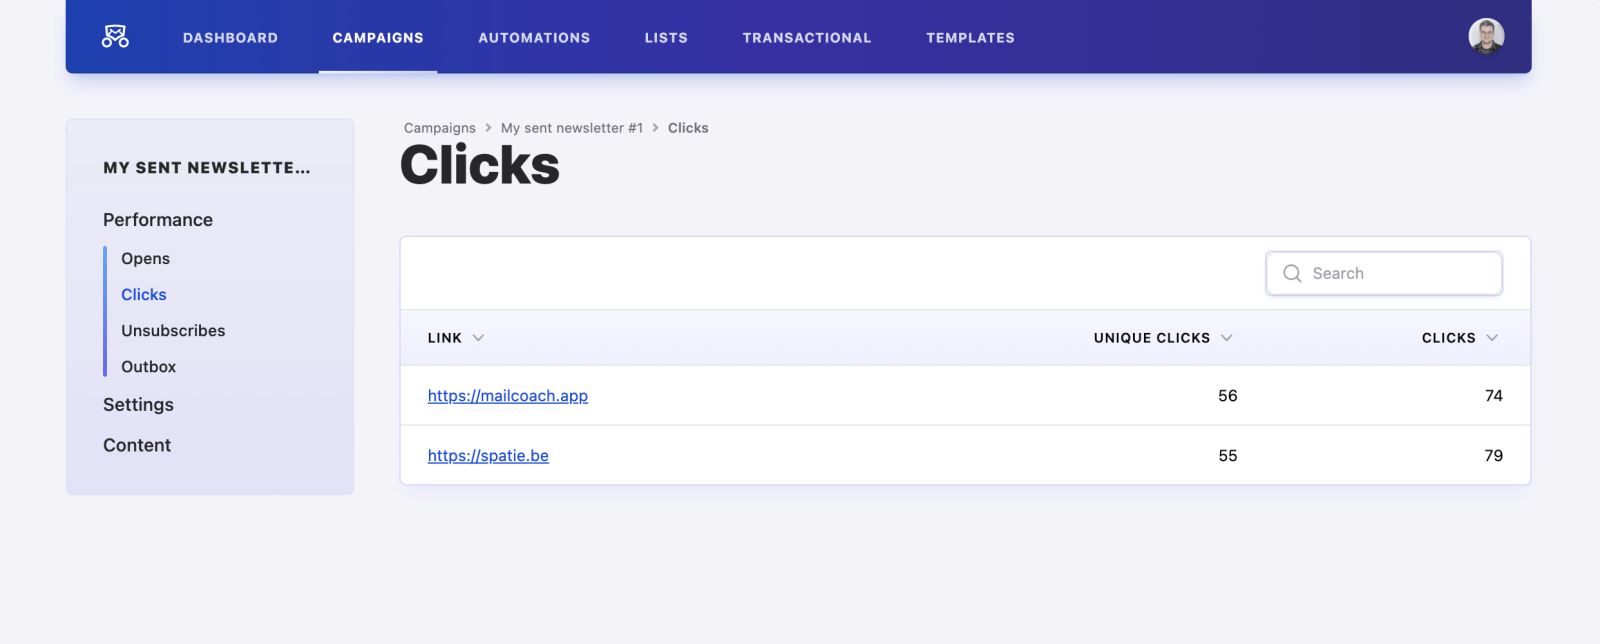
The Clicks screen has information on which links were opened and how many times. The Unique clicks column concerns how many unique users have clicked your link.
Unsubscribes
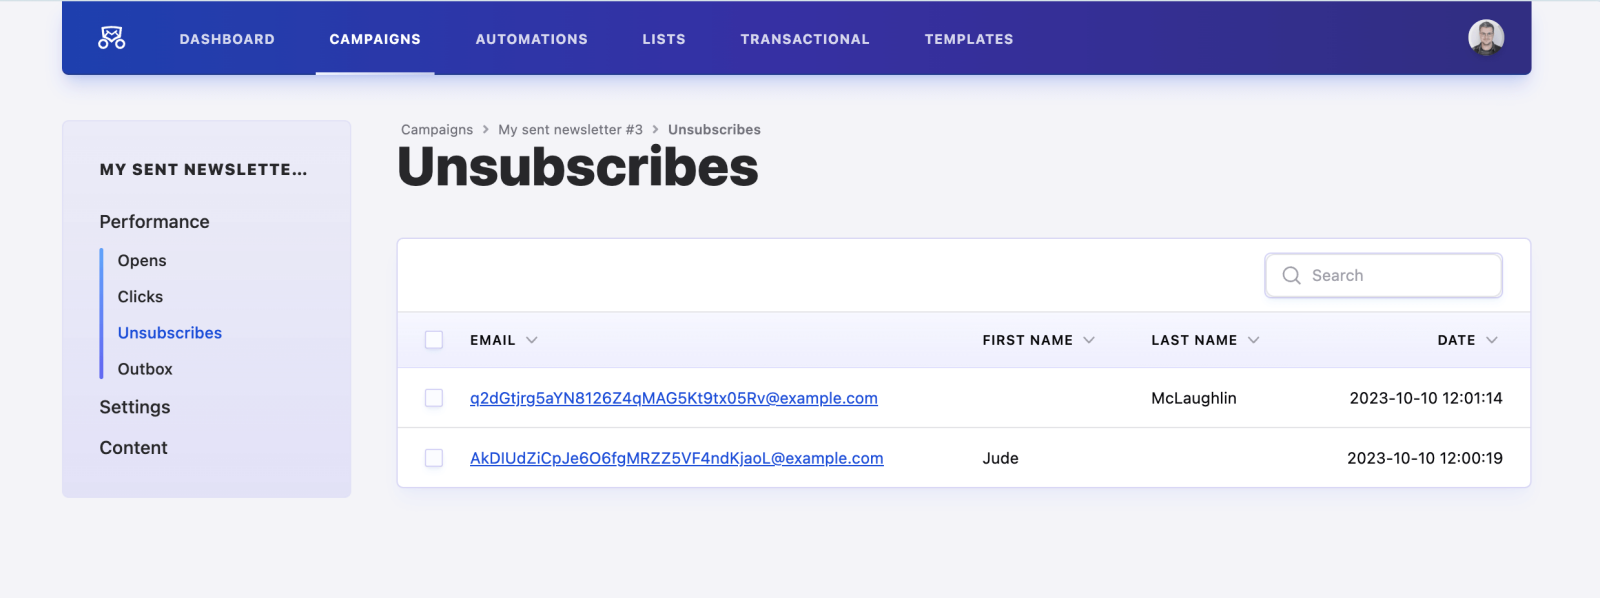
You can also see how many people, regrettably, clicked the unsubscribe link in this campaign.
Outbox
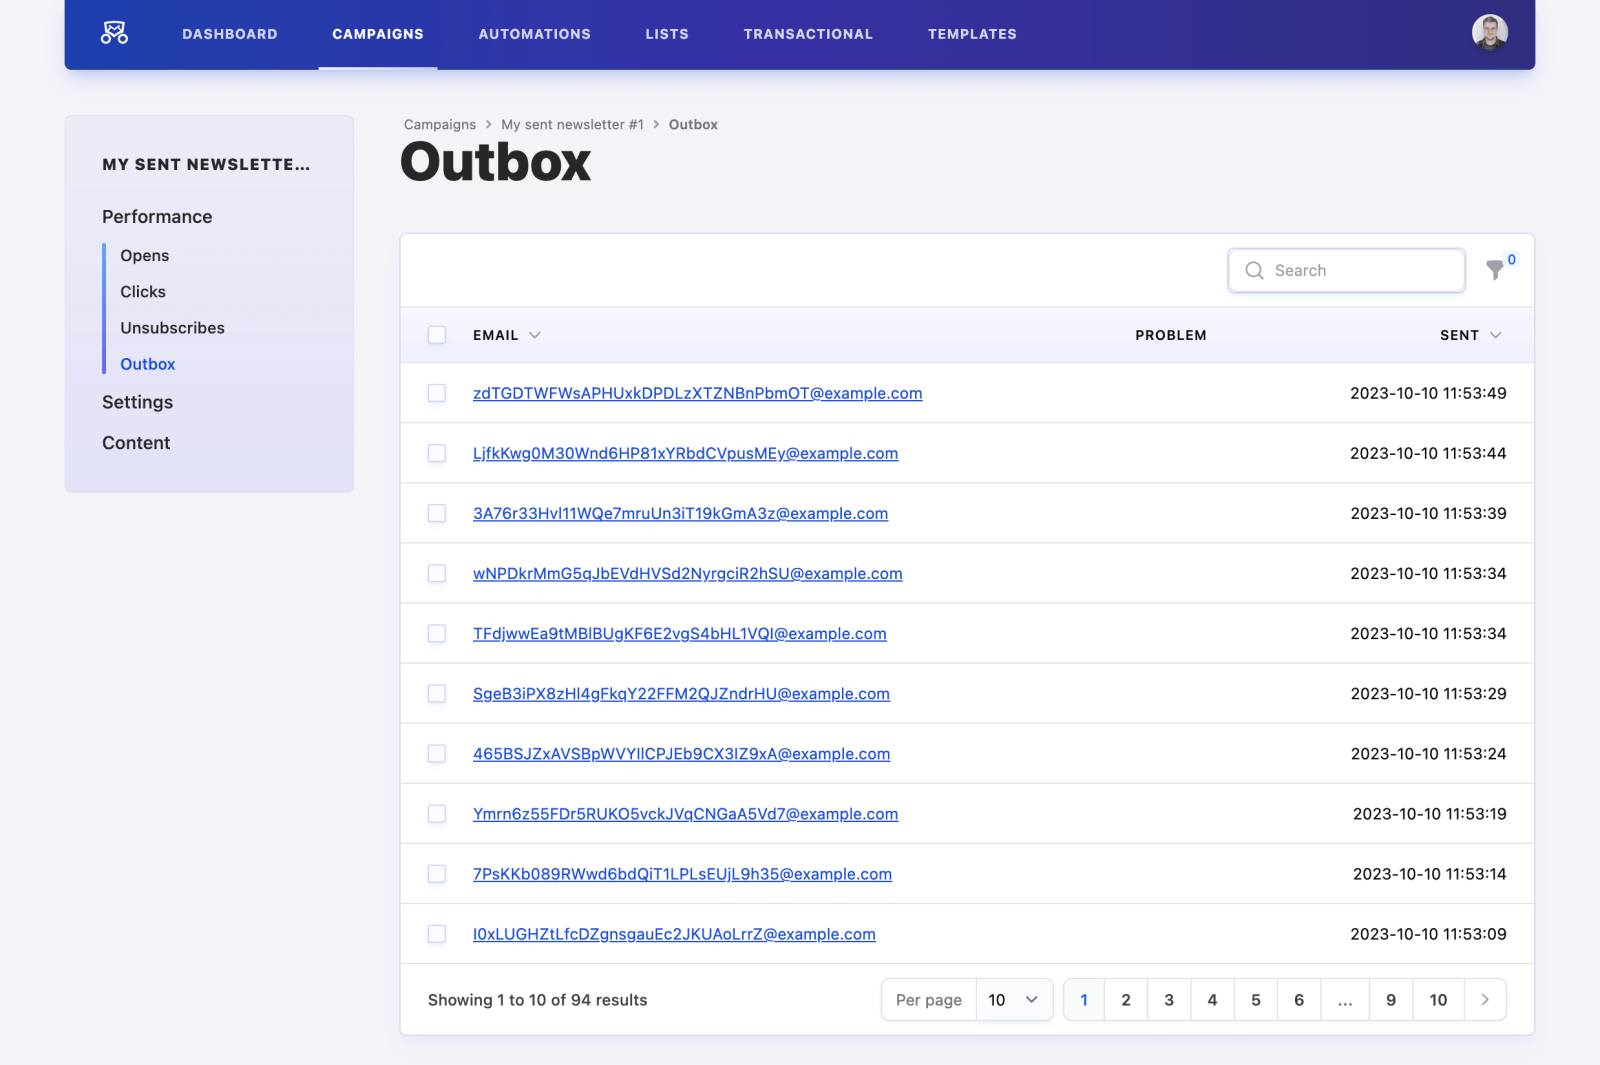
Here, you can see a collection of all the individual emails that were sent to your subscribers, and whether they encountered any issues upon arriving at their destination.
If you’re sending this campaign to a large mailing list, some emails may not have been sent yet, but don’t worry, it should clear up within a couple of minutes.
Using templates
Templates provide a starting point for a campaign’s email content.

You can preview what this template will look like in a user’s email client by creating a campaign based on this template, and visiting the campaign’s Content tab.
You can use placeholders for certain Mailcoach actions in your links:
-
{{ webViewUrl }}This URL will display the HTML of the campaign -
{{ subscriber.first_name }}The first name of the subscriber -
{{ subscriber.email }}The email of the subscriber -
{{ list.name }}The name of email list this campaign is sent to -
{{ unsubscribeUrl }}The URL where users can unsubscribe
Using extra attributes and conditionals
When creating a new campaign, you can use {{ subscriber.<key> }} to get include the value of an extra properties defined on a subscriber.
Here’s an example to get the extra property called language.
Using a default
you can tack on | default("a default value") to display a default value in case your subscriber doesn’t have a specific attribute.
{{ subscriber.extra_key | default("a default value") }}
Using conditionals
You can use attributes to render content conditionally.
In this example, the subscriber has an [extra attribute](add link) called language. If the language is set to “FR” the mail will include “Bonjour” otherwise it will contain “Hello”.
{% if subscriber.language == "FR" %}
Bonjour
{% else %}
Hello
{% endif %}
Split testing or A/B testing a campaign
When creating email campaigns, you might wonder which subject line would result in the most opens? Or you may be trying to figure out which copy of a link in your mail would result in the most clicks?
Instead of making those decisions beforehand and hoping for the best, you can use split testing. You might also know this as A/B testing.
The process
Let’s explain the split testing sending process. When your email campaign split testing, the sending process will have these steps:
- The test stage: we’ll start sending emails to a small percentage of your list. These people will get a random variant. When those emails are sent, we’ll wait a couple of hours (you can decide how many hours) and start counting opens, clicks, and unsubscribes for those sent emails.
- Deciding the winner: After the test stage, we will look at each variant’s number of clicks, opens, and subscribes. We’ll determine the variant with the best metrics and send that variant to the remainder of the people on your list.
When your mail is sent, in addition to the statistics of your entire campaign, you’ll see the statistics of each variant.
Using split testing
When creating a new campaign, you can enable split testing by clicking the “Add split test” link.
A new split view will be added to the campaign. You can add as many splits as you want.
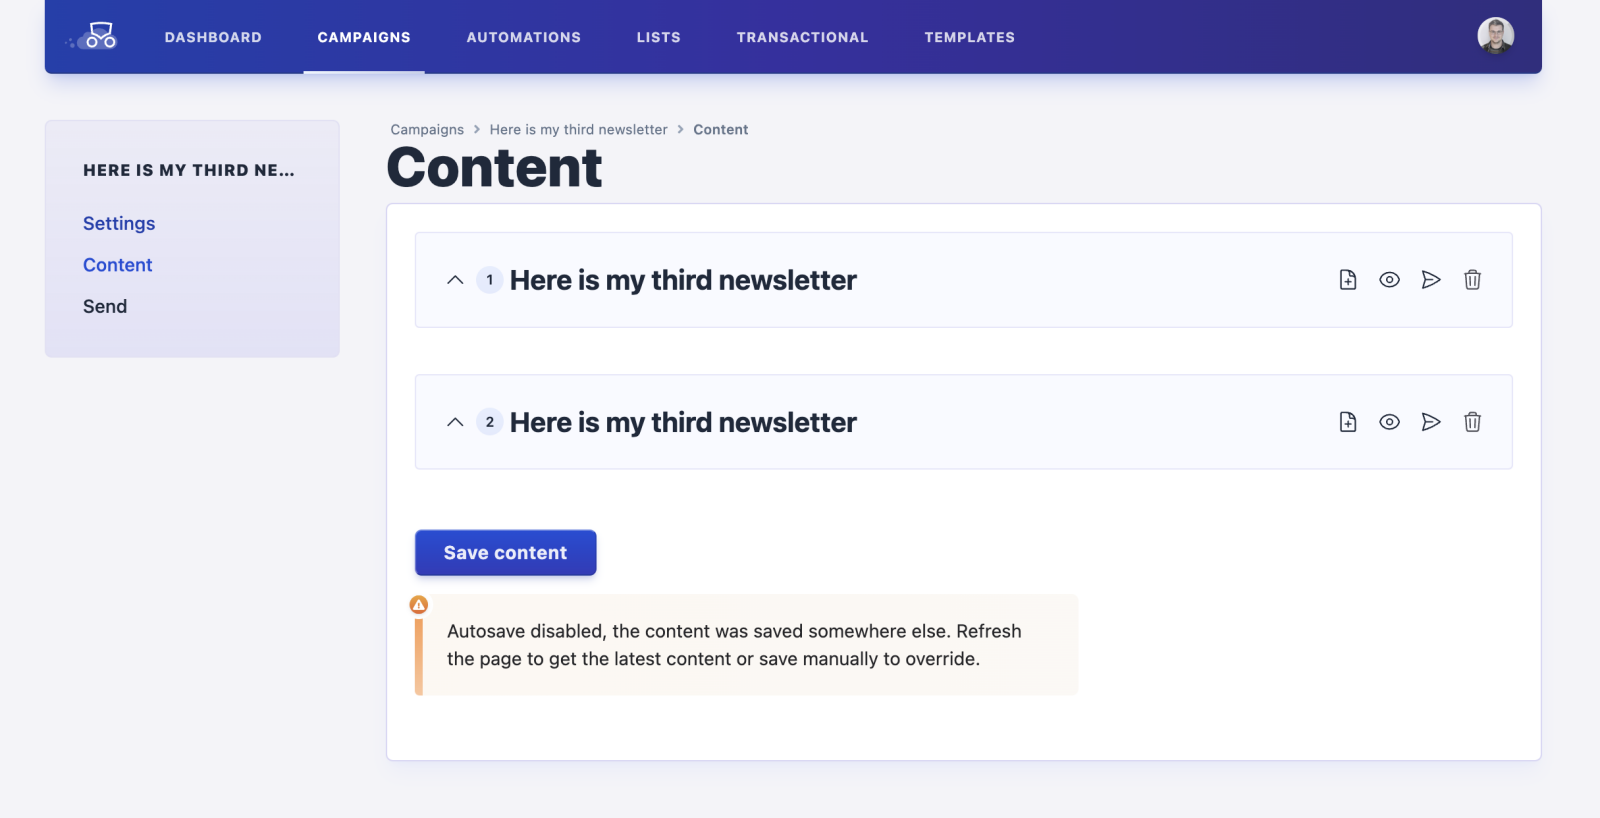
When you add a split, you can choose to split on the subject line and the content.
Continue sending a cancelled campaign
When you cancel a campaign, you can continue sending it by clicking the “Resend” button on the campaign’s Performance page.
Under the hood, this will create a new campaign with the same content and settings as the cancelled campaign. The new campaign will be sent to the subscribers that didn’t receive the cancelled campaign yet.
A Tag segment will be used to determine which subscribers have not yet received the cancelled campaign.